
Members Area Tutorial: Design an Action Packed Movie Poster
In today’s Photoshop design lesson you’ll be learning how to create an action packed movie poster design.
This is a great way to take your Photoshop skills and apply them to a real, actionable project spec that you can then transfer to your client projects.
This lesson will teach you a variety of actionable techniques such as:
- Using advanced lighting techniques to create a dramatic scene.
- Creating 3D text and effects in PS CS6 using just Blending Modes and layer properties.
- Working with lighting and shading.
- Creating a war scene through multiple image blending
- Cinematic style color correction.
- and many more interesting techniques to make your design work easier and more fun!
Creating a Movie Poster
As always, this is the final image that we’ll be creating:

Resources Used In This Tutorial
- Soldier 1 – tyrapollo
- Soldier 2 – tyrapollo
- Sildier 3 – tyrapollo
- Buildings – sxc.hu
- Night Sky – Catstock
- Fog Brushes – brusheezy
- Explosion – andrei-oprinca
- Muzzle Flash – hq-hq
- Bullet Holes – maxpowersxx
- Destroyed Van – sxc.hu
- Demolished House 1 – sxc.hu
- Demolished House 2 – sxc.hu
- Sparks – webgraphics.net
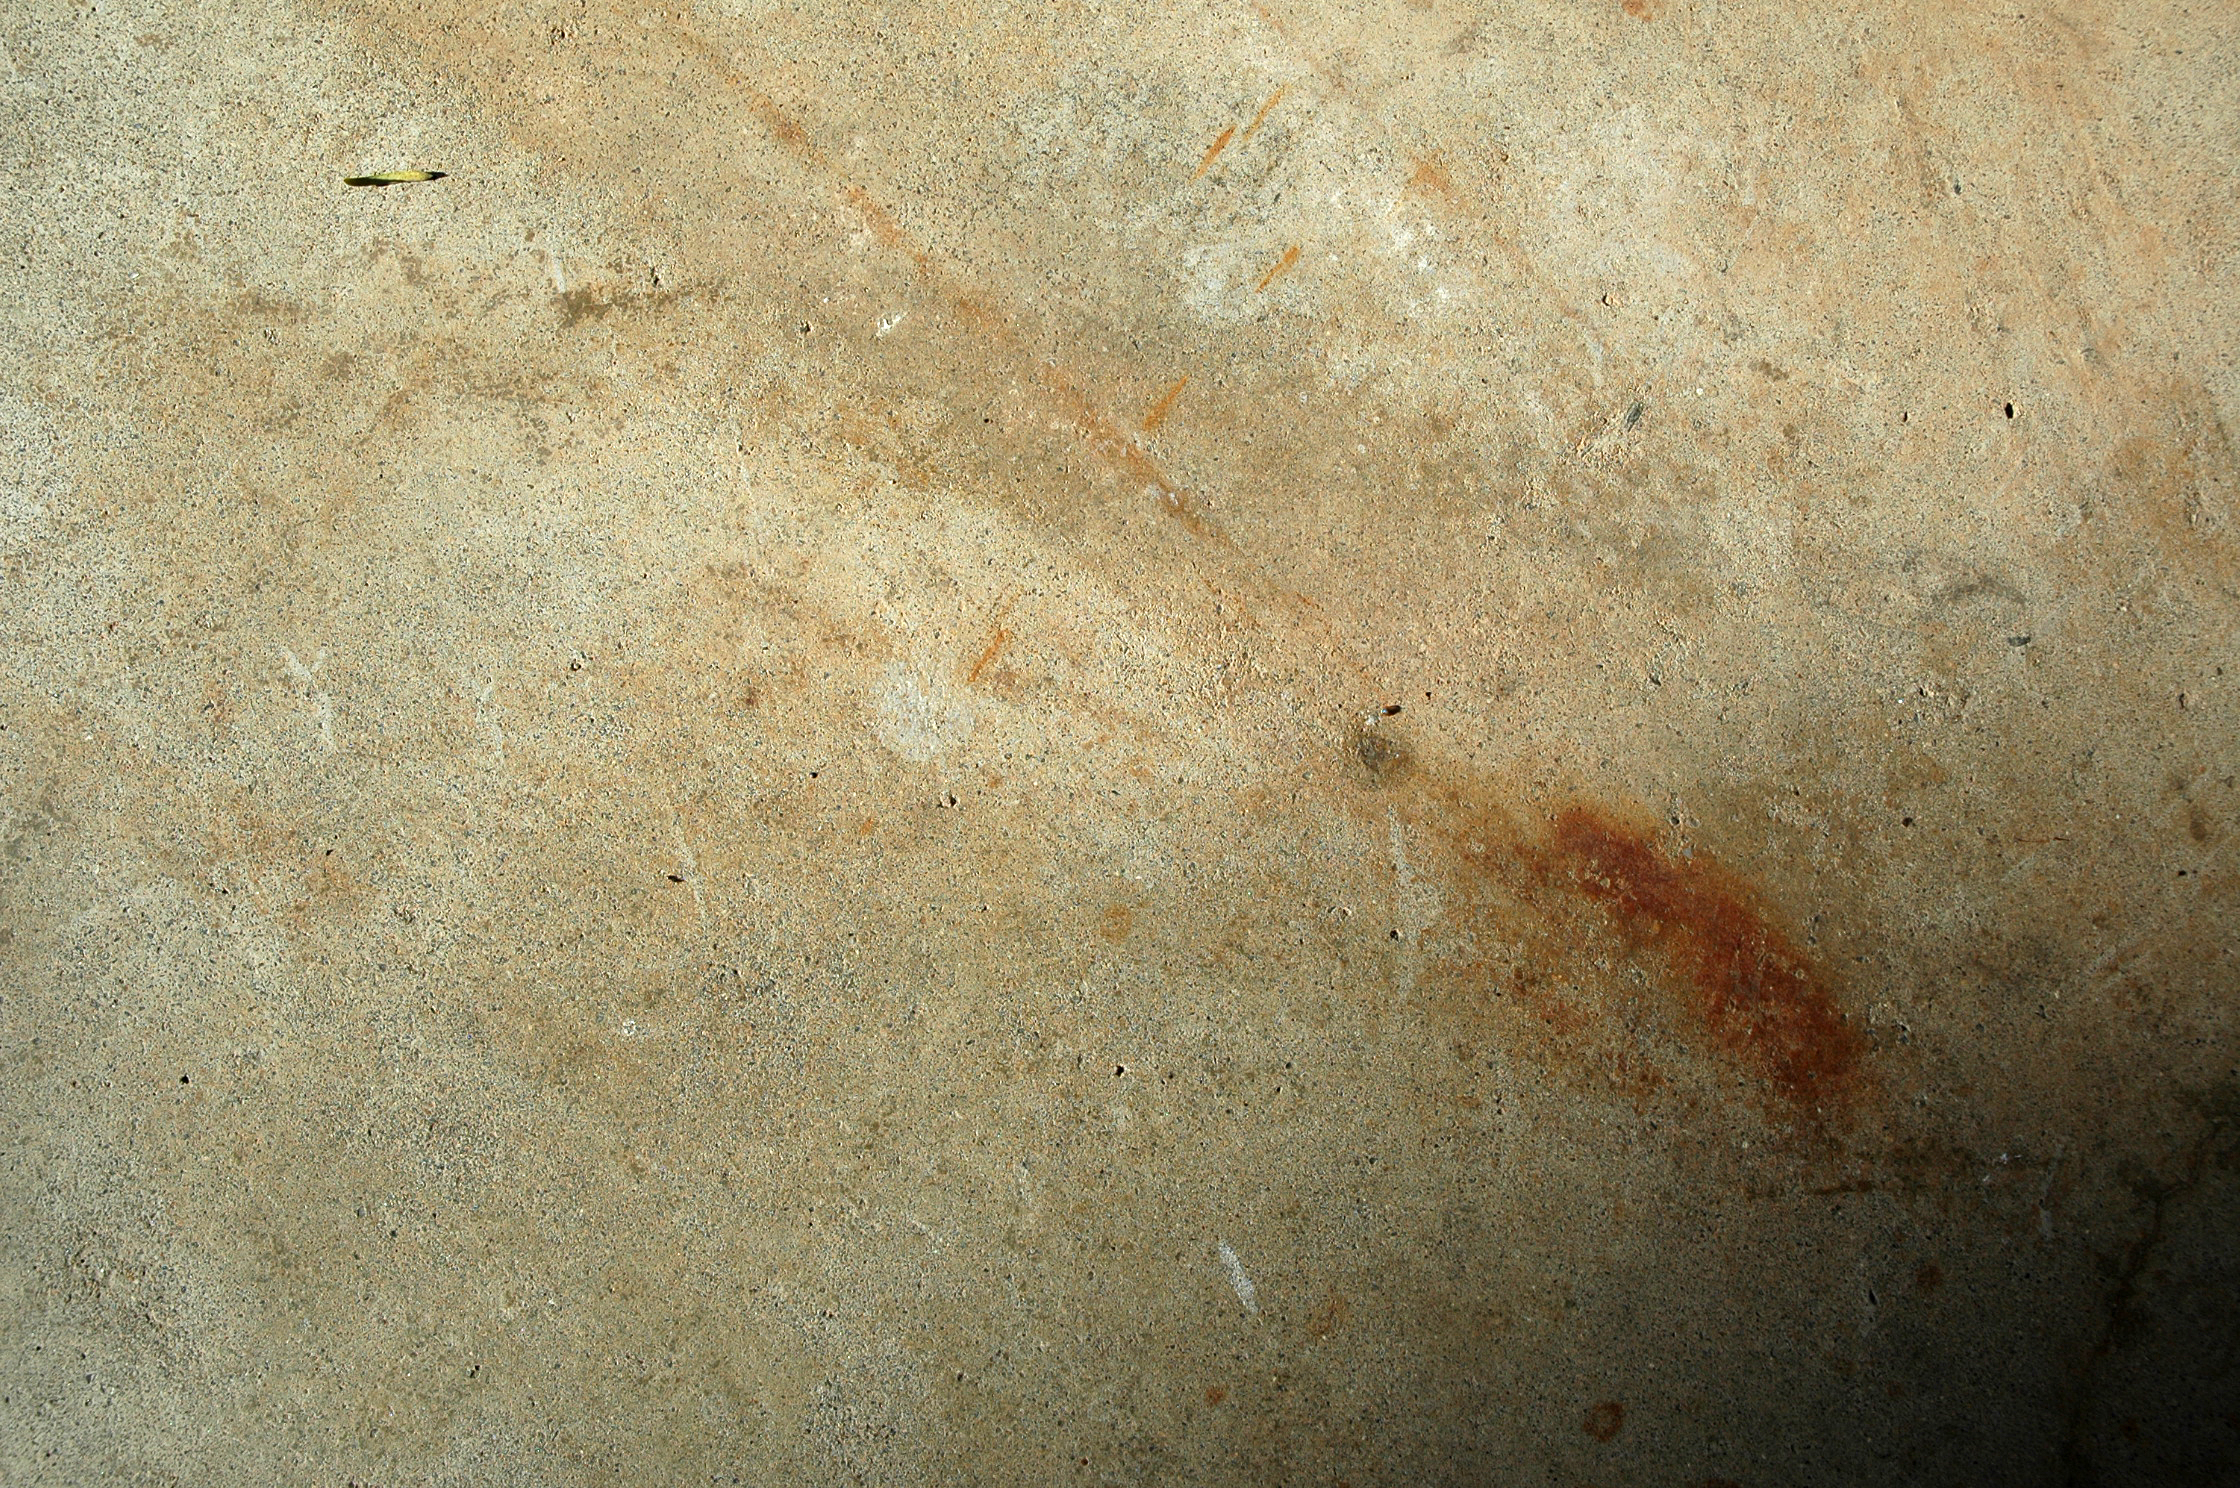
- Concrete Texture – Texture King
- Free Font: Major Snafu
Step 1
In this step we are going to arrange the soldiers in order.
1) Create a new canvas in Photoshop with the dimensions Width=3000px and Height=4147px. Then import the image of the Soldier on to the canvas and it in the center as shown.

2) Now import two more soldiers on to the canvas and place them as shown, illustrating as if they got each other’s back.

Step 2
In this step we are going to create the Buildings BG.
1) Erase the sky in the Buildings image using Magic Wand Tool (W) and import the buildings on to the canvas and place them in the background.

2) Create a Hue/Saturation adjustment layer to the buildings layer and set the Saturation level to -59.
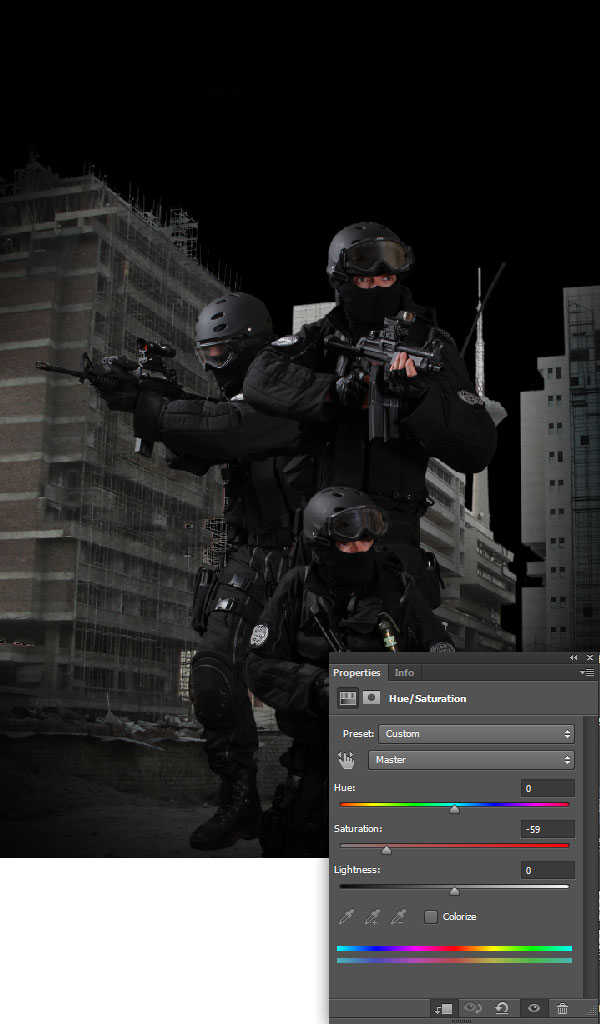
3) Now create an Exposure adjustment layer to the buildings layer and set the Exposure level to -0.46 and Gamma Correction to -0.50.

4) Create a new layer above the buildings layer and paint the shadows as shown using the Soft Round Brush (B).

Step 3
In this step we will be creating the night sky in the scene.
1) Import the image of the sky on to the working canvas and place it behind the buildings layer.

2) Now de-saturate the sky layer to -62 using the Hue/Saturation adjustment layer.

3) Using the Exposure adjustment layer increase the Offset value to -0.0174 to enhance the dark values of the sky image.

4) Now create a Curves adjustment layer to the sky layer and set the RGB curves as shown.

Step 4
In this step we are going to create fire sparks flying around in the scene.
1) Create a new layer under the soldier’s layer and paint the sparks as shown using the fire sparks brush using the color #f7c30f.
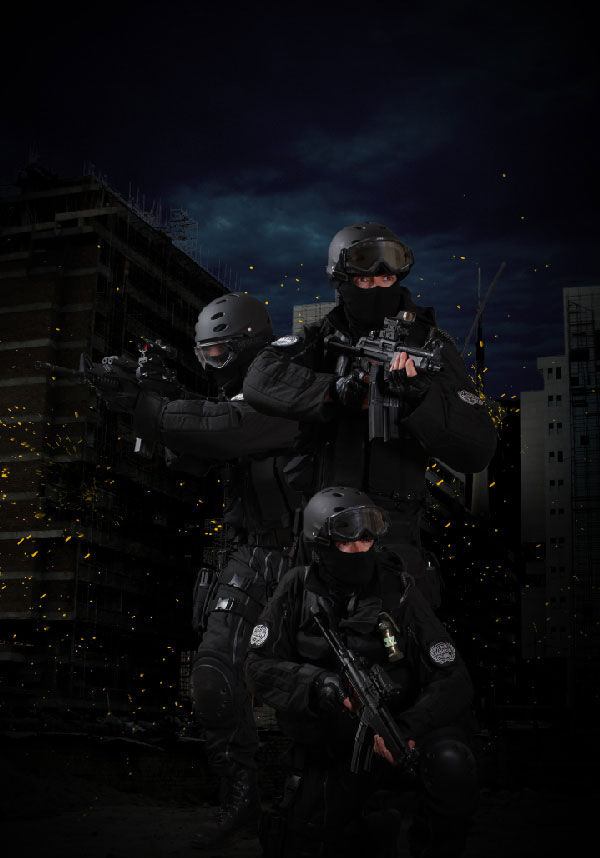
2) With the sparks layer selected go to Filters>Blur>Motion Blur and set the Angle to 14 and Distance=23px. This creates a natural depth to the sparks.

3) Similarly create more sparks in a new layer and place it above the soldiers’ layer.

Step 5
In this step we are going to color grade the scene to make it look more natural.
1) Create a new layer and place it on the top of layers palette. Then paint the colors #ffb503 and blue as shown using the Soft Round brush.

2) Then set the Blending mode of the layer to Overlay to get the following effect.

Step 6
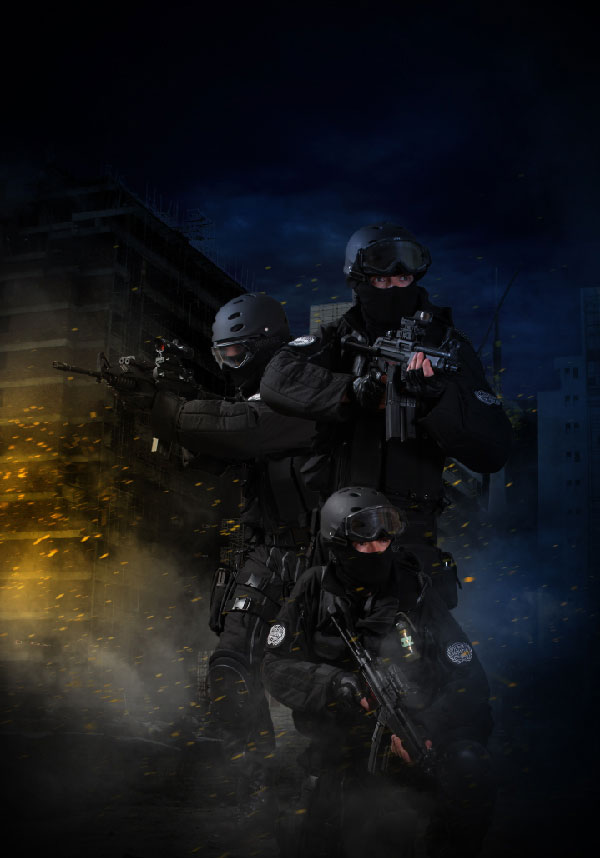
Using the fog brush paint the fog as shown around the soldiers as shown.
Step 7
To blend the soldiers more perfectly to the lighting, paint dark shadows on the right side of the soldiers as shown.

Step 8
In this step we are going to create fire light shade casting on the soldiers.
1) Create a new layer above the soldiers’ layer and set its blending mode to Overlay. Then by using the color #ffb503 paint the light shade on the left side as shown.

2) Now create an Exposure adjustment layer and apply it to the Soldiers (or black ops) folder using a clipping mask. Set Exposure to +0.23 and Gamma Correction to 0.86.

3) Using the Hue/Saturation adjustment layer to the black ops folder and set the Saturation level to -53 and Lightness =-7.

Step 9
In this step we are going to add a grenade explosion in the BG.
- Import the image of the explosion on to the working canvas and place it on the left side of the scene as shown.

Step 10
A war scene is never complete without destroyed vehicles and rubble, hence we are going to add an old destroyed vehicle in the BG of the scene.
1) Cut the image of the van from the stock image and place it on the right side of the scene as shown.
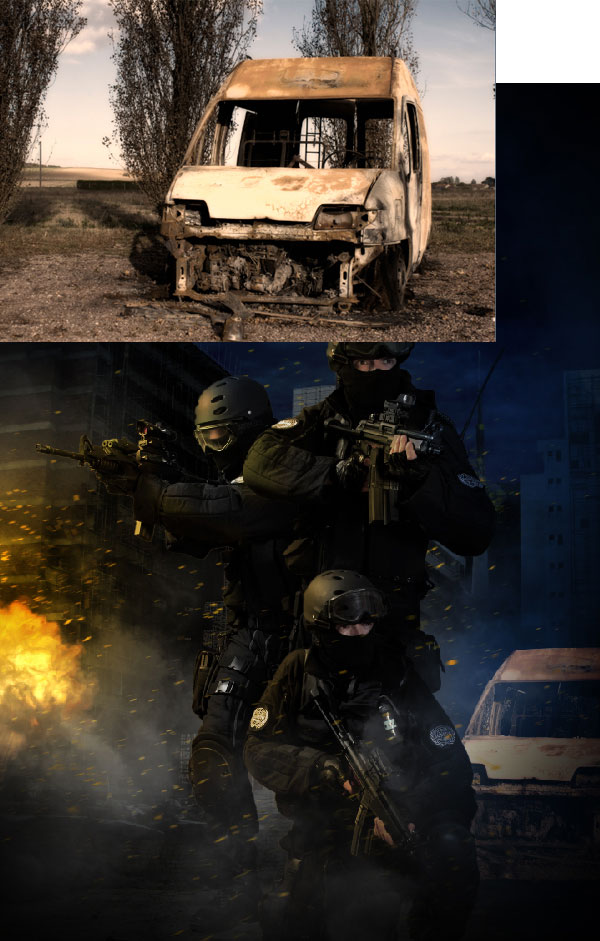
2) Using the Hue/Saturation adjustment layer de-saturate the van layer to -69.

3) To enhance the blacks in the van layer add an Exposure adjustment layer and set the Exposure level to -1.45 and Gamma Correction to 0.58.

4) By using the Brightness/Contrast adjustment layer reduce the brightness of the van to -59.

Step 11
In this step we are going to paint the explosion light casting on the van.
- Create a new layer above the van layer and paint yellow color in the shape of the van as shown and set its Blending Mode to Overlay and reduce the Opacity to 37%.

Step 12
In this step we are going to create demolished buildings in the BG to create a perfect war environment.
1) Cut a portion of the demolished house using the Lasso Tool (L) and place it on the building in BG on the right side of the scene as shown.

2) Now create an Exposure Adjustment layer to the layer and set the Exposure level to -1.33 and Gamma Correction to 0.72.

Step 13
In this step we are going to use the previous procedure to complete the building.
1) Cut a portion of another demolished building using the Lasso Tool (L) and place it on the building as shown on the right side of the scene.
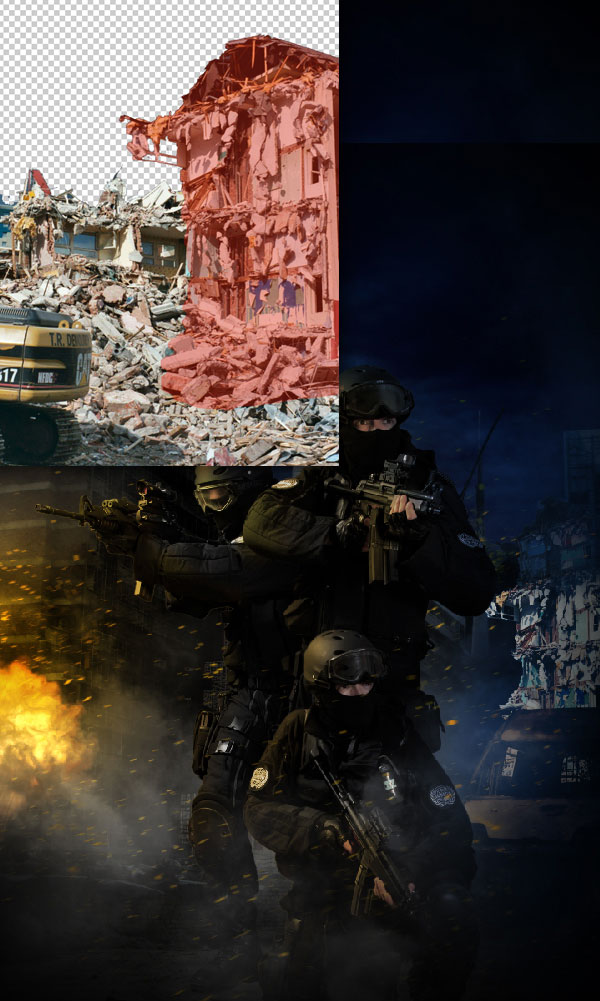
2) Using Brightness/Contrast reduce the Brightness of the demolition layer to -63.

3) Then darken the layer using the Exposure adjustment layer by setting the Exposure level to -1.33 and Gamma Correction to 0.72.

4) Now create a new layer above the demolished building layers and paint dark shadow on the right side as shown.

Step 14
In this step we are going to add muzzle flash to create a gun firing effect.
1) Import the image of the Muzzle flash on to the canvas and place it on the edge on the gun barrel of the soldier on the left as shown.

2) Now by using the Curves set the RGB curves as shown to make the muzzle flash look more reddish in color instead of the original pale look.

3) Now paint the fire inside of the barrel as shown.

Step 15
In this step we are going to create a laser ray emitting from the gun.
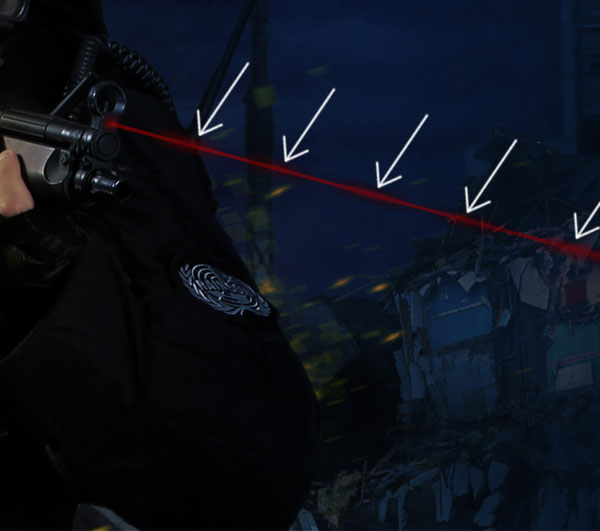
1) Select a Hard Round Brush and set its size to 4px and select Red color. Then by using the Pen Tool (P) select an axis parallel to the angle of the gun in the hands of the center soldier and right click to select Stroke path.

2) Create a small glow effect at the origin of the laser, since the intensity of the laser in high at the origin.

3) Usually a laser has an undistorted ray path which is why it has a long range capacity when compared to normal light. But due to atmospheric interferences like smoke etc it looks distorted, which is what we are going to create here.
- Create a new layer above the laser layer and paint periodic distortions along the ray as shown using soft round brush.
Step 16
In this step we are going to create the main title.
1) Type the title “SEALS” using the font “Major” on the top of the scene.

2) Import a concrete texture on to the title and cut it in the shape of the title as shown.

3) Create an Exposure adjustment layer to the texture layer and set the Exposure level to -0.40 and Gamma Correction to 0.62.

4) Then de-saturate the texture by -52 using the Hue/Saturation adjustment layer.

Step 17
In this step we are going to create a 3D depth to the title.
- With the texture layer selected go to layer properties and select Bevel & Emboss. Then set the Depth to 439% and Size=24px, leave the rest as default.

Step 18
In this step we are going to create a dramatic light effect on the title.
- Create a new layer above the title layer and fill it with black color in the shape of the title, then by using the Eraser Tool (E) erase the black color as shown to get the dramatic light effect.
(Use of Pen Tablet is recommended to take full advantage of the pen pressures to get this step right.)

Step 19
In this step we are going to create natural looking bullet holes on the title.
1) Convert the GIMP images into .PNG using the gimp software and import the bullet hole image on to the canvas and place it on the letter A as shown. Then set its blending mode to Multiply.

2) Similarly add few more bullet holes and cracks to the title as shown.

Step 20
In this step we are going to color correct the whole scene excluding the title.
1) Create a Hue/Saturation adjustment layer on the top of the layer pallet and set the Saturation level to -40.

2) Now create a Levels adjustment layer and set the levels as shown.

3) Then duplicate the previously created Hue/Saturation layer and erase the adjustment layers effect on the explosion and muzzle flash as we don’t want them to look pale.

Step 21
Before going further with this step save the image without color correction and another version with color correction.
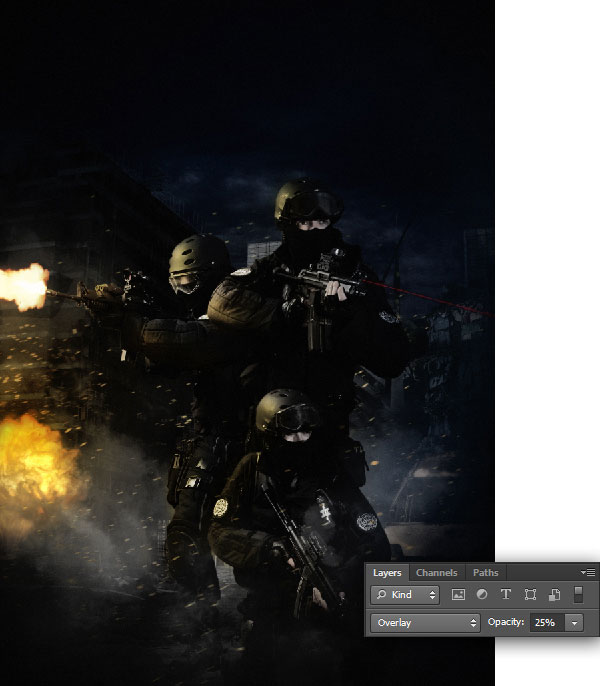
1) Now place the color corrected image on the top of non color corrected image and reduce its Opacity to 59%.

2) Now create a new layer and set its Blending Mode to Overlay. Then by using the color #ffb503 paint yellow highlights on the sides of the men, as would be caused by the explosion to their left. Reduce the layer’s Opacity to 25%.
And We’re Done!
You can view the final outcome below. I hope that you enjoyed this tutorial and would love to hear your feedback on the techniques and outcome.
Member File Download
Download the original .psd file for this tutorial here:

 Members Area Tutorial: Learn How to Photo Manipulate an Ancient Shrine
 Members Area Tutorial: Creating a Zombie Video Game Cover
 Members Area Tutorial: Construct a Realistic Old Time Scene With Advanced Image Blending

Leave a comment
0 Comments:
No comments have been posted yet. Be the first!
Leave a Comment: