Members Area Tutorial: Creating a Zombie Video Game Cover
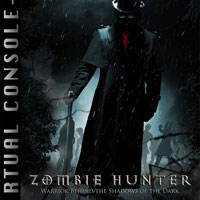
You guys have been requesting tutorials that have more practical outcomes. In this tutorial we will be creating a zombie video game cover, which will teach you some of the basics of product packaging and advertising. With this tutorial we will be covering major topics like:
- Working with Custom Shapes
- Advanced Lighting
- Digital Painting
- Working with the Ruler Tool
- Advanced color correction
- and many more interesting topics interesting topics on product cover design.
Zombie Hunter
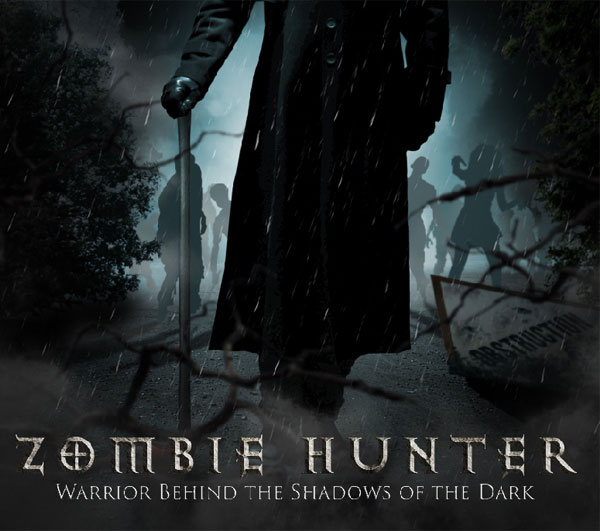
As always, this is the final image that we’ll be creating:

Resources Used In This Tutorial
- Main Character – mjranum-stock
- Zombie Woman – mjranum-stock
- Zombie Shapes – tmwors
- Tree Brushes – markyfan
- Tree png – spacenewt
- Corner tree 1 – gd08
- Corner Tree 2 – gd08
- Rain Brush – amorphisss
- Grunge Brush – brusheezy.com
- Title Font – fontzone
- Beyond the Mist – brusheezy.com
- Smoke Brush – brusheezy.com
- Window – free-photoshop.net
- Night Sky – sxc.hu
- Dead Tree – sxc.hu
- Axe – sxc.hu
- Axe Blade – sxc.hu
- Mud Road 1 – sxc.hu
- Mud Road 2 – sxc.hu
- Sign Board – sxc.hu
- Concrete Texture – sxc.hu
- Metal Texture – sxc.hu
- Tie – sxc.hu
Step 1
In this step we will be creating the mud road for the BG.
1) Import the image of the mud road on to the canvas and place it as shown.

2) To expand the width of the road, import the image of another mud road image and place it on the right side of previously created road. Use a layer mask to blend the images together smoothly.

3) Duplicate the previously created layer and place it on the left side of the road as shown.

Step 2
In this step we will be creating a full moon sky.
1) Create a new layer under the ground layer and fill in with Black color.

2) Now import the image of the full moon sky on to the canvas and place it as shown.

Step 3
In this step we will be introducing the main character in the scene.
1) Import the image of the model on to the canvas and place it as shown.

2) Now create an Exposure adjustment layer and set the Exposure to +2.25.

3) Using the Brightness/Contrast adjustment layer set the Brightness to 103 and Contrast level to 21.

4) To blend the light shade on the model with the moon light paint a color gradient with the color #588892 on a new layer placed above the Model layer. Then set the Blending mode of the layer to Overlay.

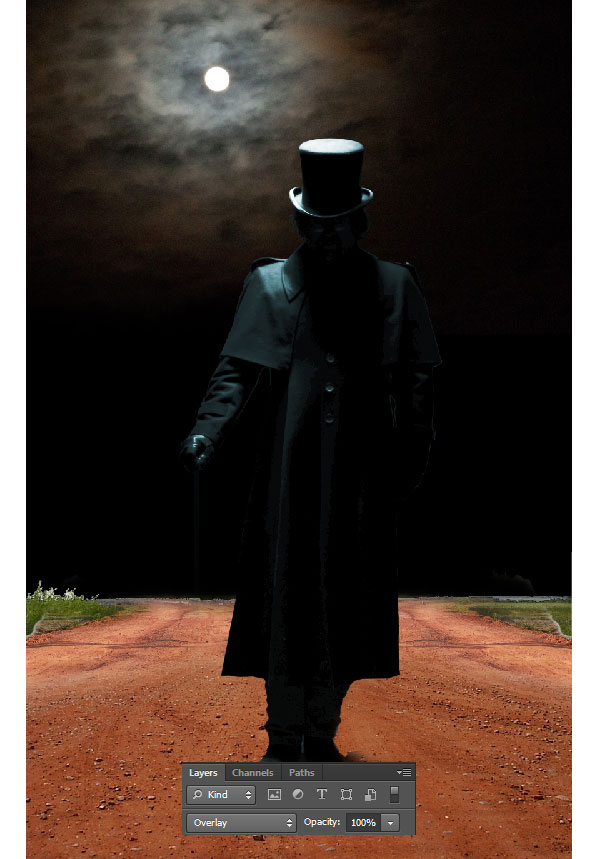
5) Now by using the Hue/Saturation adjustment layer set the Hue level to 189 and Saturation level to 25. Make sure to check the Colorize box before adjusting the Hue and Saturation levels.

Step 4
In this step we will be color correcting the Sky and the ground.
1) Create a Hue/Saturation adjustment layer to the sky layer and check the Colorize box, then set the Hue to 189 and Saturation level to 25.

2) Create Curves adjustment layer to the ground folder and set the Blue and Red curves as shown.

3) Now create an Exposure adjustment layer to the ground folder and set the Exposure level to -0.63 and Gamma Correction to 0.56.

4) Now de-saturate the ground layer by -51 using Hue/Saturation adjustment layer.

5) Create another Exposure Adjustment layer to the ground folder and set the Exposure level to -0.51 and Gamma Correction to 0.74.

Step 5
In this step we will be creating a tie to the model.
1) Cut the image of the tie from the stock image and place it on the model as shown.

2) Now create a new layer above the tie layer and paint the dark shadow as shown.

Step 6
In this step we will be creating trees in the scene.
1) Import the image of the tree on to the canvas and place it on the right side top corner of the scene as shown.

2) Now create an Exposure adjustment layer to the tree layer and set the Exposure level to +0.11 and Gamma Correction to 0.31.

3) Using the Curves adjustment layer set the Blue and Green curves as shown.

4) Now de-saturate the tree layer by -48 using the Saturation adjustment layer.

5) Similarly import few more tree images and place them as shown.

6) Select the second tree layer and add a Gaussian Blur of Radius 3.1px.

Step 7
In this step we will be adding few more trees on the sidewalk.
1) Import the image of a tree and place it on the left side of the scene as shown. Name this tree as “Tree 4″

2) Using the Exposure adjustment layer to the tree layer set Gamma Correction level to 0.85.

3) Now de-saturate the tree layer to -66 using Hue/Saturation.

4) Now create a new layer above the tree layer and fill in the color #162f40 in shape of the tree. Then set the Blending mode of the layer to Overlay.


5) Now merge the tree layers and add a Gaussian Blur of Radius 1.3px.

6) Using the tree brushes paint a couple of trees in the scene as shown.

7) Create a new layer above all the tree layers and paint the dark shadow as shown using the Soft Round Brush (B).

8 ) Create a new layer in between the distant tree and the “tree 4″. Then paint the fog as shown using the Fog brush.

Step 8
In this step we will be creating dense fog behind the main character.
1) Using the forest fog brush and paint the fog as shown in a new layer placed above the Ground layer.

2) Now by using another fog brush paint the as shown of the left side of the model.

3) Now create a new layer and paint the white light behind the model as shown using soft round brush.

4) By using fog brushes paint the fog behind the character as shown.

5) Now group the entire fog layers into a single folder. Then create a Hue/Saturation adjustment layer to the folder and check the Colorize box and set the Hue level to 189 and Saturation level to 25.

Step 9
In this step we will be creating an axe in the hands of the character.
1) Cut the image of an axe from the stock image and import it on to the canvas, then cut half the axe and move it downwards as shown.
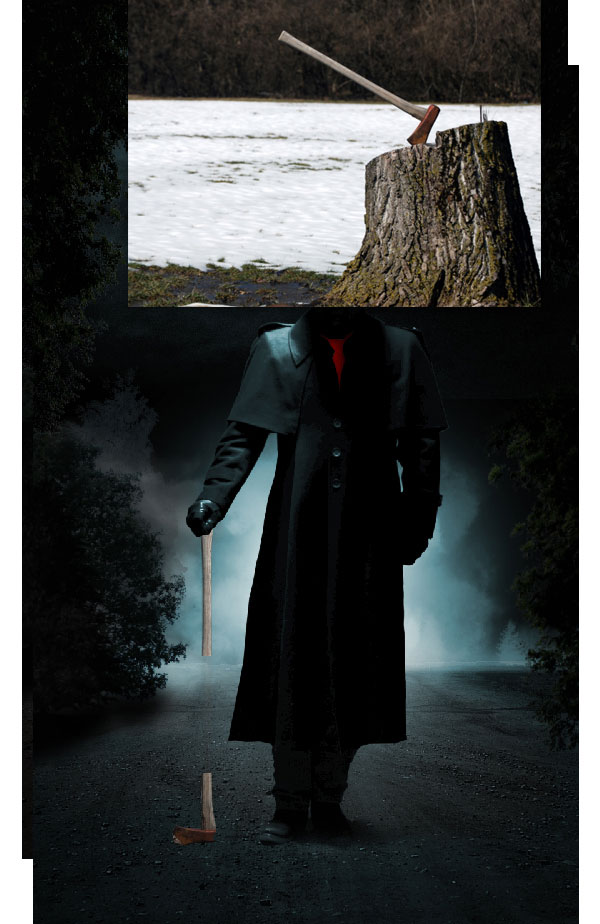
2) Now duplicate the axe’s handle and cover the empty gap as shown.

3) Create a new layer above the axe layer and paint the dark shadow as shown.

Step 10
In this step we will be replacing the Axe blade.
1) Cut the image of the Axe blade and place it on the bottom end of the axe as shown.

2) Create an Exposure adjustment layer to the axe blade and set the Exposure level to -0.89 and Gamma Correction to 0.40.

3) Create a new layer and paint the shadows of the character and the axe as shown.

4) Now duplicate the Hue/Saturation adjustment layer we created in step8-5 and clip it to the axe layer.

Step 11
In this step we will be creating spectacles on the face of the character.
1) Using the Pen Tool (P) create a mask in the shape of the spectacles and fill in with Black and Grey gradient.

2) Now by using Hue/Saturation Adjustment layer check the Colorize box and set the Hue level to 189 and Saturation level to 25.

Step 12
In this step we will be creating Zombies in the Back Ground (BG).
1) Import the image of a zombie woman and place her in the BG as shown.

2) Now create a new layer above the zombie woman and fill the color #25383d in the shape of the zombie.

3) With the zombie gradient layer selected go to Filters>Blur>Gaussian Blur and add a Gaussian Blur of Radius 3.4px.

4) Now create another layer for the shadow and fill it with Black color in the shape of the zombie and by using the Move Tool (V) transform the layer as shown on the ground.

5) Now add a Gaussian Blur of Radius 6.0 to the shadow layer.

Step 13
In this step we will be Custom shapes to create the zombie fleet.
1) Select the Custom Shapes tool (U) from the tools pallet and then go to Shapes and select the zombie shape. Now click and drag the tool to generate the zombie shape. Make sure you have the color # 25383e selected before creating the shape.
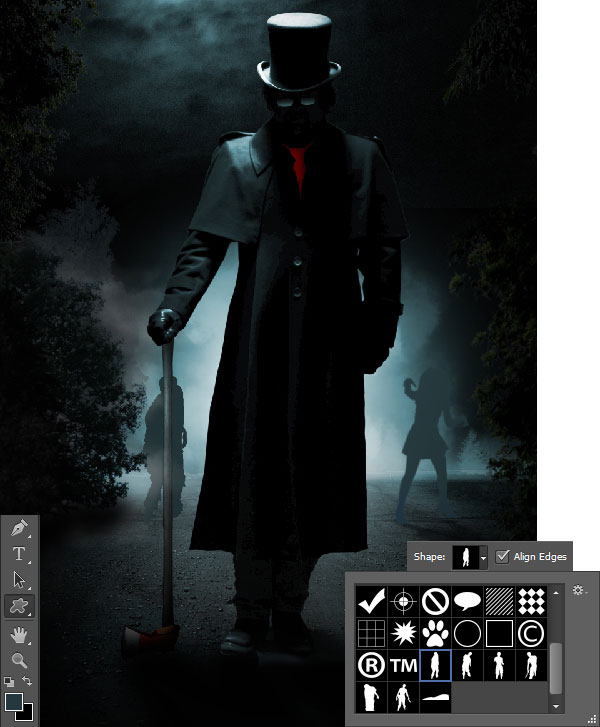
2) Now create the same zombie shape in Black color and transform it on the ground as shown using the Move Tool (V).

3) Now add a Gaussian Blur of Radius 1.7px to the zombie 2 layer.

4) Select the ‘zombie 2′ shadow layer and add a Gaussian Blur of Radius 5.0px.

5) Similarly add two more zombies with shadows in the BG as shown.

Step 14
In this step we will be creating more zombies located distantly from the scene.
1) Using the Custom Shapes tool (U) create more zombie in the scene as shown. Make sure all the zombies are created in different layer.

2) Create a new layer under the zombie 2 layer and paint the fog partially covering the BG zombies.

Step 15
In this step we will be painting the rain.
1) Using the Rain brush paint the rain with white color selected. Use digital pen tablet to get better results with this brush.

2) With the rain layer selected go to Filters>Blur>Motion Blur and set the Angle to 59 and Distance to 23px.

3) Now create a new layer above the model layer and paint the raindrops splatter on the hat and shoulders of the model using the drop splatter brush.

Step 16
In this step we are going to create dead branches in the scene.
1) Import the image of the dead tree and select Blue layer from the Channels pallet and then go to Image>Calculations and select blue from the channels Drop down list and press OK. This will create an Alpha 1 layer in the channels pallet. Then with the Alpha layer selected go to Image>Adjustments>Levels and set the levels as shown to make the dead tree a perfect silhouette.

2) Now go to Select>Load Selection and select Alpha 1 FROM Channel drop down list and press OK to generate the mask around the tree.

3) Using the previously generated mask erase the BG sky in the image.

4) Now import the image of the dead branches on to the working canvas and place it on the left side of the scene as shown.

5) Here we want the branches to be closer to the scene hence add a Gaussian Blur of Radius 7.6px to maintain the Depth Of Field of the scene.

6) Similarly add few more dead branches in the scene.

7) Group all the dead branches into a single folder and create a Hue/Saturation adjustment layer to the folder. Then set the Saturation level to -72.

8 ) Now create an Exposure adjustment layer to the dead branches folder and set the Gamma Correction level to 0.55.

Step 17
In this step we are going to create a broken sidewalk sign.
1) Import the image of the sidewalk sign and place it as shown on the right side of the scene.

2) Using the Curves adjustment layer color correct the side walk sign as shown.

3) Now de-saturate the sign by -58 using Hue/Saturation adjustment layer.

4) With an Exposure adjustment layer set the Exposure level to -1.28 and Gamma Correction to 0.73.

5) Now create a new layer above the sign layer and paint some grunge on it as show.

6) Create another layer and paint the dark shadow as shown using the Soft Round Brush (B).

7) To maintain the DOF of the scene add a Gaussian Blur of Radius 3.5px to the signboard.

Step 18
Create a new layer on the top of layers pallet and paint the fog as shown at the bottom of the scene.

Step 19
In this step we are going to create the Title with 3D depth using textures and Blending Options.
1) Type in the title “ZOMBIE HUNTER” with the tag line ‘Warrior Behind the Shadows Of The Dark’ in two separate layers.

2) Now place a texture on the main title and cut the texture in the shape of the title into a new layer and name the layer as ‘Texture Title’.

3) Now go to texture title layer’s Blending options and open Bevel & Emboss. Then set the Depth to 562%, size=18px and leave the rest as default.

4) Copy the previous layer style and paste it to the tag line.
Step 20
In this step we are going to work with Ruler Tool (I).
1) Merge all the layer of the image we created into a single layer leaving the titles, then name the layer as cover. With the cover layer selected choose the Ruler Tool (I). Then click and drag an inclined line at the bottom of the image as shown and click on Straighten Layer to shift the horizon of the image.

2) Now create a new layer and create a black strip on the left side of the cover as shown with a small white box on the left side top corner.

Step 21
In this step we will be filling the side strip with logo and supporting console name.
1) Place the logo in the small white box and type the name of the console as shown along the black strip.

2) Now open the Blending Options of the text layer and open Gradient Overlay and select the grey and black gradient. Then fill the text with the selected gradient as shown.

3) Now create another strip on the top of the cover as shown.
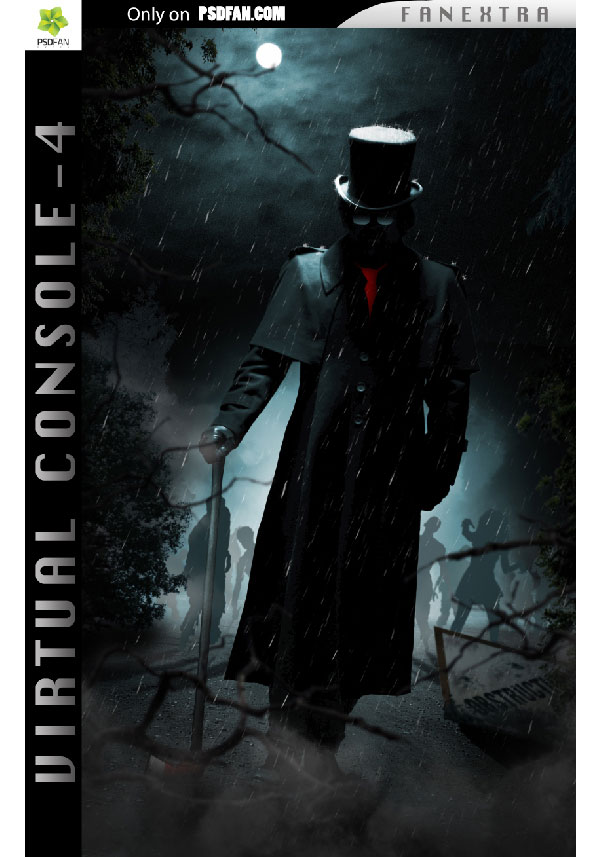
4) Unhide the main title and reposition it slightly towards the center.

5) Now place the certification logo on the left side of the cover as shown.

Step 22
In this step we will be creating a logo for the gaming company.
1) Import a concrete wall texture on to the canvas.

2) Using the Curves adjustment layer raise the Red curve as shown.

3) Now de-saturate the layer to -30 using Hue/Saturation.

4) Now import a metal texture and cut it in the shape of Omega symbol.

5) Now create a new layer under the omega layer and fill in with black color in the shape of Omega. Then move the layer slightly towards the left as shown.

6) Then add a Gaussian Blur of Radius 3.5px.

7) Merge all the logo layers and import the logo on to the working canvas and place it on the right side bottom corner as shown.

8 ) Using the Type Tool (T) type the name of the company ‘Omega Games’ as shown.

And We’re Done!
You can view the final outcome below. I hope that you enjoyed this tutorial and would love to hear your feedback on the techniques and outcome.

Member File Download
Download the original .psd file for this tutorial here:

 Members Area Tutorial: Learn How to Produce an Elaborate Matte Painting
 Members Area Tutorial: Create a Stunningly Detailed Matte Painting Landscape
 Members Area Tutorial: Create a Beautiful Snow Queen Photo Manipulation

Leave a comment
0 Comments:
No comments have been posted yet. Be the first!
Leave a Comment: