
Members Area Tutorial: Create a Vintage Gun From Scratch Using Photoshop
Creating a real life object in photoshop with realistic details is always a challenging part of art which requires a lot of observation and details to be added to object to give it realistic look. In this tutorial I will tell you how to create a vintage hand gun with realistic details by using some most basic drawing and matte painting techniques.
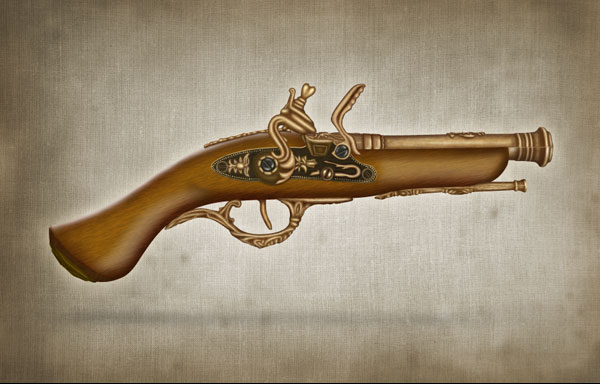
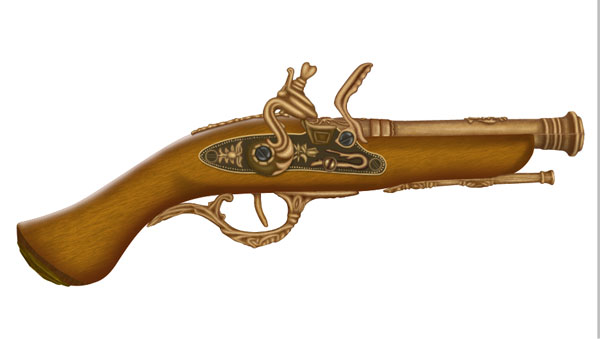
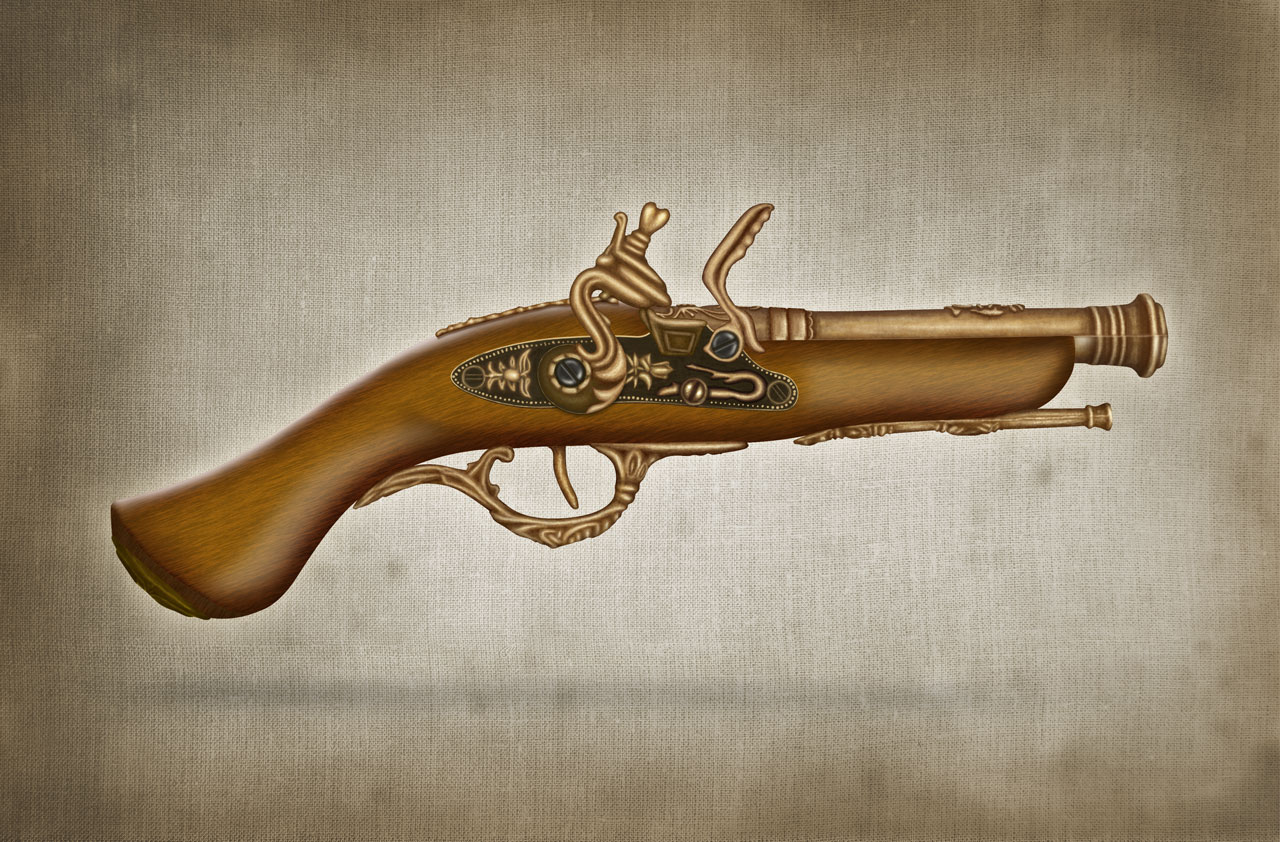
Final Image
As always, this is the final image that we’ll be creating:
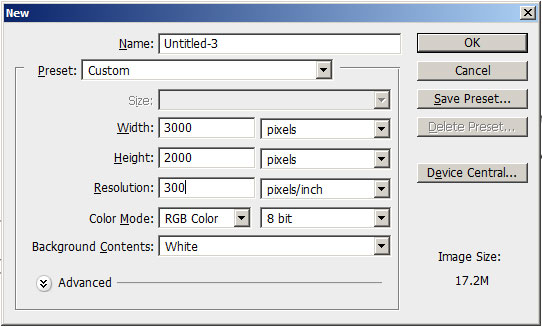
Step 1
Create a new document of size 3000 px width and 2000 px height and set its resolution to 300 dpi.
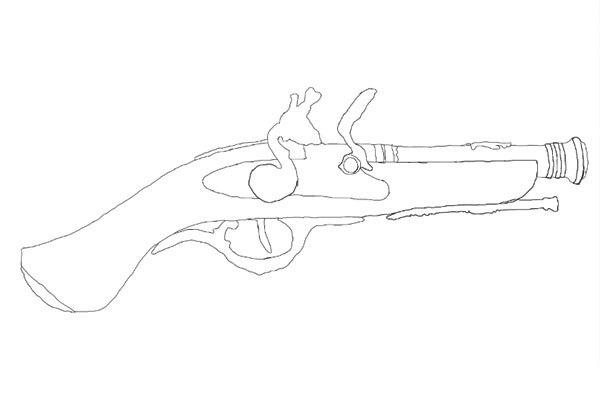
Step 2
Select a brush of size 3 pixels and start drawing rough outlines of gun for reference. Don’t spend much time for perfection because rough outlines would work.
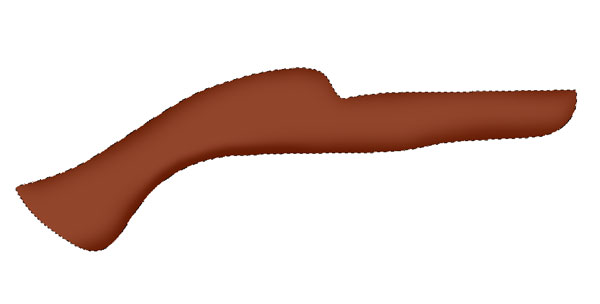
Step 3
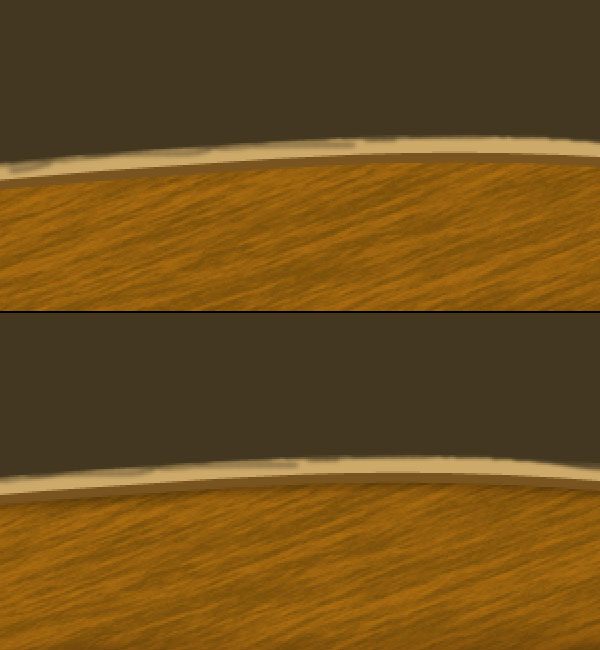
Select a pen tool and start creating the wooden shape, make sure to turn shape layer on. Set the shape layer’s colour # 92452b and rename the layer to “wooden base".

Step 4
Create a new layer, press Ctrl + click to shape layer to get its selection then select a soft brush of colour black and starts creating shadows on wooden base layer.
Step 5
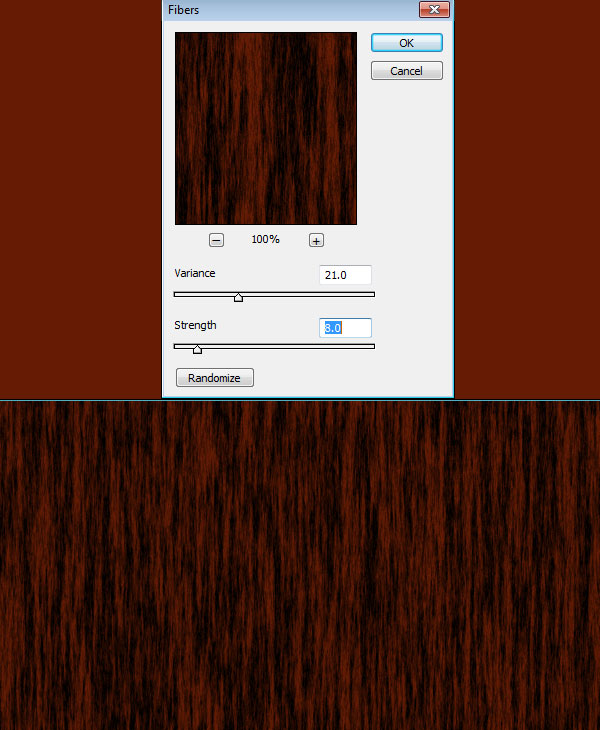
To create wooden texture for wooden base layer, create a new document of dimension 1000 px X 1000 px. Set foreground colour to #651c04 and fill same colour to layer. Now set background colour to black, go to Filter > Render > Fibers and set these values; Variance = 21.0, Strength = 8.0.
Step 6
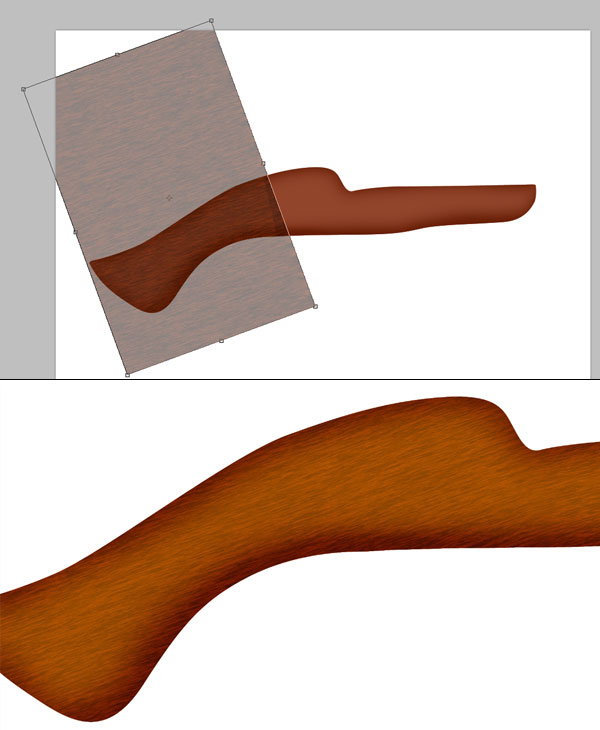
Import this fiber layer to main document. Scale, transform and rotate it to cover the wooden base layer and set its blending mode to soft light with opacity 70%. Duplicate the fiber layer and set its blending mode to screen and opacity 60%. Change the wooden base layer’s colour to # ab6e05 for better appearance.
Step 7
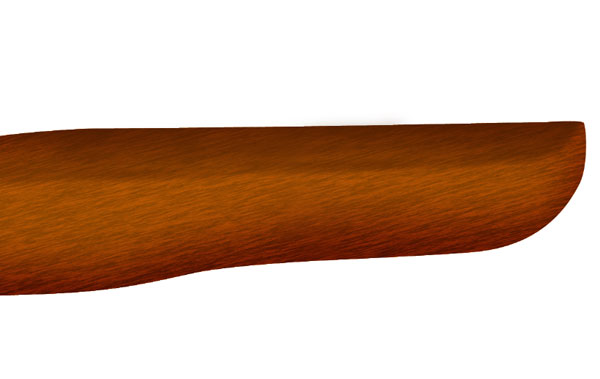
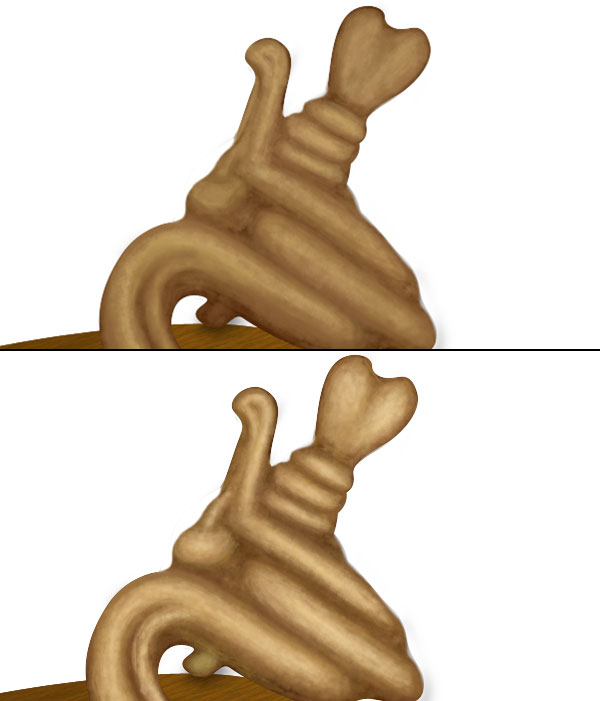
Select a brush of size 100 px and softness 50%. Set foreground colour to # 4d1e01 start adding shadows to the wooden base layer.
Step 8
Next create a new layer and make a selection on wooden base layer. Invert the selection if needed and start adding shadows to that area with a soft brush.
Step 9
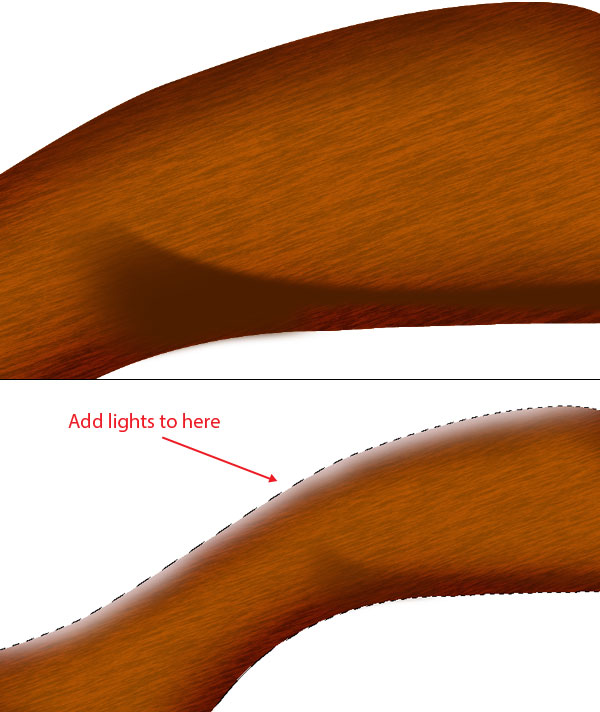
Select the shadows and add Gaussian Blur of radius 5 pixels. Now select a soft brush of colour # ddc8c6 and press Ctrl + click to the wooden base layer to get its selection, invert the selection and start adding lights along the top portion of wooden base layer. Now we will correct the colour of wooden base which appears to be more reddish. For this add a Hue / Saturation adjustment layer with these settings; Hue = +8, Saturation = -18.
Step 10
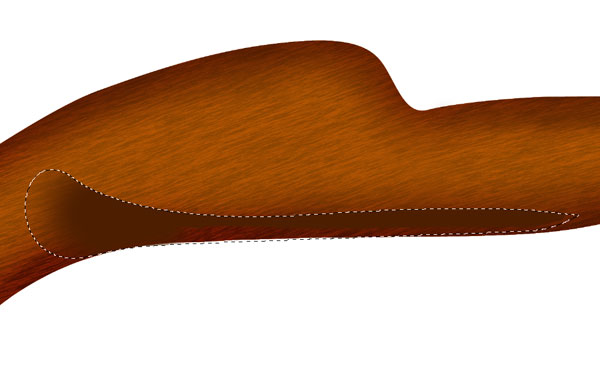
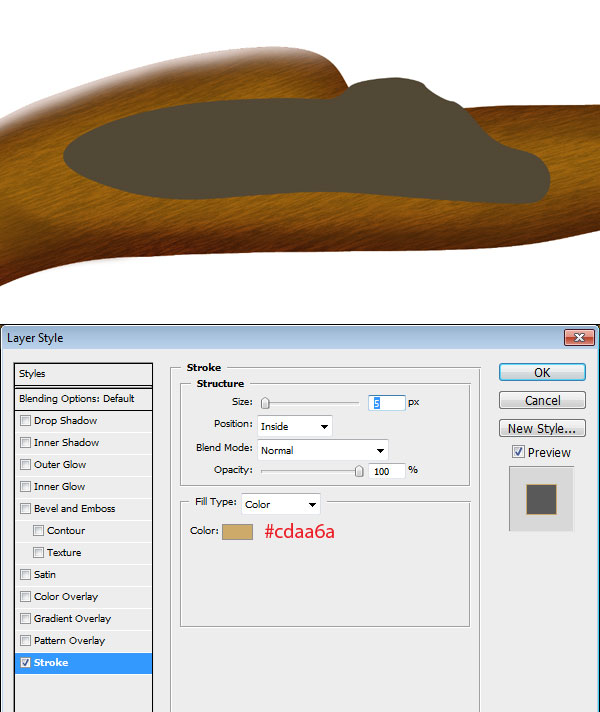
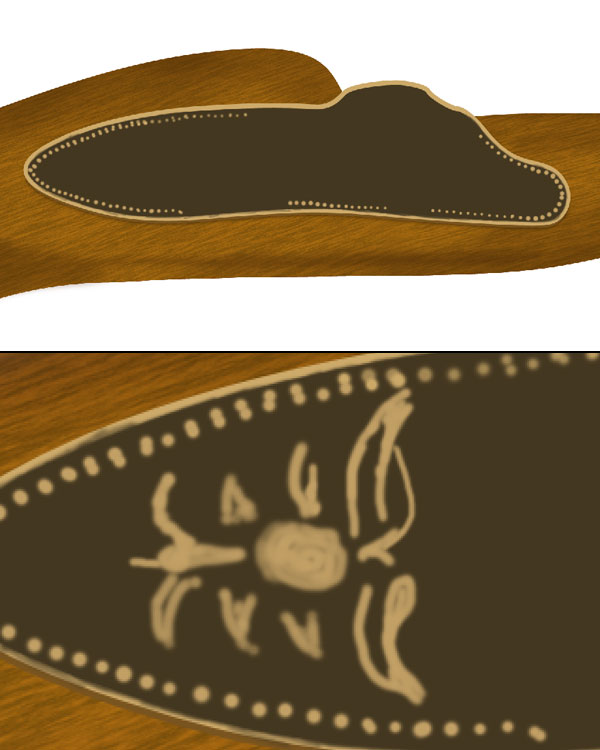
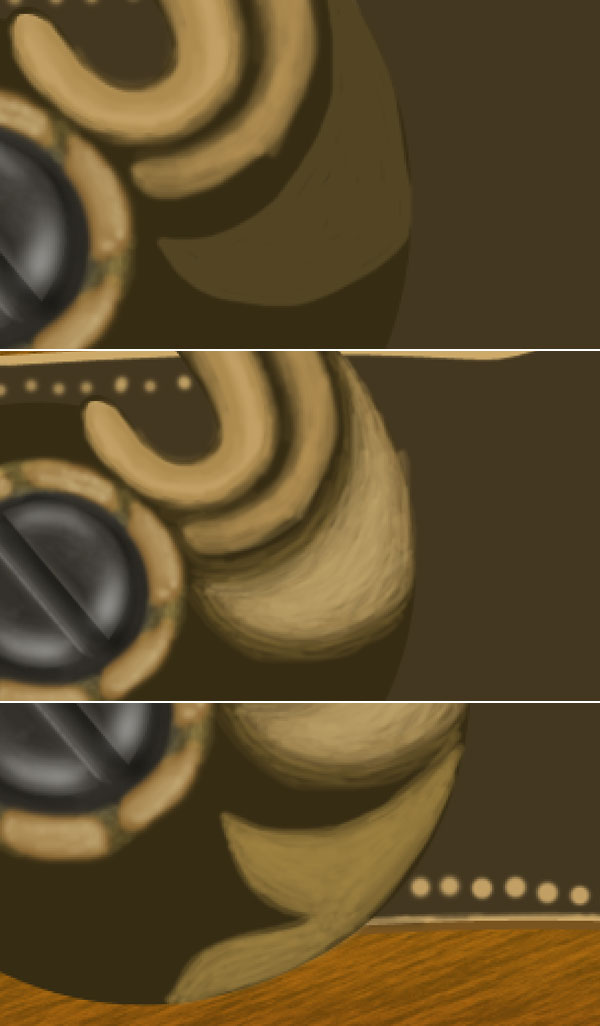
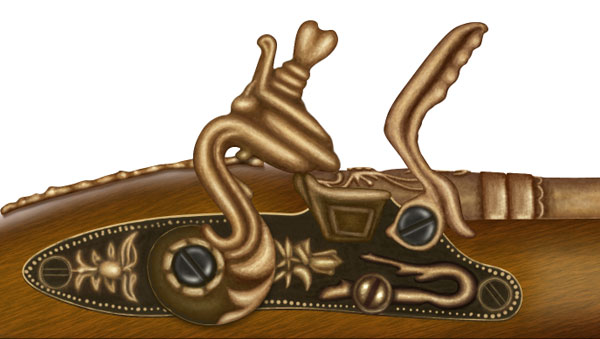
Now create a new layer group and name this group to “centre gold” then select pen tool and create a shape layer of colour # 433720. Add a stroke layer style with stroke size 5 pixels and colour #cdaa6a. Rename this layer to “centre gold”.
Step 11
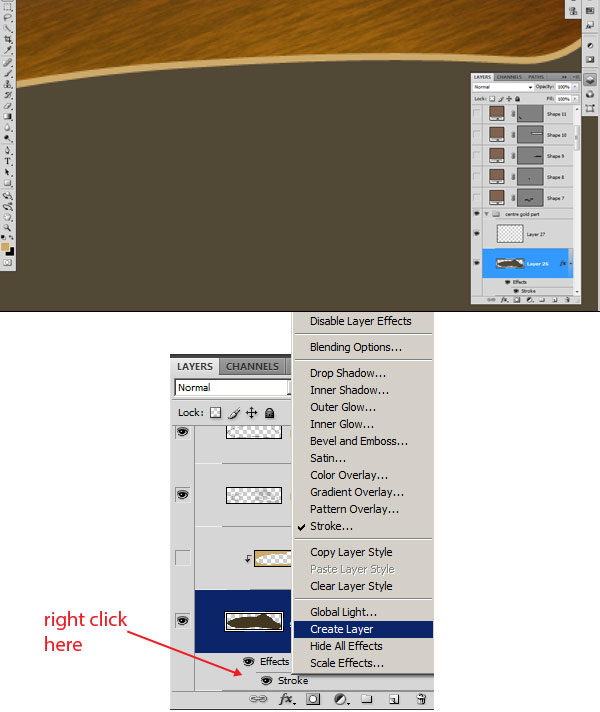
Select centre gold layer; right click on stroke filter icon associated with gold layer and click to “Create Layer”. This will separate the stroke layer style by creating it into another layer clipped into our main layer.
Step 12
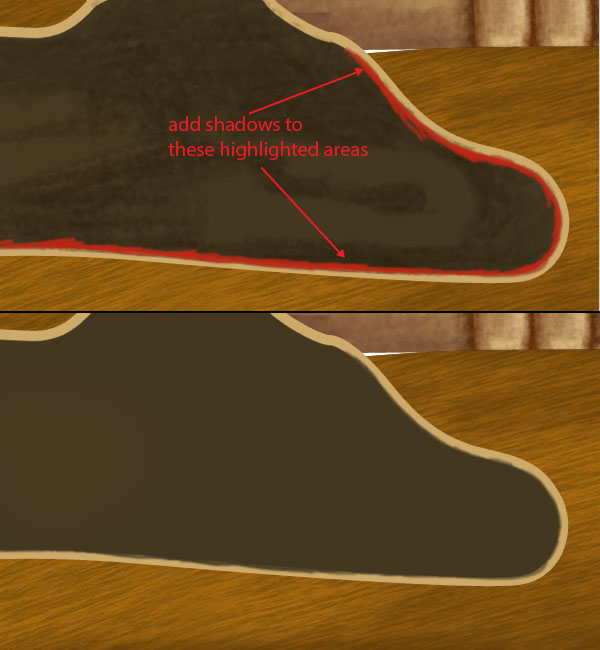
Next, create a new layer, select a soft brush of colour black & size 10 pixels and draw some shadows on gold stroke layers to roughen it.
Step 13
Select “centre gold” layer, press Ctrl + Click on the layer itself then create a new layer below centre gold layer and fill this layer with colour # 79541f to create centre gold layer’s lower lining. Duplicate this layer and fill with colour black to create lower lining shadow then apply some Gaussian blur of radius 3 pixels.
Step 14
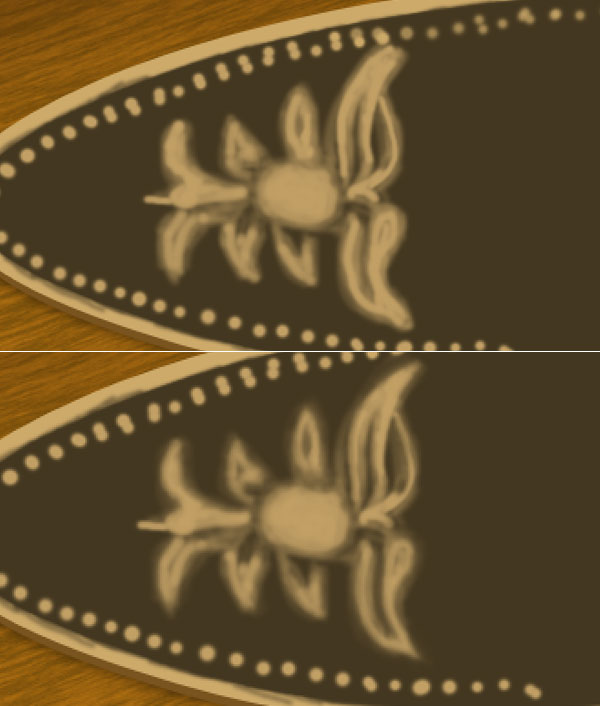
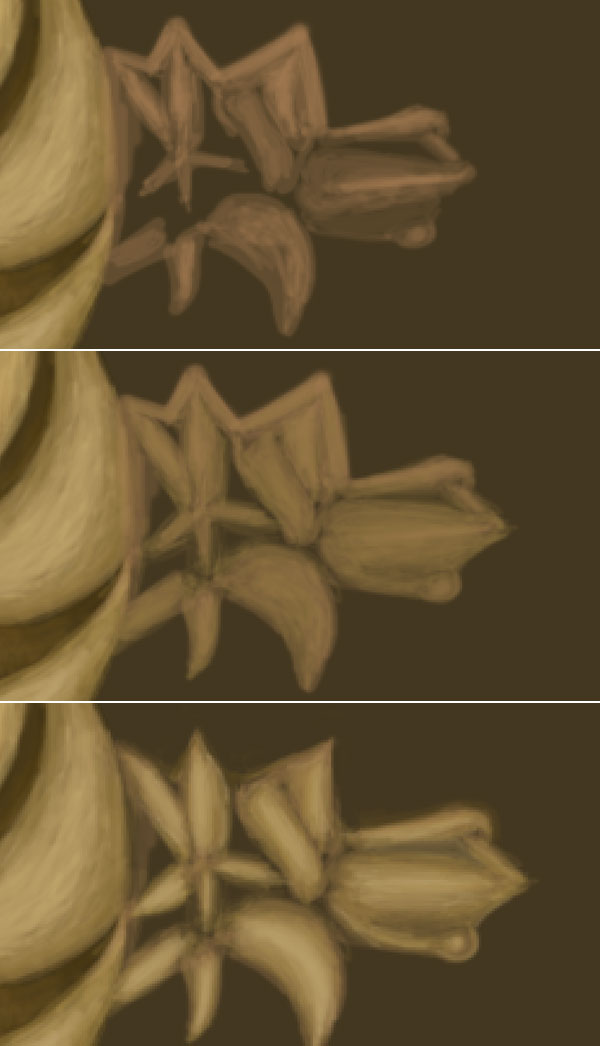
Select a small brush of size 5 pixels & colour #c2a065 and add some dots in the lining of centre gold layer. Now we will create some ornaments on in the centre, for this select a soft brush of colour #c2a065 and start drawing basic outlines of flower.
Step 15
Next, reduce the opacity of brush and add more details in the flower. Add some shadows to sharpen the edges of flower.
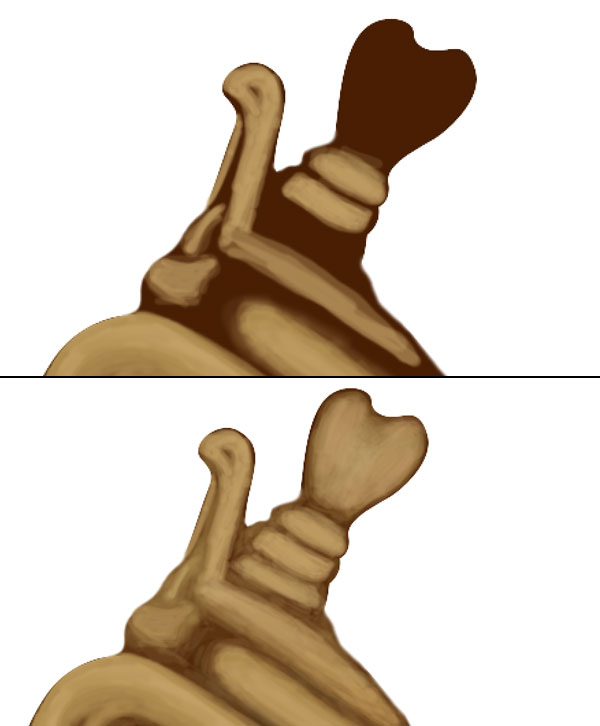
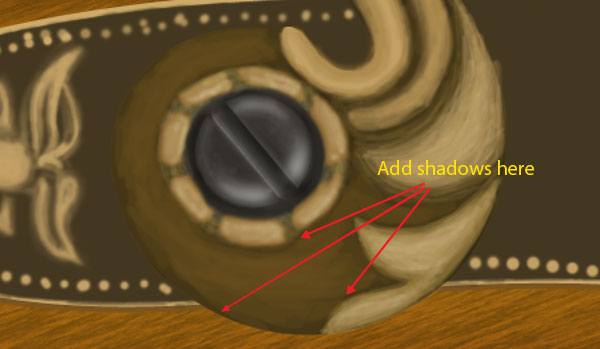
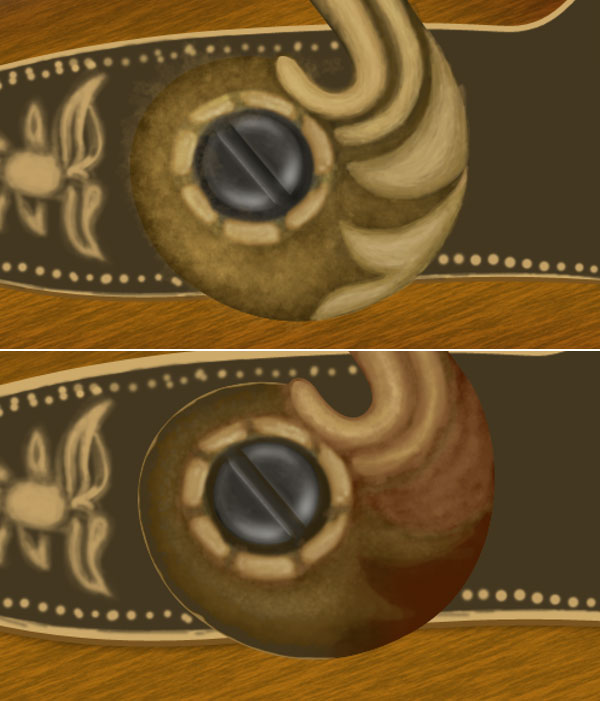
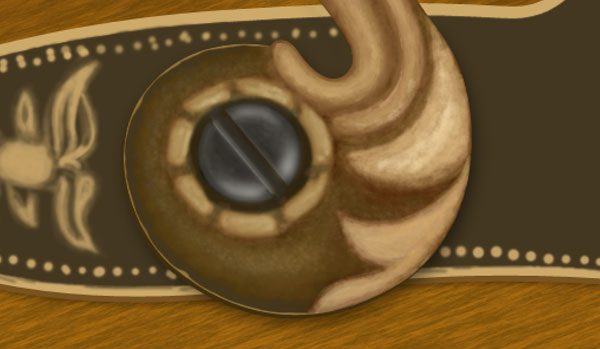
Step 16
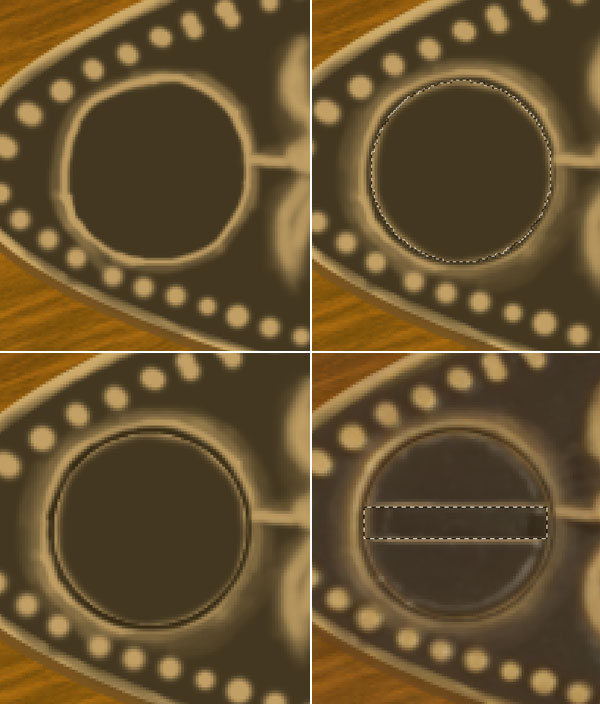
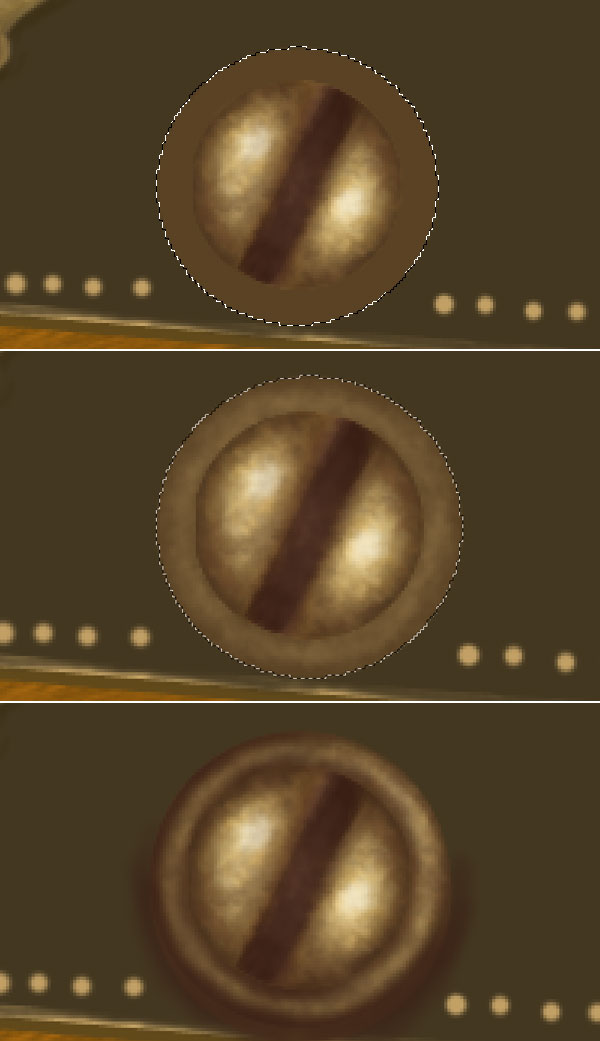
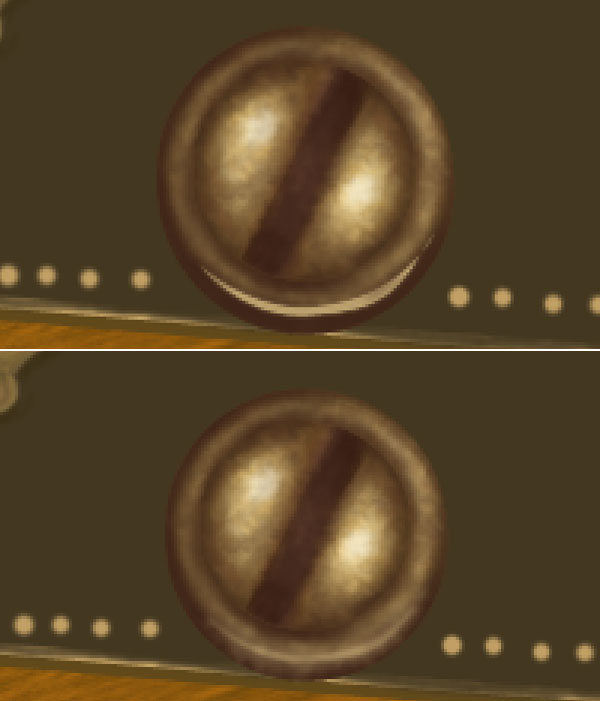
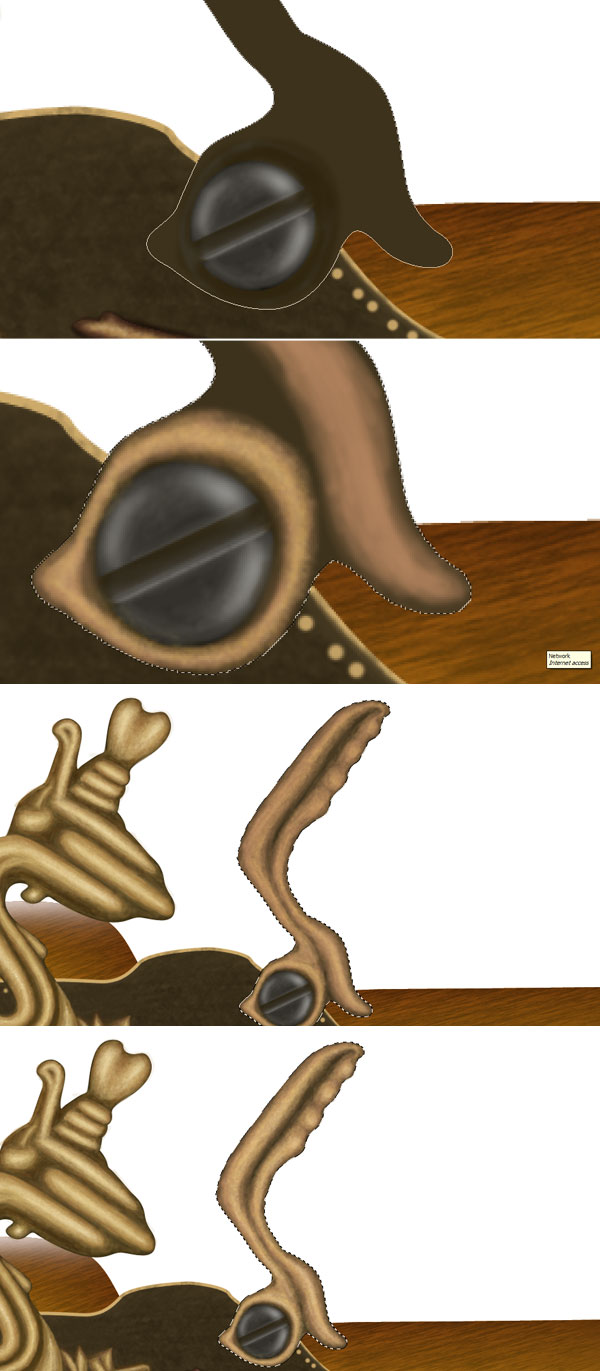
Now we will create a screw in the left side, for this select a soft brush of same colour & size as in step 14 and create outlines of screw. Next reduce the opacity of brush and add some shading to add more details.
Step 17
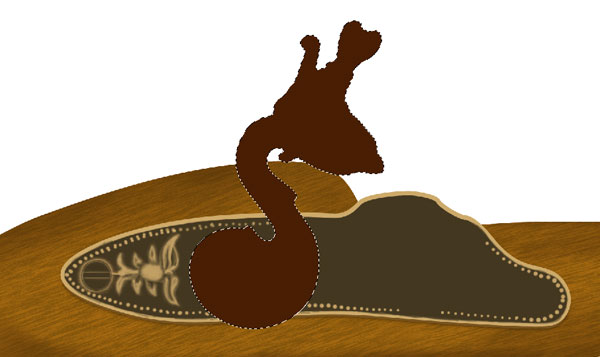
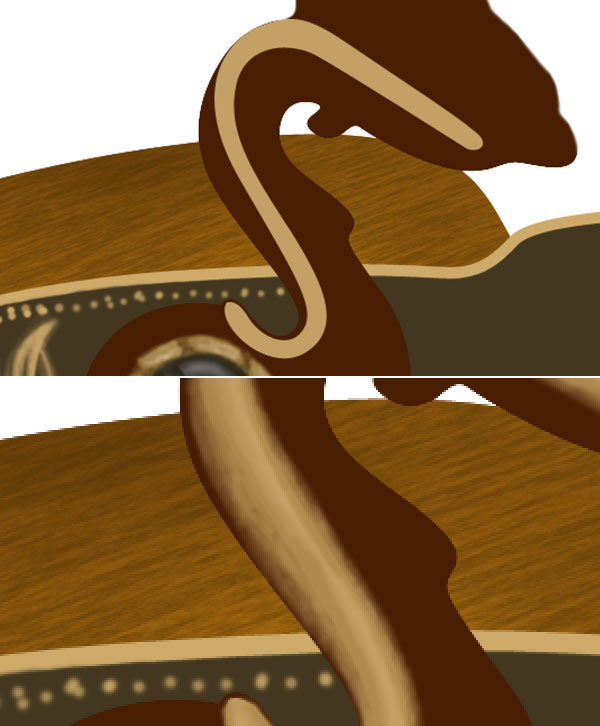
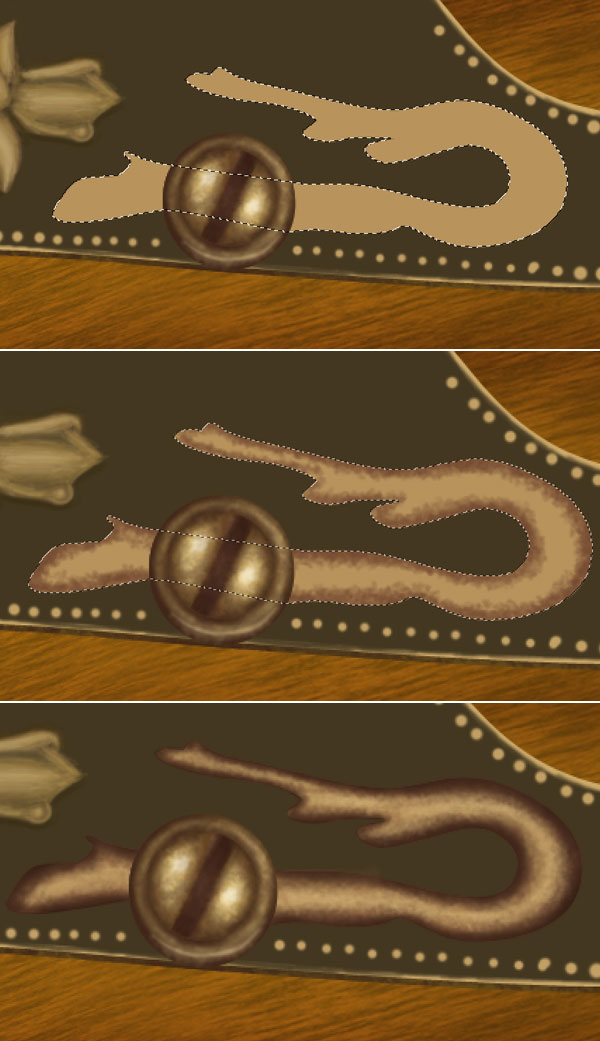
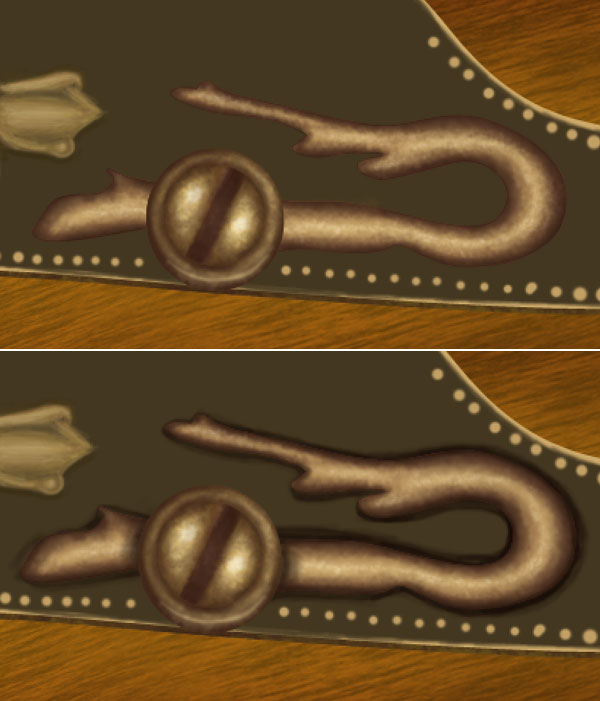
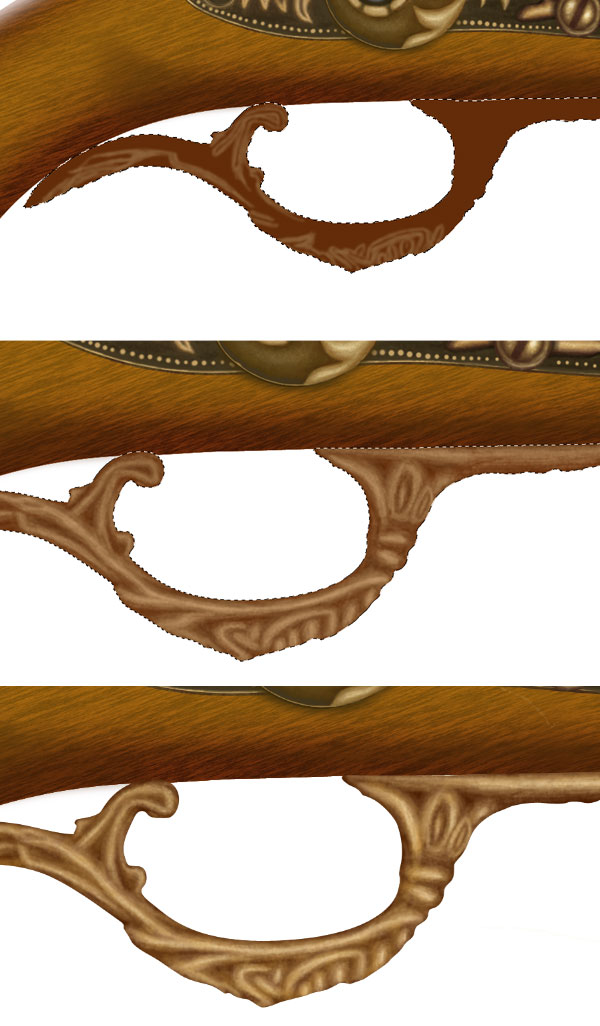
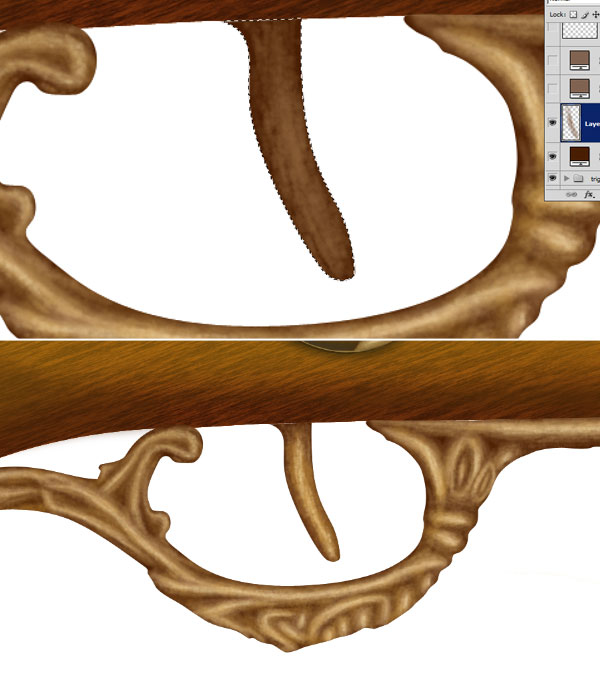
Select pen tool and create the main lever shape and fill this layer with colour #481e03, make sure to turn shape layer ON.
Step 18
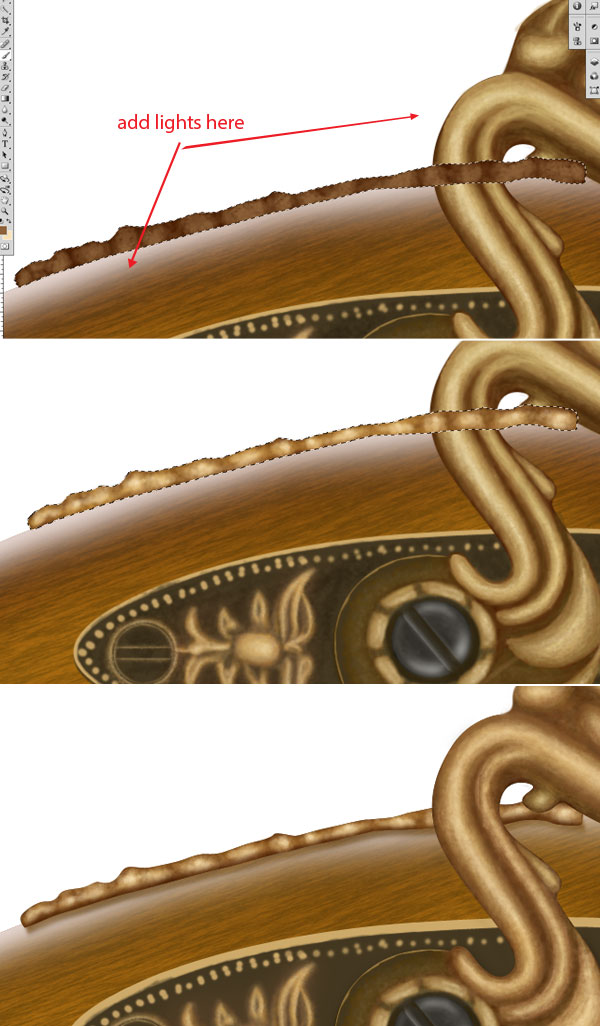
Set foreground colour to #8e6a35, select a soft brush of size 10 pixels and create a dashed ring. Next, select a soft brush of colour #b3945d and start adding lights to the ring and then select a brush of colour #e4d4a8 and add some sharp lights to the ring. Now add some shadows to the ring with a soft brush of colour #c8b163 and opacity 40%.

Step 19
Now we will create the centre screw of lever for this, draw the outlines of screw with a soft brush of colour black. Create half section of screw by pen tool, make sure to turn shape layer on and change its colour to #2f2d26. Change the foreground colour to #59564f and add some lights on it.
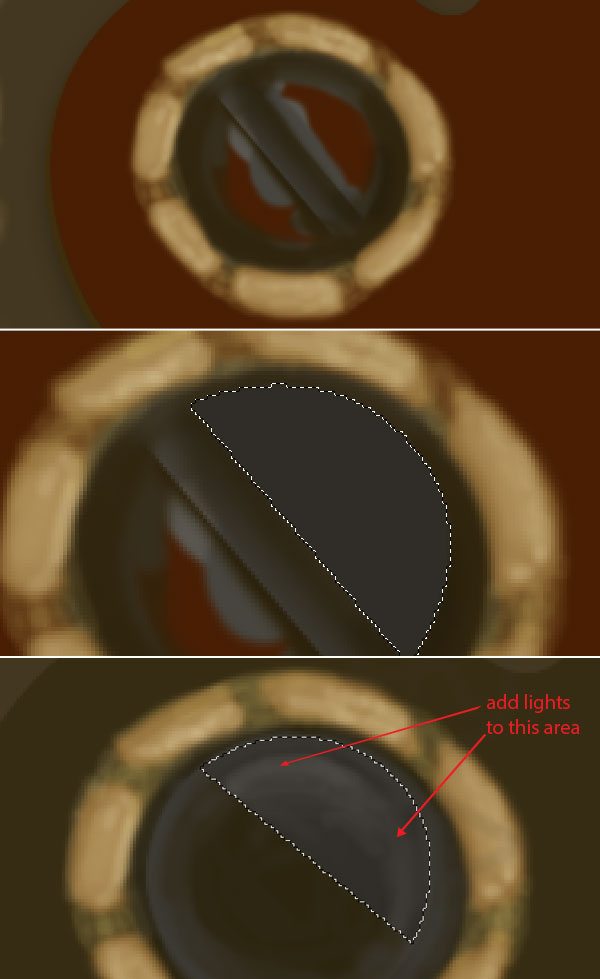
Step 20
Next add some more lighting to the screw half portion, group these layers and transform it to align it to make another half portion of screw.
Step 21
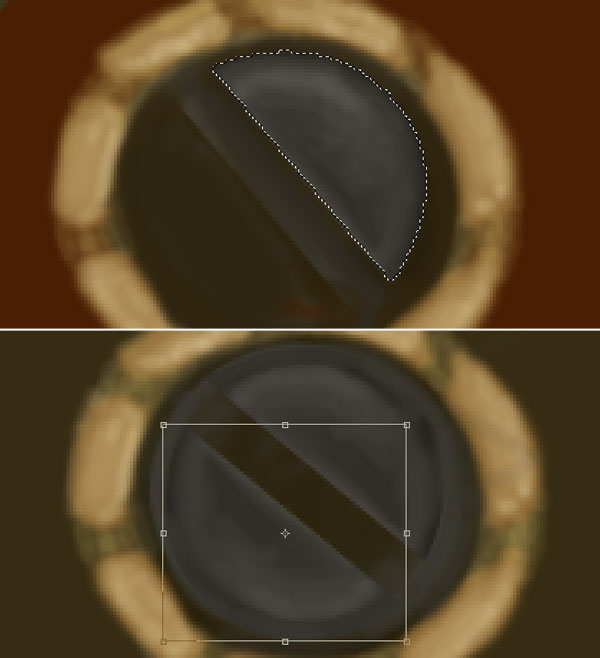
Select a rectangular marquee tool and create a middle area selection by transforming it by going Select > Transform Selection. Ctrl + click to the half section of both layer group. Add some lights and shadows to the middle section to give it depth.
Step 22
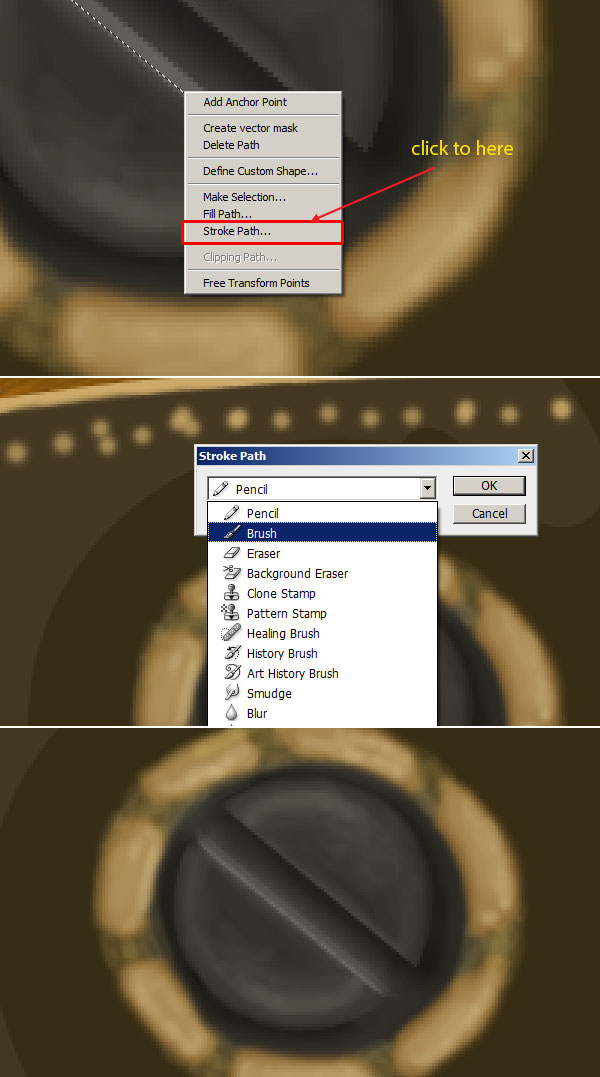
Create a selection to the edge of half screw and fill it with colour #524f4a. Now turn path layer on by clicking to the icon right to shape layer icon and create a path on the edge of half section of screw.
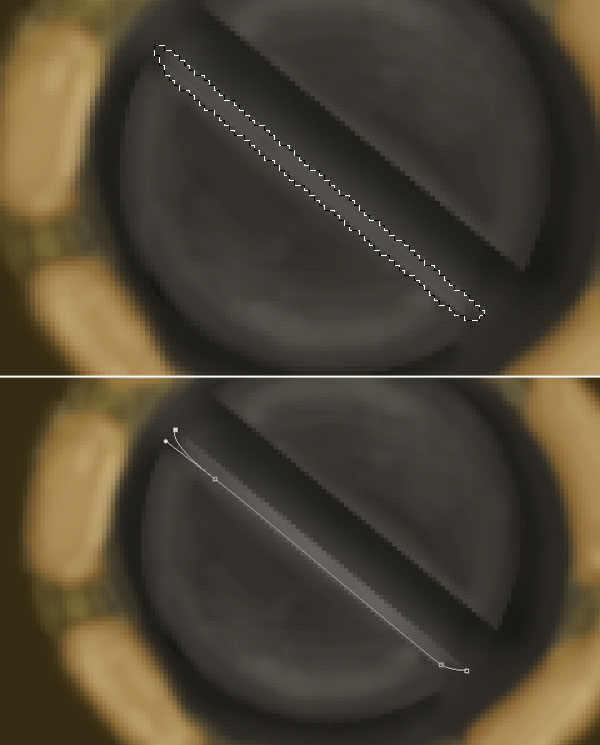
Step 23
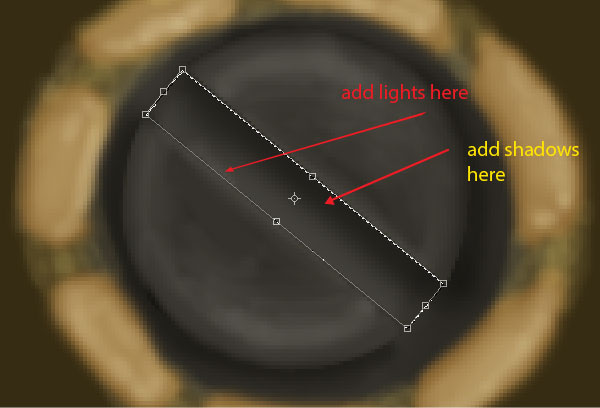
Select a brush of size 3 pixels, hardness = 100% and colour white. Select pen tool, right click to the path and select “Stroke Path” then select “Brush” from drop down menu in stroke path window. Reduce the opacity of brush to 30%.
Step 24
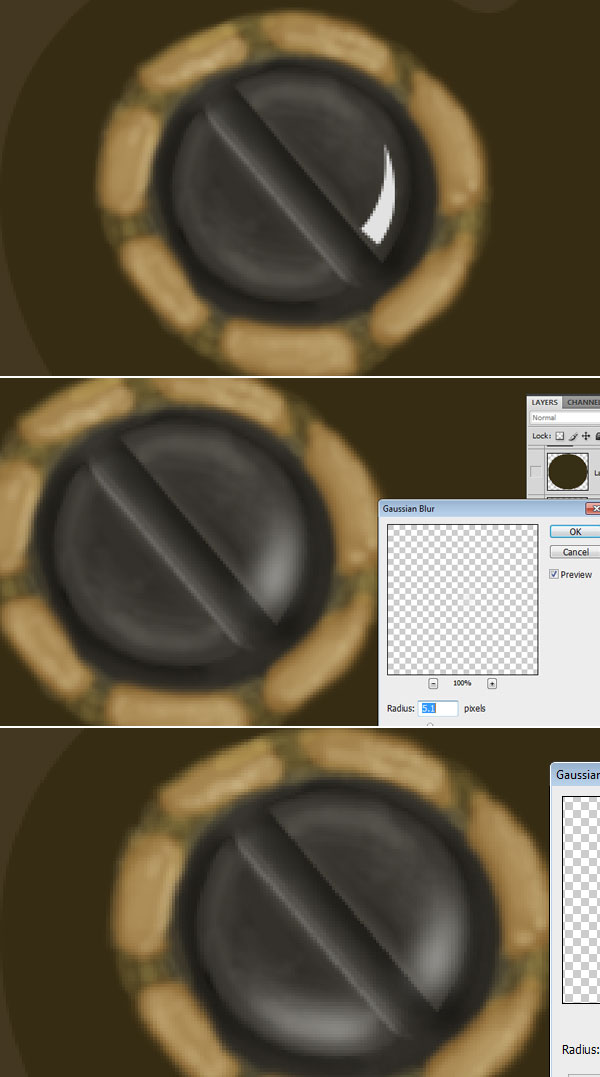
Now we will add some lights to the screw for this select pen tool and create light area. Fill it with colour #e2e2e2 and apply Gaussian Blur of radius 5 pixels. Repeat the same step and create on other side of screw. The screw will look like this;
Step 25
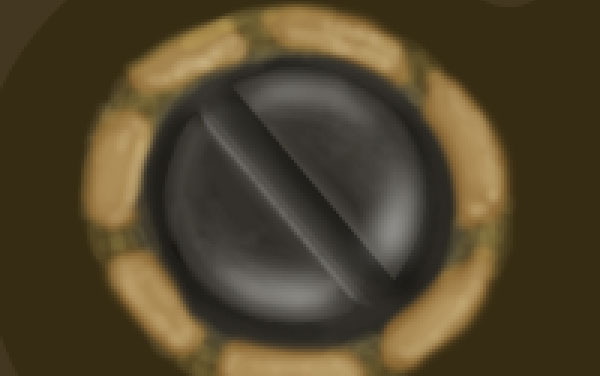
Repeat the Step-25 and create some more lights on the other portion of screw to give it more realism. Group all layers and name the group to “screw”. If everything done properly then result would look like this;
Step 26
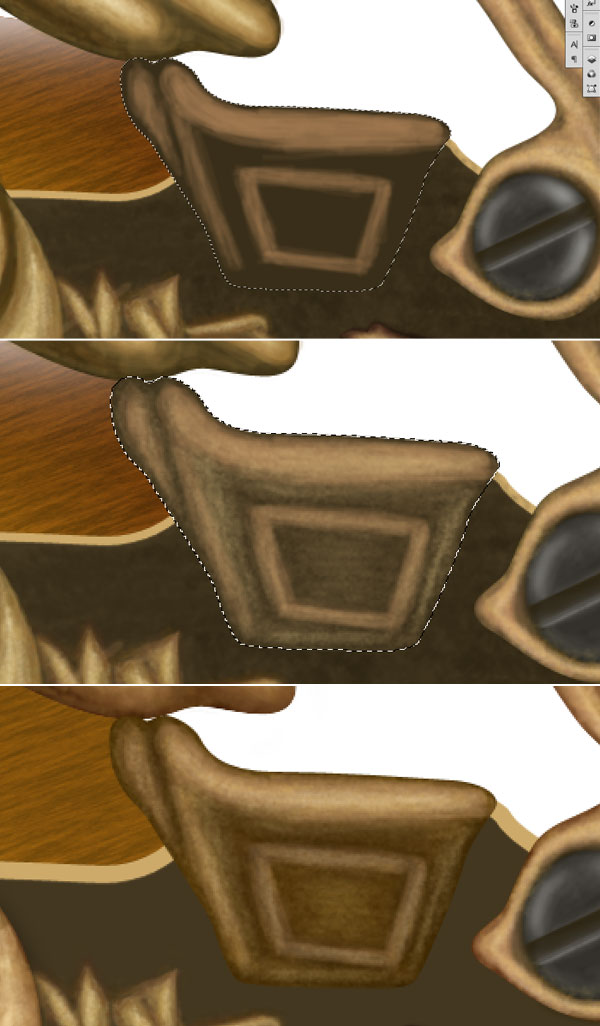
Now we will create the neck golden portion of lever for this select a brush of size 10 pixels, colour #c2a065 & hardness 100% and start creating some outlines of golden texture. Select a soft brush of colour #ad8b4f with 50 % opacity and start adding more details to the neck.
Step 27
Set foreground colour to #937034 and create gold texture, reduce the opacity of brush to 40% and hardness 0% and add some details. Next set foreground colour to #c2a065 and add more details the area.
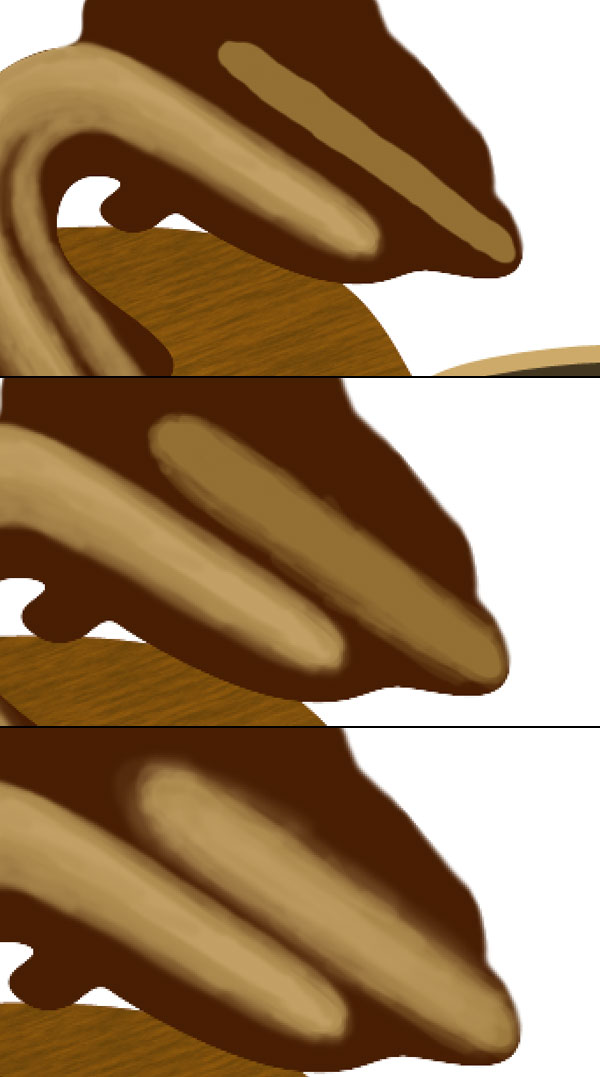
Step 28
Repeat the step 26 & 27 and create upper portion of lever. Change the brush opacity, hardness as per needed.
Step 29
Now we will create lower portion of lever for this set foreground colour to #524523 and roughly draw gold leaf area. Next, change the foreground colour to #a28442 and add more details to the gold leaf. Repeat the same step and create another gold leaf.
Step 30
To create dark texture of lever select a brush from default brush set, press F5 to access brush setting panel and apply these settings;
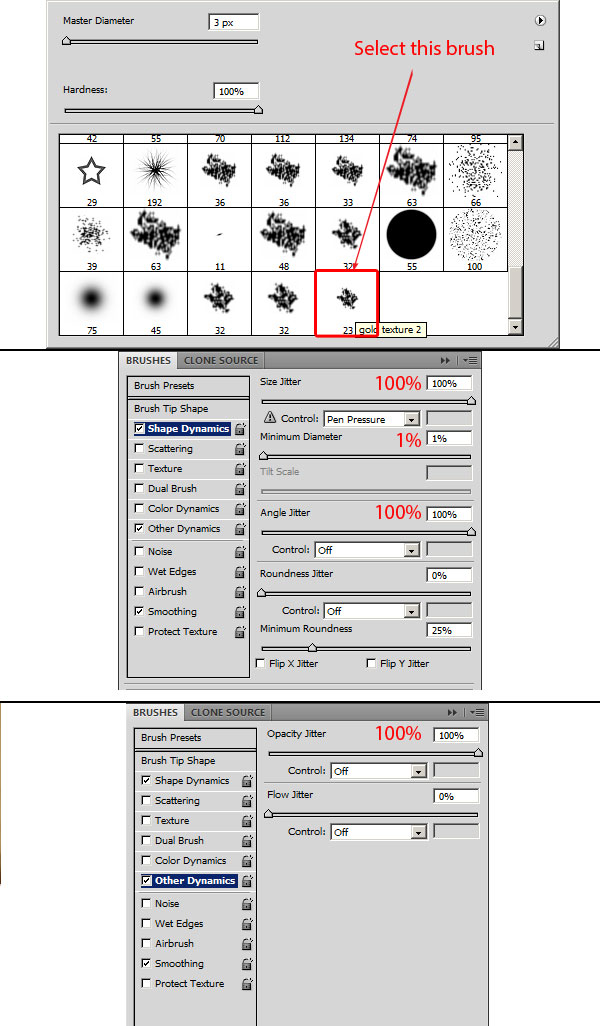
Step 31
After applying necessary settings to brush click on the “create new brush” icon in the bottom right corner of brush settings panel and rename the brush to “gold texture”. Set foreground colour to # 674d1c and start adding texture to the lower portion of lever. Change the brush colour to # 513b10 and add some shadows to the lower portion.
Step 32
Change the foreground colour to # 816837 and add some textures to the lever. Next Ctrl + click gold lever layer to get its selection, invert the selection then set foreground colour to # b2914a and create golden border of lever.
Step 33
To add depth we will add lower lining to the lever for this duplicate the gold lever layer, drag it below gold lever and change its colour to # 3e2d0c. To add shadows, create a new layer below gold lever layer, Ctrl + click the gold lever layer and fill the layer with colour black then add Gaussian blur of radius 3 pixels.
Step 34
Now we will add more details to the gold texture for this set foreground colour to # a0764c and start adding texture. Next change the brush colour to # c79d6e to add more details to the texture. Add shadows, lights with colour # e1c491 wherever needed to make it better. Group all layers and name the group to lever, duplicate & merge layers then set its blending mode to multiply and opacity to 20%.
Step 35
Next we will create the right side flower for this keep selected the brush you created in step 30, change the brush colour to # a67c52 and create some basic structure of flower. Change the brush colour to # 8f753e and add more detailing to the flower and finally change the foreground colour to # bca471 to add details.
Step 36
Now we will create the gold screw for this create a circle and fill it with colour # 95703b. Select a soft brush of colour # 523d21 and draw the half portion of screw, change the brush colour to # b49b66 and add some details. Select the brush which you created in step 30, change its colour to #dec07e and add lights. Change foreground colour to # dec07e and add some sharp lighting to the screw.
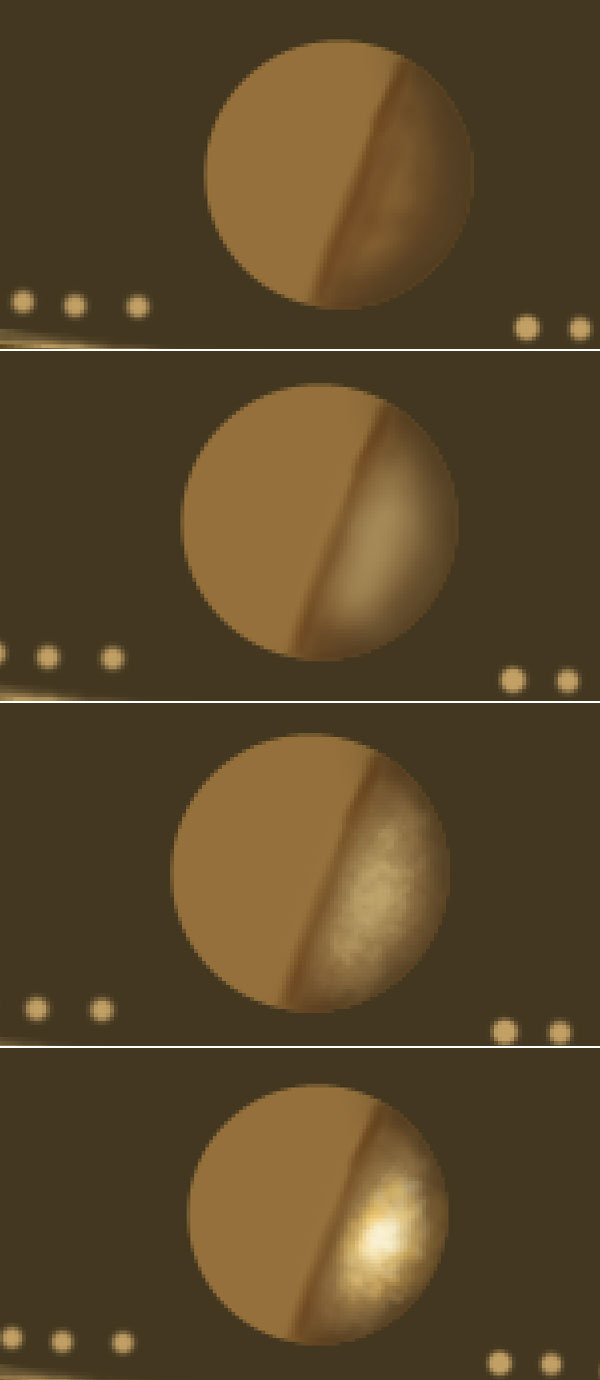
Step 37
Group all layers and name the group to “screw half” and duplicate the group to create another half portion of screw. Change foreground colour to # 683f21 and create middle section then add some shadows with colour # 533326.
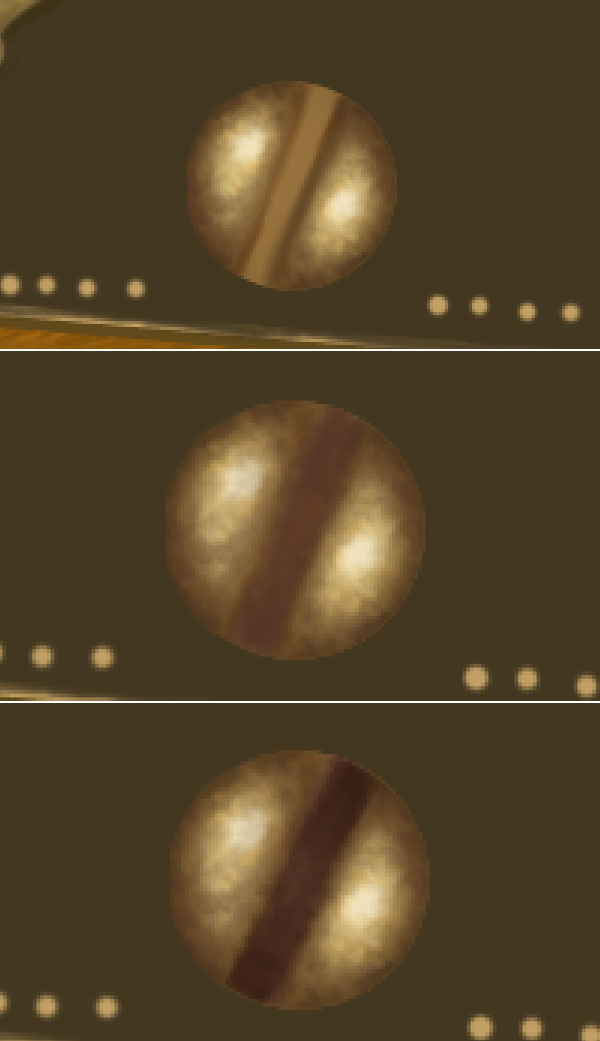
Step 38
Next we will create the outer ring of screw for this create a ellipse of colour #5a4224, select golden texture brush we created in step 30, change its colour to #997c4e and start adding details to the ring. Add some shadows and lights to give it more realism.
Step 39
Here we will add some additional lights to the screw ring for this create a shape with pen tool, change its colour to #b89d6b and apply some Gaussian Blur of radius 3 pixels.
Step 40
Next we will create gold ornament for this, create gold ornament by pen tool and fill it with colour #b8935c. Select the “gold texture” brush, set its colour to #71472f and start adding shading around the edges of shape. Add some more shadows to the ornament with colour #452a1e and add some lighting to the ornament with colour #e3c585.
Step 41
Increase the opacity of brush to 60% and then start creating some sharp lighting on the ornament then add dark shadows with colour black.
Step 42
Now add some sharp lights to various parts of gun for this repeat the step 41 and add lights to flower, lever and ornament.

Step 43
Next create right lever for this select pen tool and create lever shape, fill it with colour #3d321c then duplicate the black screw and place it on right lever. Repeat steps 34 & 35 to add detailing in the right lever.
Step 44
Select a soft brush of colour #a67c52 and follow the steps 34 & 35 to create middle gold button. Add some shadows to the button with a soft brush of colour black.
Step 45
To make barrel, select pen tool and create barrel shape and fill it with colour #734b32. Select gold texture brush, set its colour to #d6b56f and start creating gold texture to the gun barrel.
Step 46
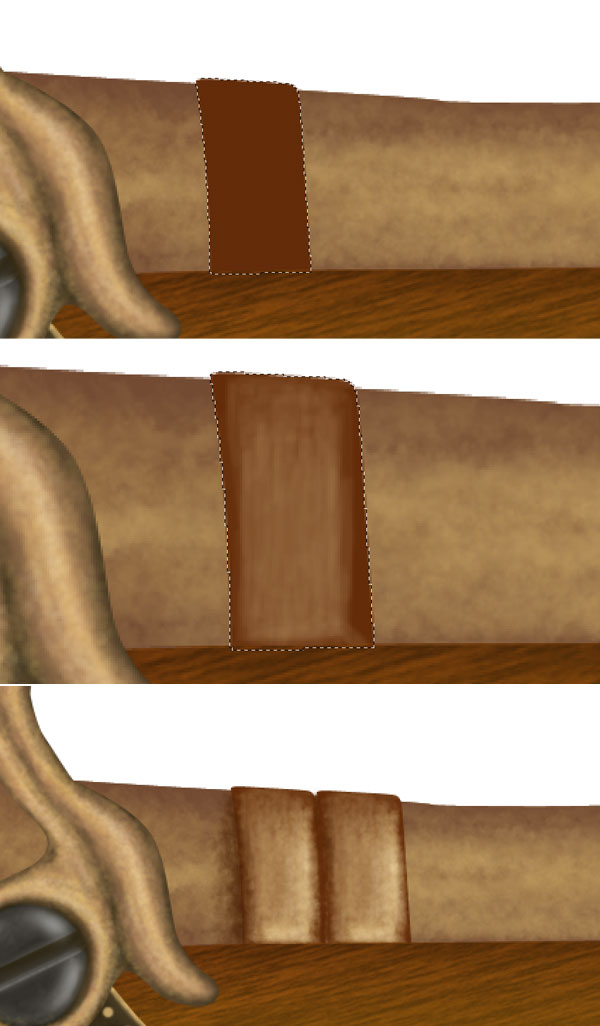
Next add dividers to the base of barrel for this create the shape of divider and fill it with colour #632c09. Set foreground colour to #a67c52 and add detailing to the divider. Add some sharp lights to the divider with colour #f8e3b7 group the layers and duplicate it to add another divider.
Step 47
Next add some flowery ornaments on the top of barrel by following steps 35 & 36.
Step 48
By following step 35 & 36 add more details to the barrel including ornaments and dividers at tip of barrel.
Step 49
Group the layers, duplicate and align the layer group to create its remaining portion of barrel.
Step 50
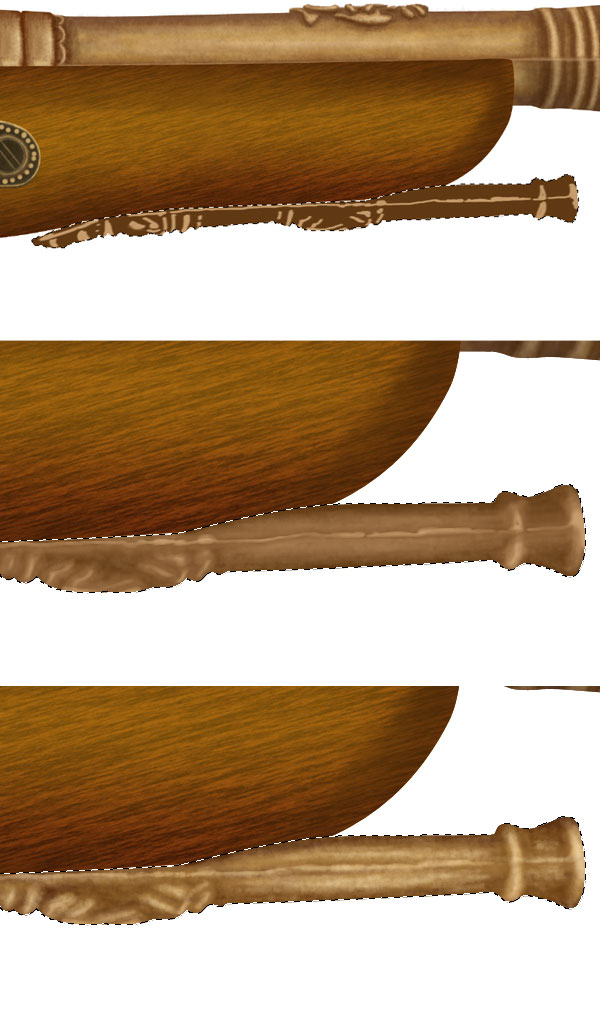
Similarly, by following step 35 create the grip of trigger.
Step 51
Next, create the trigger by following step 50; add lights and shadows wherever needed.
Step 52
Now we will create a small cannon attached below the gun barrel for this select a brush of size 5 pixels, hardness 50% and colour #8c6239 and create basic highlights of small cannon. Change foreground colour to #c69c6e and add some shading to the cannon. Finally select “gold texture” brush, change its colour to #e3c585 and add some lights & shadows to the small cannon to make perfect.
Step 53
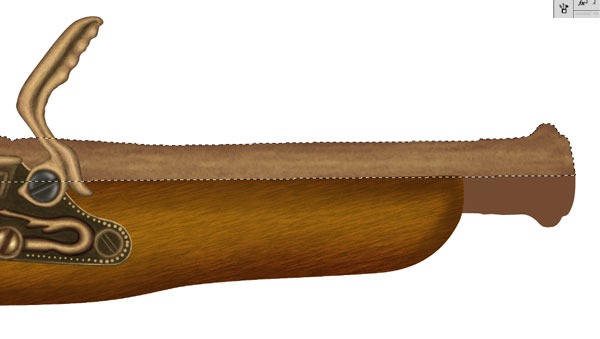
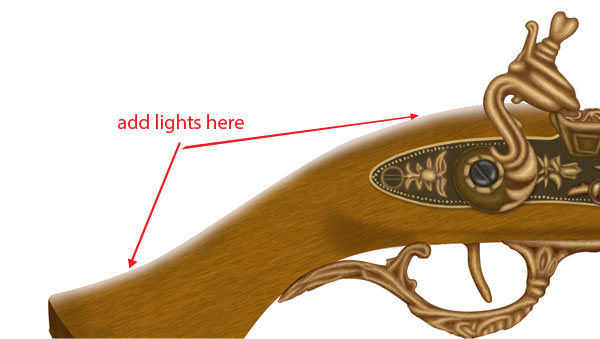
Here we need to add some light reflection in the wooden base layer for this, Ctrl + click wooden base layer, invert the selection, select a soft brush of colour white and start adding lights on the top portion of wooden base.
Step 54
Now repeat the step 52 and create top left gold ornament of gun. Add shadows to the ornament, Ctrl + click to the shadows then add layer mask to the light reflection layer of wooden base. This will make shadows perfect. Similarly create lower gold portion of gun, pay special attention to the light source and shadows.
Step 55
Add some more shadows to the gun, group all layers and name the group to “gun”. It will look like this;
Step 56
Now we are going to add some finer details to the gun for this duplicate the gun layer, desaturation it by pressing Ctrl + Shift + U then reduce its opacity to 10% and set the blending mode to multiply. This will add some darkness to the gun to give it more realism.
Step 57
To add lights on the gun select the pen tool and create a shape of colour #fdfdf0, apply Gaussian blur of radius 18 and reduce its opacity to 20%. Add some more lights to the gun to give it realism.

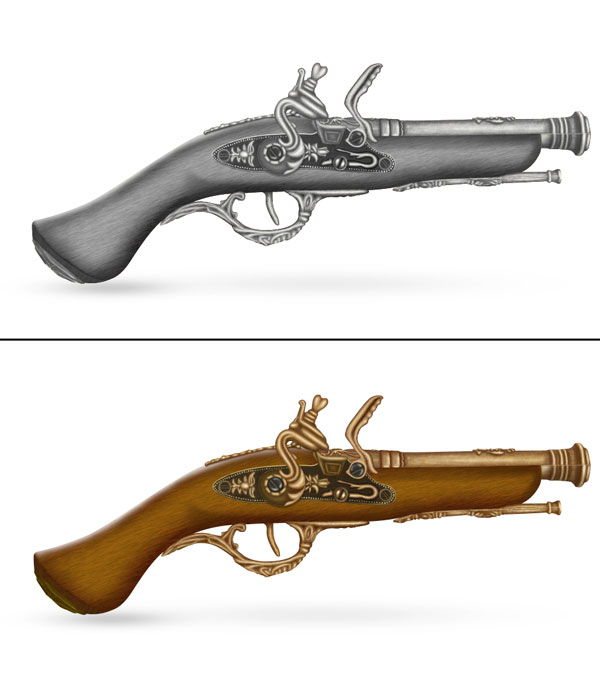
Step 58
We are about to finish this tutorial, now we need to add some finer details. First we will add a sharp light reflection in gold texture for this go to the channel palate and click on each channel separately to check if image have enough contrast. Here our image have high contrast in blue channel hence, duplicate blue channel and press Ctrl + L to access level adjustment window and apply these settings; 0, 0.25, 154.
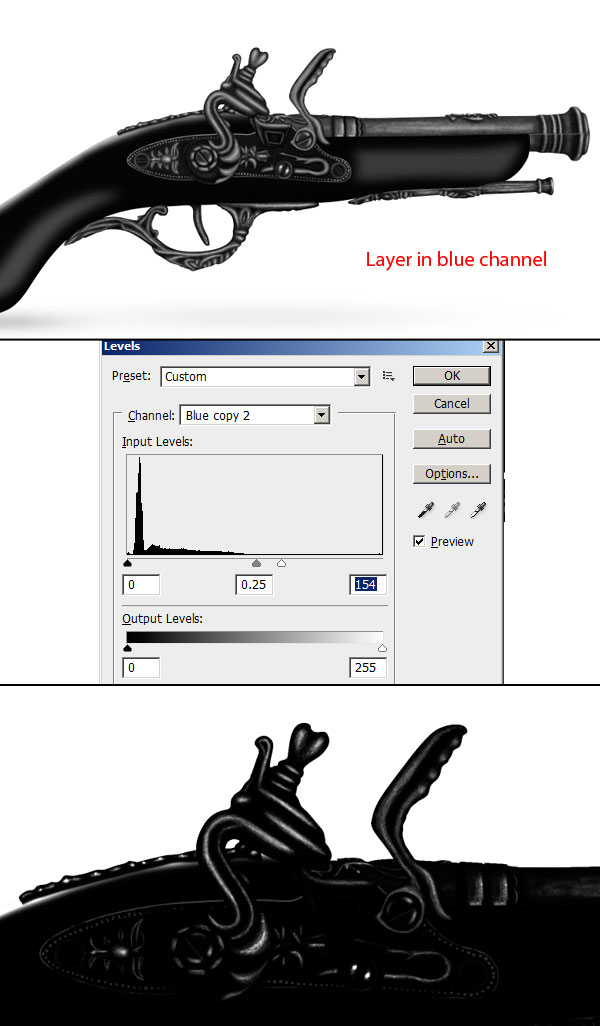
Step 59
Rename the channel layer to “reflection”, Ctrl + click to get the reflection channel selection then create a new layer and fill the layer with colour #eee4c3.
Step 60
This is the last step of tutorial; add some interesting backgrounds and shadows to the gun to make it look better. Apply outer glow layer style with opacity 40% and colour #ffeac1 and congratulations! We have finished the tutorial. Here is the final preview.
And We’re Done!
You can view the final outcome below. I hope that you enjoyed this tutorial and would love to hear your feedback on the techniques and outcome.
Click the image below to see the full-sized outcome:
VIP Download
Download the original .psd file for this tutorial here:

 Members Area Tutorial: Create a Mixed Media Effect in Photoshop
 Members Area Tutorial: Create an Amazing 3d Text Effect
 Members Area Tutorial: Create A Glamorous Digital Illustration With Photoshop

Leave a comment
0 Comments:
No comments have been posted yet. Be the first!
Leave a Comment: