
Create A Glamorous Digital Illustration With Photoshop
In this tutorial I am going to show you how to design a colorful and funky image that uses a glamour model as a focal point. We will be using a lot of color effects, light effects, and masks, but we will also go over creating custom patterns and how to use them successfully in your composition. If you’re ready to get started, fire up Photoshop and let’s get to it!
Resources Used In This Tutorial
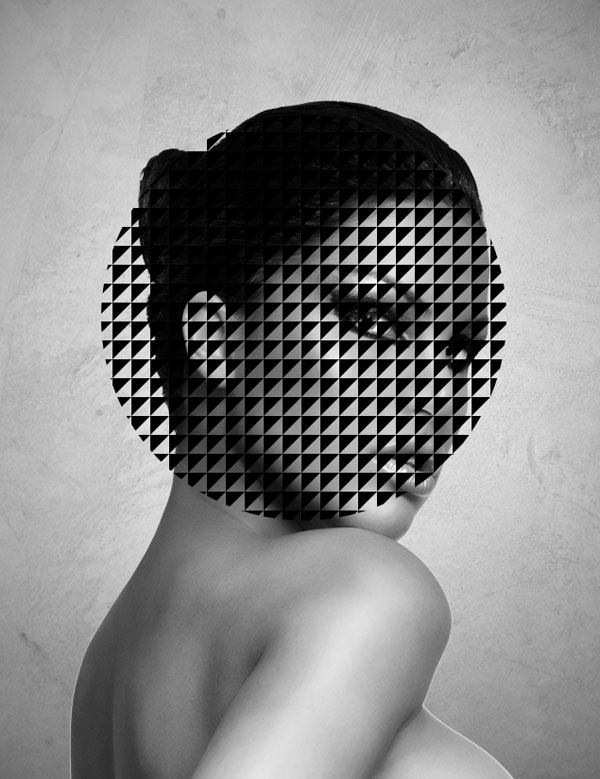
Final Image
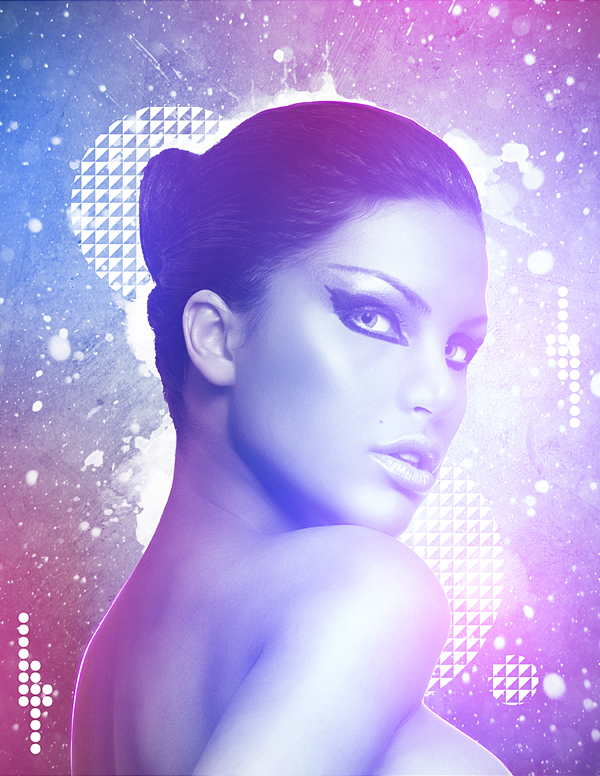
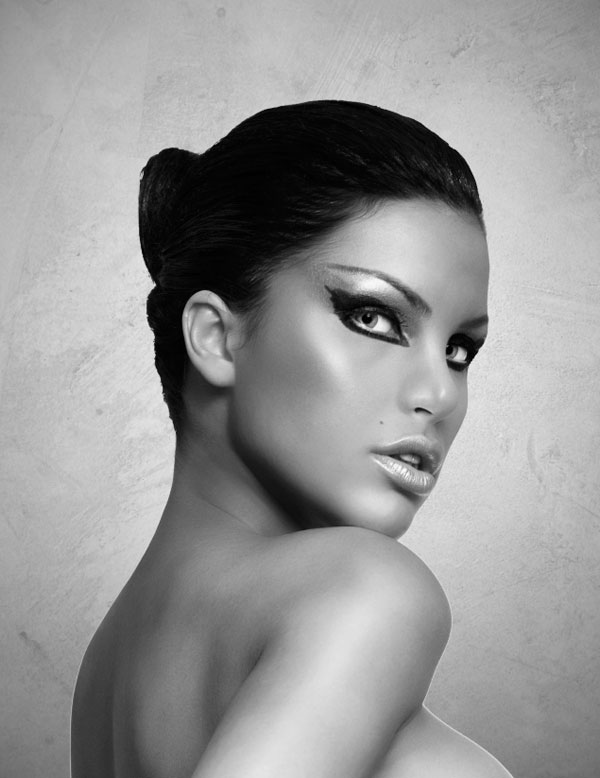
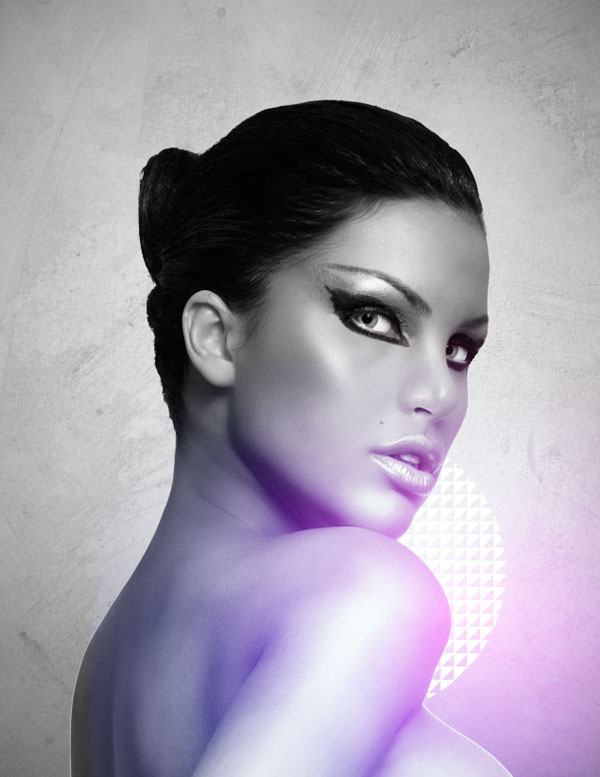
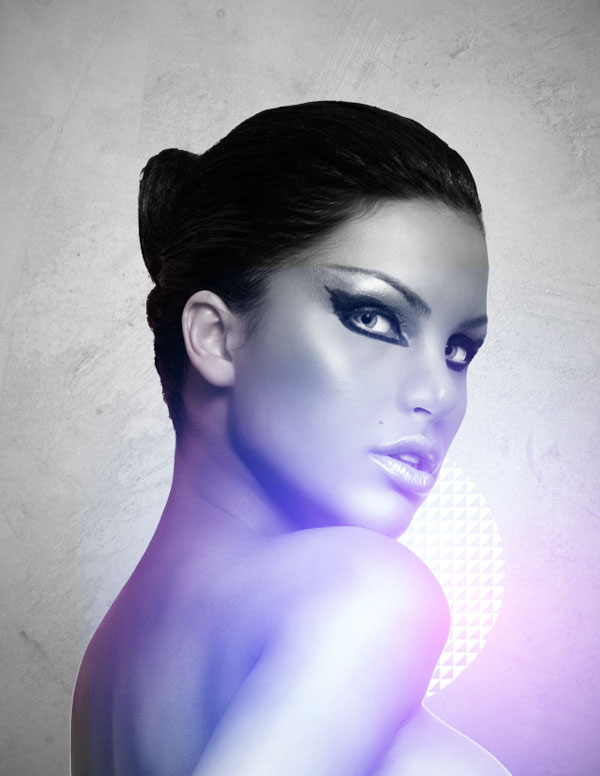
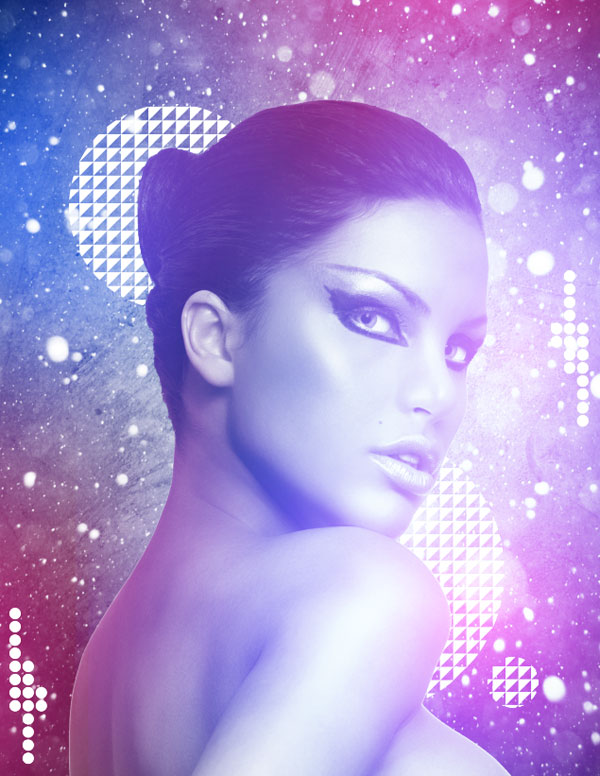
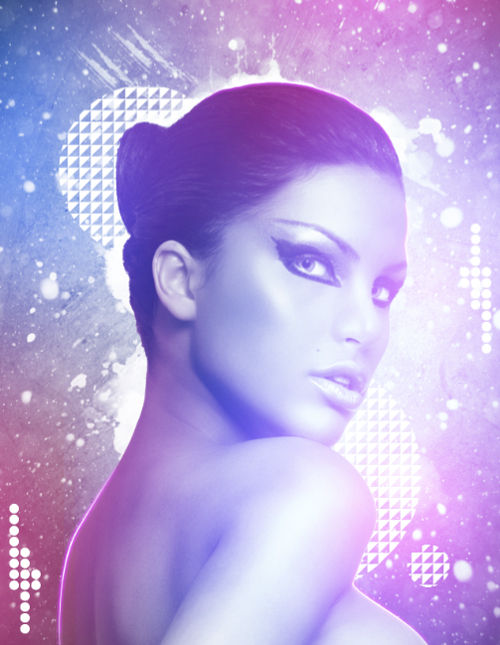
Here is a preview of the image that we are going to be creating:
Step 1
We will start things off by first opening up our model image and what we want to do is isolate her from the background. After a while this becomes pretty routine procedure, but you have several ways of doing this. For this particular image we can simply use the magic wand tool because there is a solid amount of contrast between the figure and the background. Double click on the Background layer of the image to unlock it so that you can modify it, and then with your Magic Wand Tool (W) selected, click on the background. You may continue to select any additional areas that you miss the first go-round by holding the Shift Key and clicking your mouse.
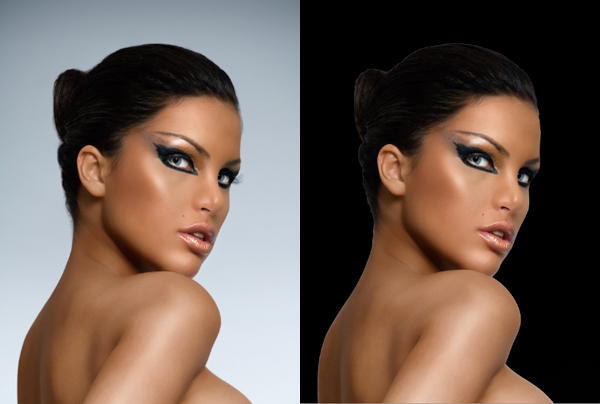
The result is clean and we can always be thankful for an image that we don’t need to labor over to clip.
Step 2
Create a new document that is 8.5×11 inches and make it RGB for now at 300 dpi. Drag the isolated image into your document and scale it up to fill out the space by using the Free Transform (Command+T) before holding the Shift Key and dragging outwards from one of the four corners of the image to enlarge it.
Next, double click on the Background layer to unlock it. The image below shows the small lock that I am talking about. Now that you can modify the Background layer, fill it with solid black using your Paint Bucket Tool (G). A good tip if you don’t already have your Default colors selected in your Tools Palette, you can simply press ‘D’ on your keyboard and it will reset.
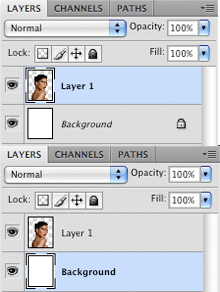
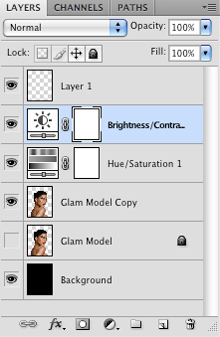
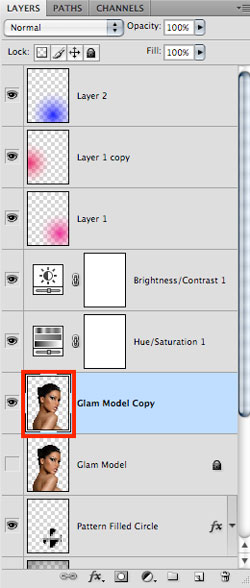
Next, make a copy of the model layer by highlighting the layer and pressing Command +J. Once you have made a copy you can lock and turn the visibility off on the original. At the bottom of the Layers Palette, select the black and white icon that is highlighted in the image below:
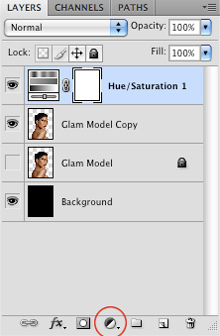
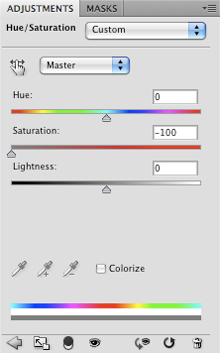
Choose ‘Hue/Saturation’ from the menu that appears and once the dialog box pops up, move the Saturation slider all the way to the left to desaturate the image. This will also desaturate anything beneath this layer but it ultimately gives you more control over the image.
Step 3
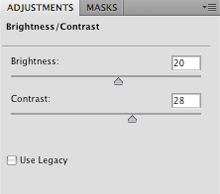
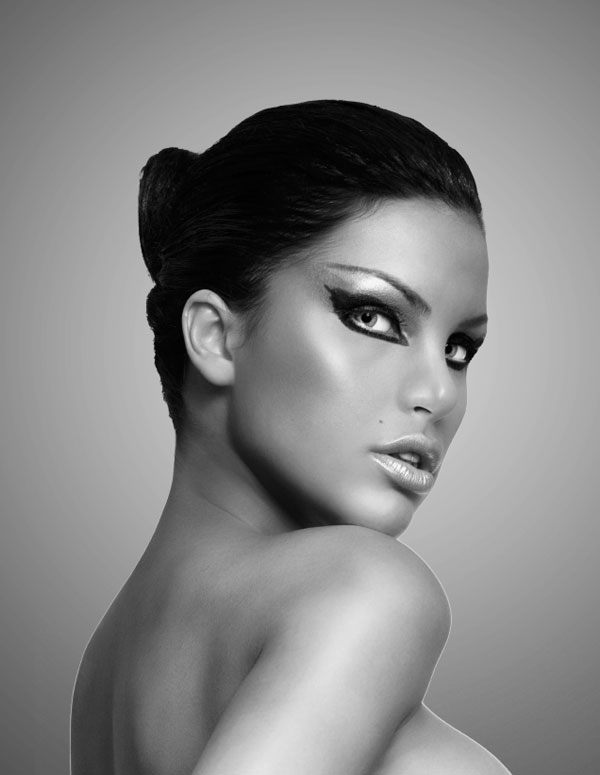
After applying the Hue/Saturation Adjustment Layer, we will return to the same icon to bring up the menu, only this time we want to select ‘Brightness/Contrast’.
Apply the settings shown below in order to add contrast and bring out more of the overall lights and darks in the image.
Step 4
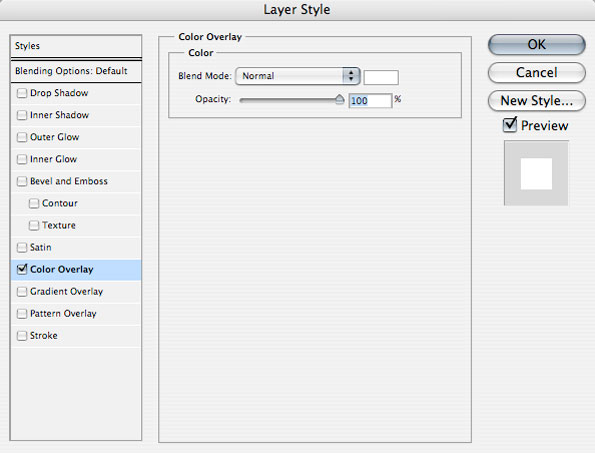
Double click on the background layer to bring up the Layer Styles Dialog Box as shown below:
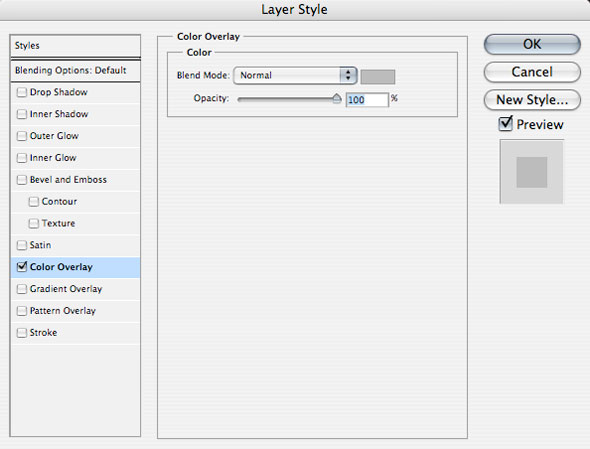
Once the box appears, we are going to check off ‘Color Overlay’ and for the color we will be using a light gray color (#BCBCBC) for the background.
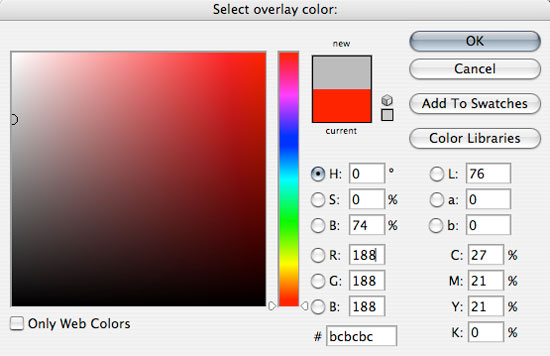
Once you have done that, press OK to apply the changes.
Step 5
Next, create a new layer above your Background Layer and switch over to your Gradient Tool (G). Apply the settings shown here using a solid black color:

Be sure to check off the box that says ‘Reverse’ as well. Next, we will click in the center of our image and drag outwards to create a Reverse Radial Gradient that will get darker around the outer edges of our design.
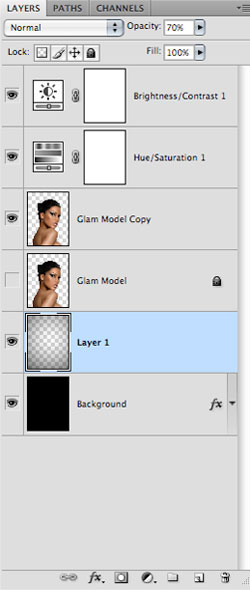
Once you have done that, reduce the opacity of the layer to about 70% so it’s more of a deep gray color instead of solid black. You should now have something like the image shown here:
Step 6
Open the dirty texture image from the resources folder and import it to your Photoshop document. We will need to scale the image up a bit so to do this simply press Command+T, and then hold the Shift Key while dragging outwards from any of the four corners of the image. Once the entire canvas is covered by the texture press the Enter Key to apply the changes.
We want to place this layer just above our Background layer, but below the Reverse Radial Gradient layer we made in the previous step. Also, we are going to change the Blending Mode of the layer to Screen.
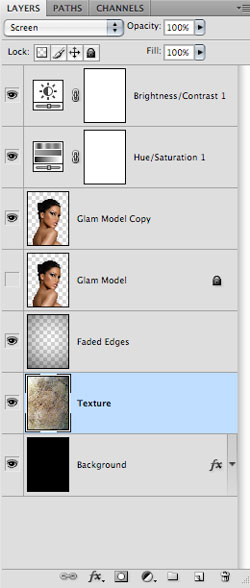
After placing the texture in the back of the model we will have a nice subtle effect happening. This is not a very bold texture but it will add more visual interest than a simple gradient background. Details like this make a big difference later on.
Step 7
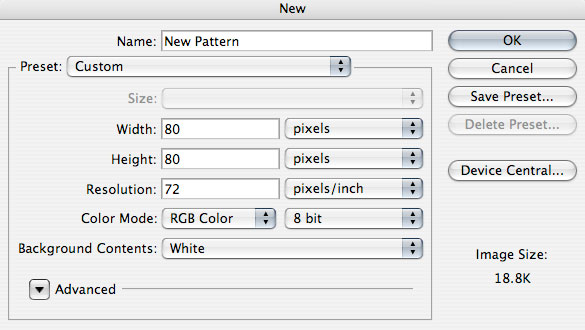
Create a new document that is 80×80 pixels in size and has a resolution of 72 dpi as shown below:
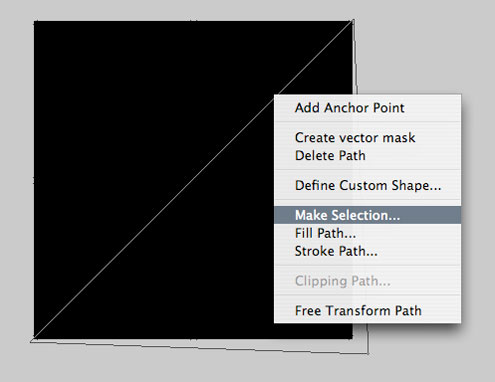
Create a new layer above the background and fill it with a solid black color using your Paint Bucket Tool (G). Next, switch to your Pen Tool (P) and create a path that cuts through the middle of the square diagonally. Close the path and then hold down the Control Key and click anywhere along your path to call up the menu. From this menu we are going to choose ‘Make Selection’ as shown here:
Once your selection is active and you see the marching ants, hit the Delete Key to erase half of the shape.
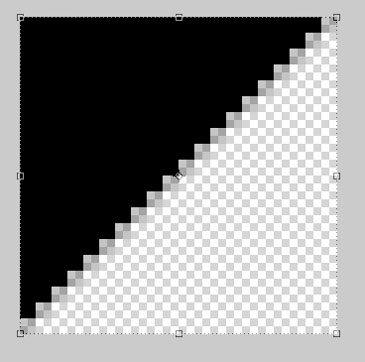
Next, go to the Edit Menu and down to ‘Define Pattern’ that will allow us to set this shape up as a New Pattern.
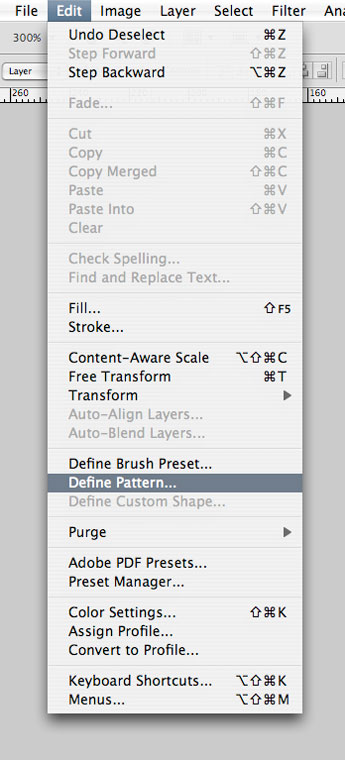
When you are prompted with the dialog box that asks you to name your New Pattern, type in something like ‘Half-Square Pattern’ and press OK to accept the changes and save your new pattern.

You may now close this document and return to the main image.
Step 8
Create a new layer at the top of your Layers Palette and switch over to your Elliptical Marquee Tool (M). Create a medium to large sized selection while holding the Shift Key in order to constrain the proportions of the shape.

With your selection still active, go to the Edit Menu and choose ‘Fill’ as shown below:
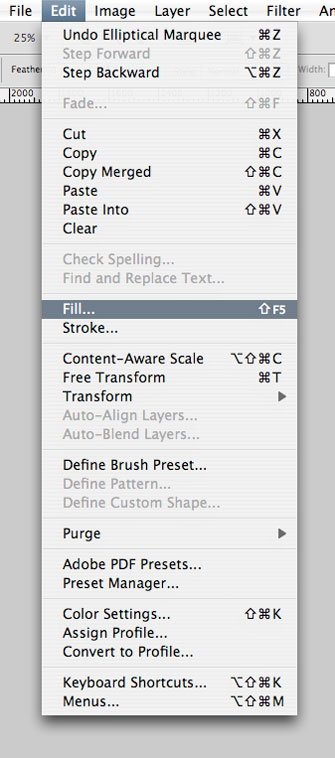
Once the dialog box appears it will ask if you want to fill the shape with a color or a pattern, which you can toggle by clicking on the dropdown menu. In this case, we are going to use the custom pattern we have just created so that should appear on your list of patterns.
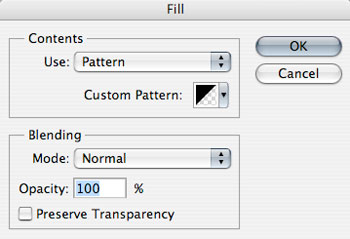
By default, the pattern will fill in as a solid black color.
We can change the color by double clicking on the layer to bring up the Layer Styles Dialog Box where we can check off ‘Color Overlay’ and apply a solid white color instead.
From here, we will move the layer down so it’s underneath the model layer, and scale it down a bit using the Free Transform Command:

Step 9
Create another new layer at the top of your Layers Palette and select the color #EE299F.
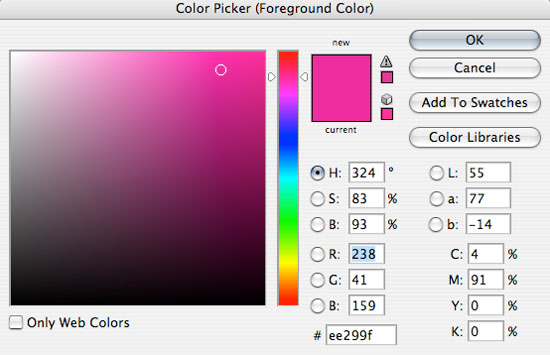
Switch over to your Gradient Tool (G) and make sure to uncheck the Reverse option we used earlier. Everything else can stay the same for now. We still want a Radial Gradient that fades from solid to transparent.

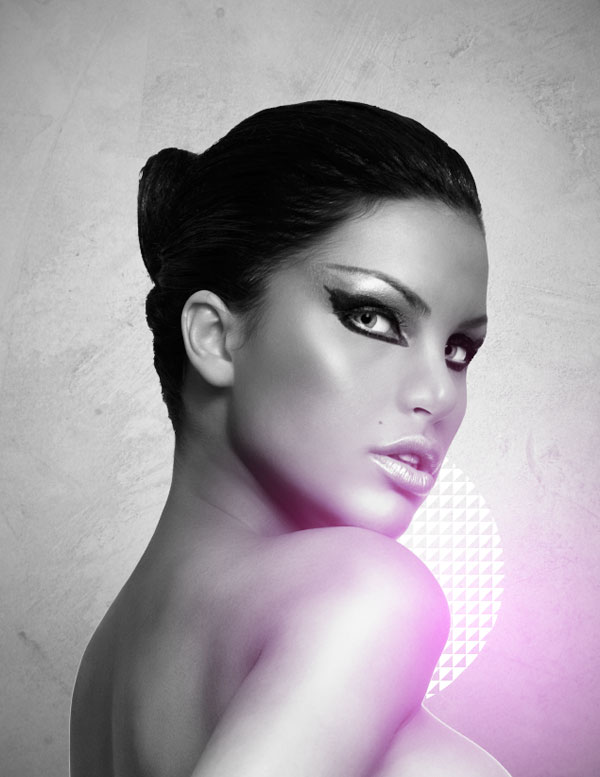
Click in the center of your canvas and drag outwards to create your gradient. Once you have done that, position it in the lower right-hand corner and change the Blending Mode to Linear Dodge (Add) as shown here:
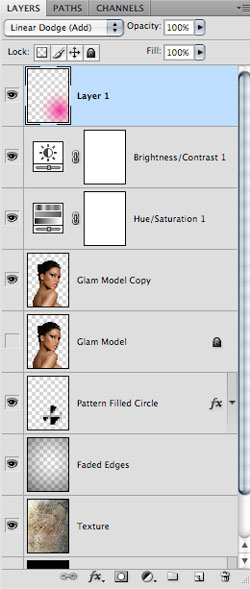
The result should look similar to this:
Step 10
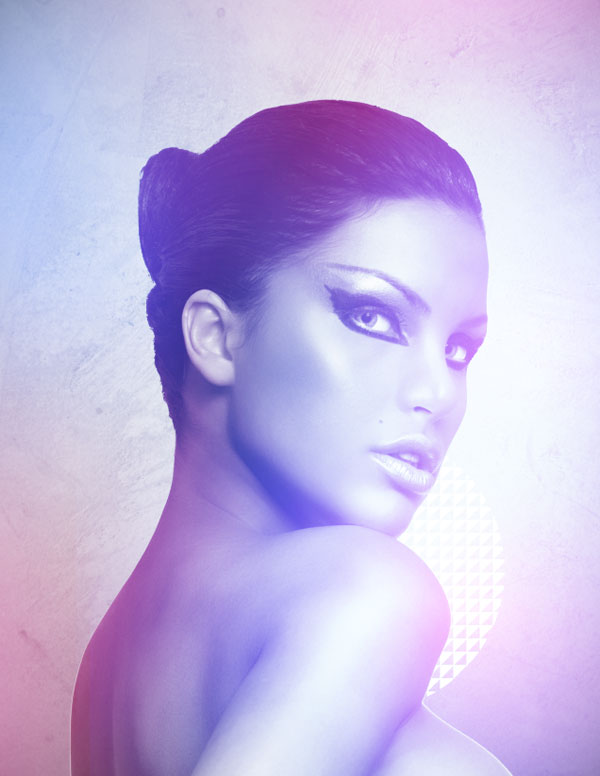
We are going to add some additional color to our lighting by creating a new layer at the top of the Layers Palette and selecting the color #060EFE as shown below:
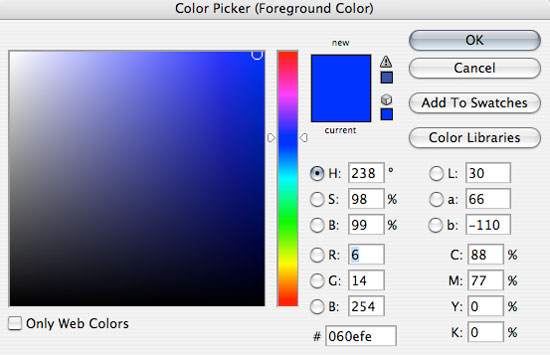
From here, we will create another Radial Gradient and set this layer’s Blending Mode to Linear Dodge (Add) and reduce it’s opacity to about 74%.
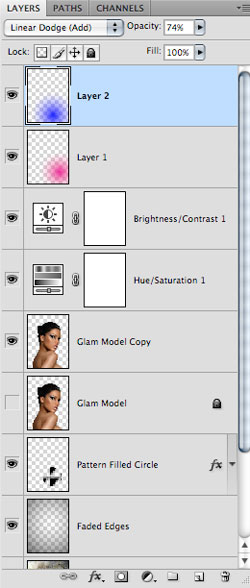
Position the gradient so that it slightly overlaps the magenta colored gradient from earlier. This will mix the colors in an interesting way, producing an indigo sort of color.
Step 11
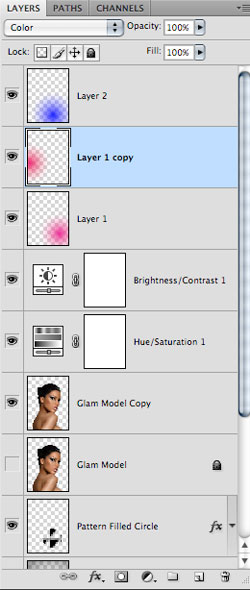
Next we will select the magenta gradient layer and press Command+J to duplicate it. Change the Blending Mode of this layer to Color and move it to the left side of the image so the color is showing on the model’s back.
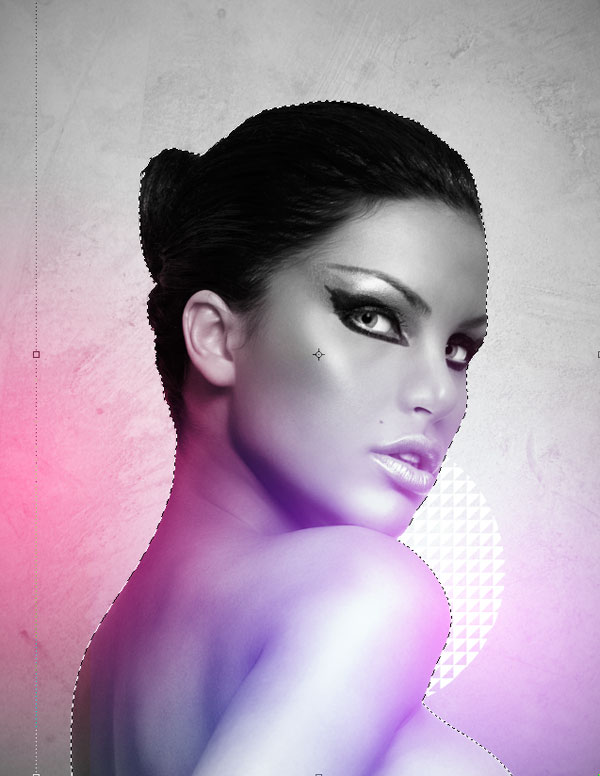
Hold down the Command Key and click on the thumbnail layer icon of the model layer to activate the selection.
Once the selection is active you will see the marching ants around the model as shown below:
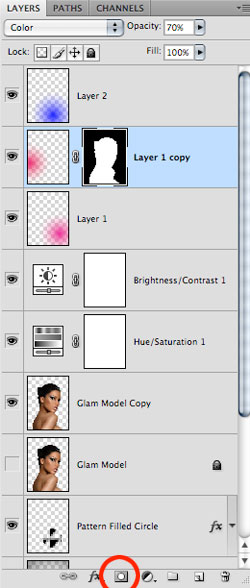
With the selection still active, return to the duplicated gradient layer that we have set to color so that it’s highlighted. Click on the mask icon at the bottom of the Layers Palette shown below to mask everything outside of the model’s body out. Notice the mask that is added to the gradient layer.
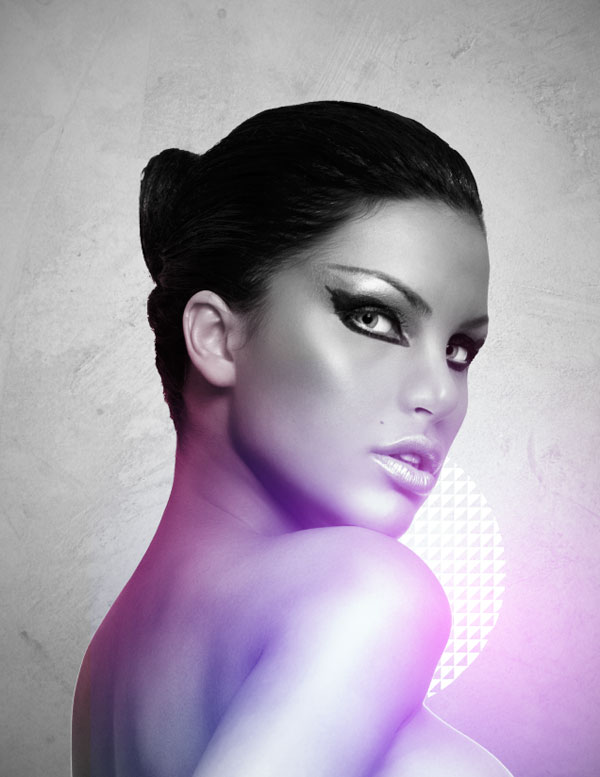
You should now have something like this:
Step 12
We will now duplicate the blue gradient layer as well by once again pressing Command+J. Change the Blending Mode of this layer to Screen and play around with the positioning of the layer.

We are gradually building up some really nice colors by overlapping our gradients and setting them to varied Blending Modes. You can see the nice effect we are getting so far:
Continue to experiment with this to get some interesting effects. We will be building this up even further before adding some more geometric shapes to our design. Continue to duplicate some of the gradients and experiment with the positioning and Blending Modes until the whole image has at least some color to it. Varying the opacity will also help blend the overall image together.
When you are satisfied with the results, select the top gradient layer and then hold down the Shift Key and select the bottom gradient layer. Once you have all of these layers selected and highlighted, press Command+G to put them into a Group Folder and give it a name such as ‘Colors’ or anything that will help you to remember what is stored inside.
Step 13
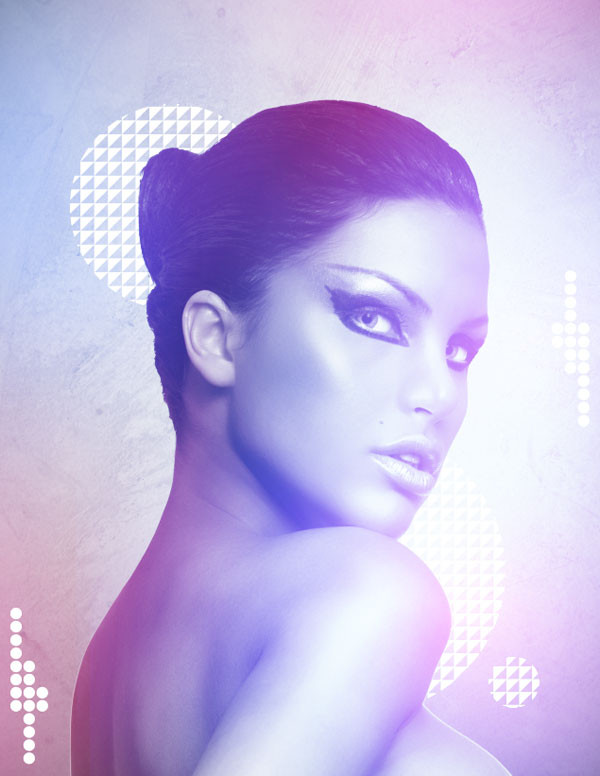
At this point our colors are looking pretty good, so we are going to shift gears and add a few more geometric shapes to our composition. Using the same pattern we had created earlier on in this tutorial, we will make two more layers and on each one make a circular shape that is filled with the custom pattern. Double click the layers to bring up the Layer Styles Dialog Box and check off the Color Overlay option. For the fill we will just use a solid white color as we did before.
I am also going to add a few small circular shapes, in sort of a staggered pattern. This is just a detail but it helps to add some rhythm to the design. You can simply create one small circular shape that is filled with white, and duplicate it, moving it up or down a few times until you form a row of circle shapes. Once you are happy with your pattern simply select each of the layers while holding the Command Key and press Command+E to merge them.
Step 14
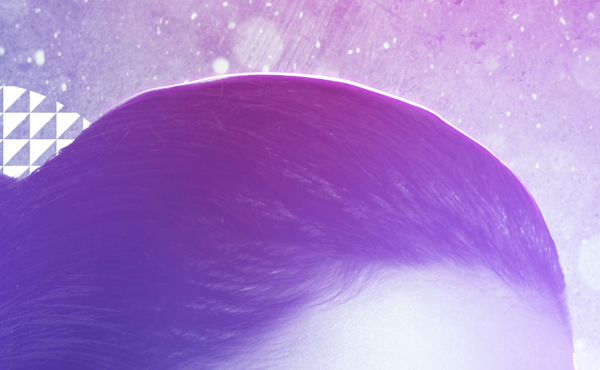
Next, open up the snow texture from the resources folder and bring it into your document. Rotate it so that it’s taller than it is wide and scale it up using the Free Transform Command. Place the texture just below the model layer and change it’s Blending Mode to Overlay as shown here:
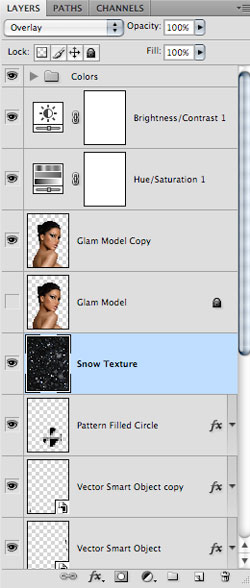
Once you have done that you should have something like this:
Using an image like this that is mostly dark will add a lot of contrast to the background, but it will also help the model stand out in front more. This is good because it helps to establish a clear focal point so everything isn’t the same value throughout the image.
Step 15
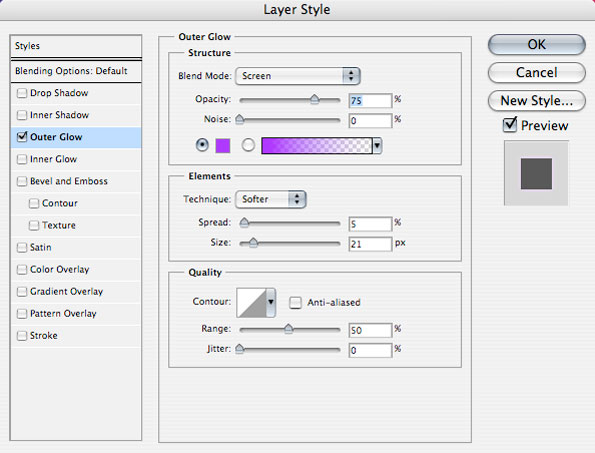
Create a new layer at the top of your Layers Palette and double click on it to bring up the Layer Styles Dialog Box. Check off ‘Outer Glow’ and for the actual glow color I am using a violet color with the hexadecimal value of #AE00FF.
Step 16
Once you have applied the glow effect switch to your Brush Tool (B) and make sure you have a hard round brush, about 6 or 7 pixels in diameter. Press the D Key on your keyboard to quickly switch to your default colors – make sure that white is your foreground color.
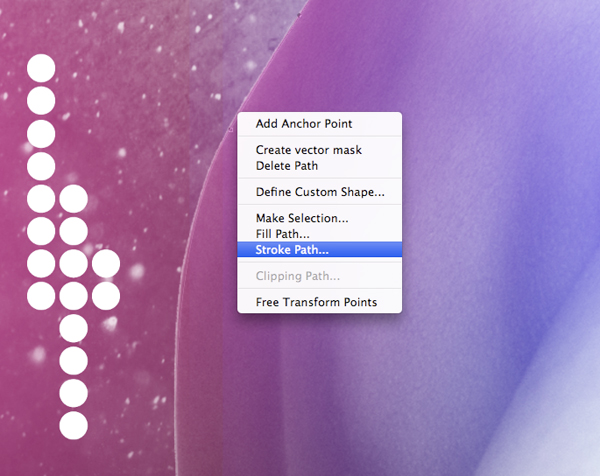
Now, switch to the Pen Tool (P) and zoom in closely for this. Trace a curve around the back of the body and just follow in a sort of swooping motion. After that hold the Control Key and click anywhere along the path to bring up a menu where you want to choose ‘Stroke Path’ as shown below:
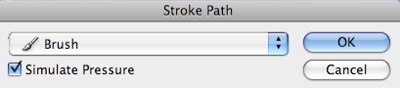
When the next dialog box appears, we also want to check off ‘Simulate Pressure’ from here.
Now you will have a path that is naturally following the contours of the body, and it also happens to have a pretty cool glow effect. The last thing we will do here is hold down the Control Key and click along the path that remains above the glowing line. Select ‘Delete Path’ from this menu like you will see here:
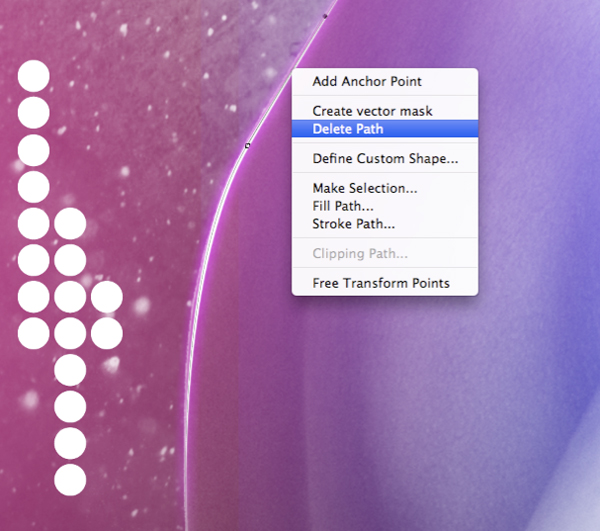
The result is pretty much the same just without the path in the way.

Step 17
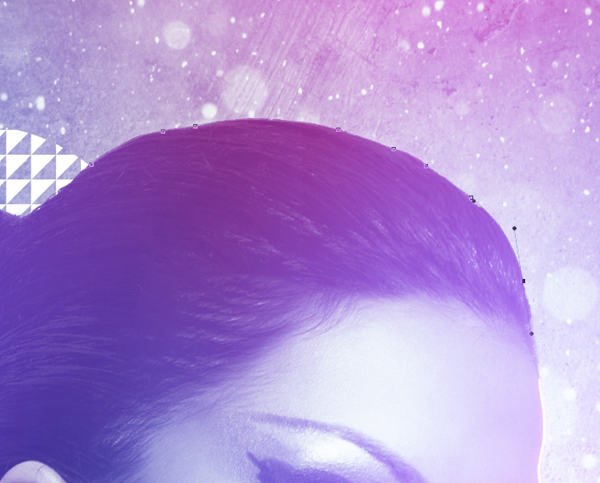
From here we will repeat the previous step by first making a path that follows a contour of the body with the Pen Tool (P).
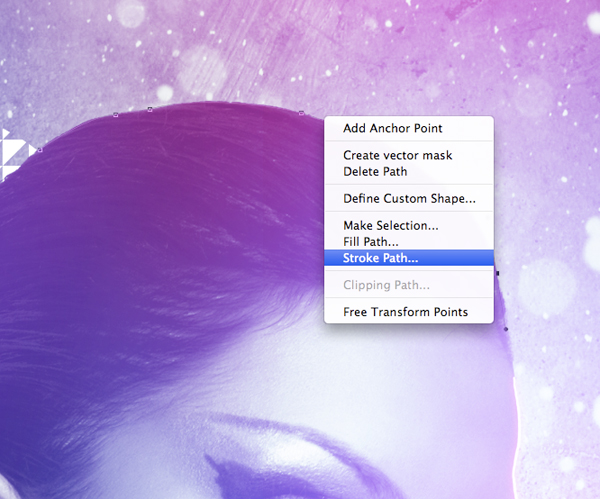
Hold the Control Key and click anywhere along the path before choosing ‘Stroke Path’ from the dropdown menu. Keep ‘Simulate Pressure’ checked off and press the Enter Key.
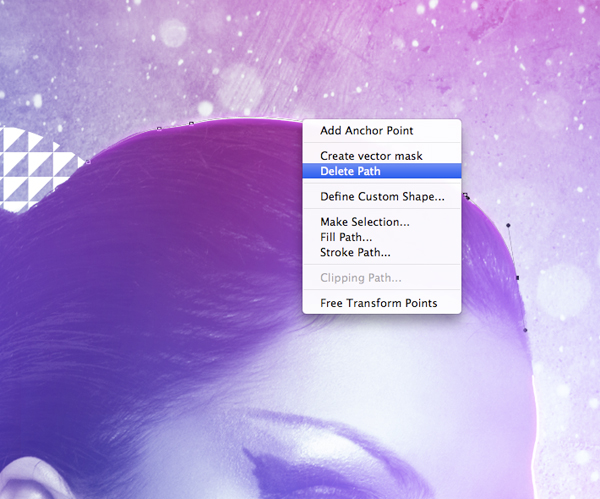
Delete the path and you should now have another swooping line that also has the same glow effect applied.
You can continue to create new glowing lines on this layer to build up a nice effect. The glow effect will be applied to any new paths that we create on this layer.
Step 18
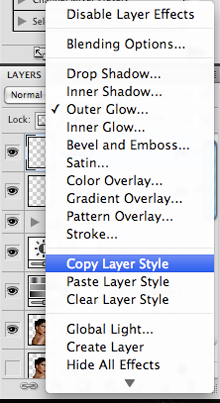
Next, create another new layer just above this one with the glow effect. With your mouse, move over the small FX icon showing up on the layer. Hold the Control Key and when the menu appears we are going to choose ‘Copy Layer Style’ to copy the glow effect.
Select the new layer and click on it while holding the Control Key to once again bring up the same menu we used before. This time, however, we just want to select ‘Paste Layer Style’ to apply it to our new layer.
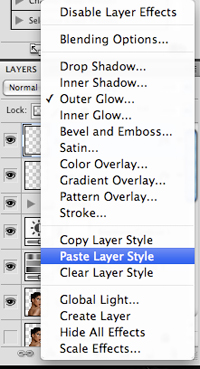
Once you have done that you will now have a new layer that you can paint on that has the same glow effect applied.
Step 19
Create a new layer just above the snow texture and load up the Watercolor Brushes from the resources folder. On your new layer, paint with one or two of the different brushes using a solid white color. Also, max out the size so that it’s large enough to fill out the canvas.
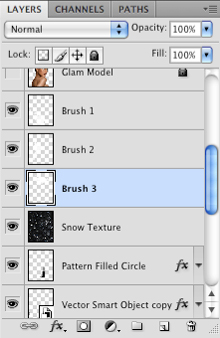
I have used three different brushes from the pack just to add a bit of detail to the background. Doing this also helps to break up the very structured feel of the geometric shapes in the background.
Step 20
Next, click on the Adjustment Layer icon at the bottom of your Layers Palette as shown below:
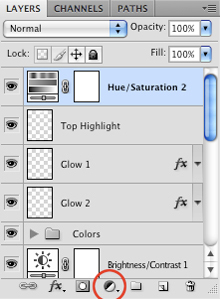
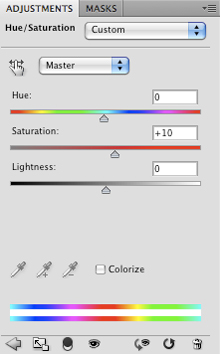
Choose Hue/Saturation from the menu that appears and apply the following setting to the middle slider to add an overall saturation boost to the image. This will make the colors a bit richer.
Step 21
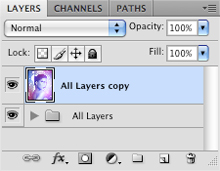
Select the very top layer in your Layers Palette and then hold down the Shift Key and scroll down to select the very bottom layer in your palette. You should now see all of your layers highlighted, indicating that they are indeed selected. From here, press Command+G to put all of these layers into a Group Folder and call it something clever such as ‘All Layers’.
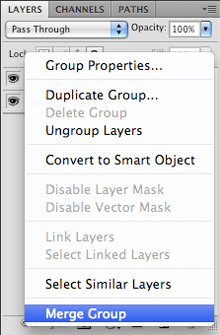
Next, grab the folder and drag it down to the New Layer icon at the bottom of the Layers Palette to make a copy of the entire folder. Hold the Control Key and click on the newly duplicated Group Folder and a dropdown menu should appear. From this list you want to choose ‘Merge Group’ as shown below:
Once you have done that, your Layers Palette should be looking pretty clean.
Step 22
Lastly, go to the Filter Menu and choose Sharpen>Unsharp Mask.

Once the Dialog Box appears, apply the following settings to sharpen the details of the whole image overall.
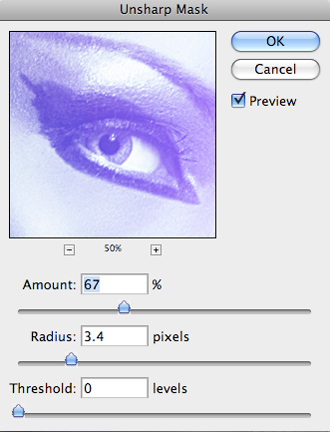
This brings out a good amount of detail in the image and gives an extra polished look. Press OK to apply the changes and once you have done that you can save your new project because we are all done with this tutorial. I hope that you have enjoyed the final outcome as well as all of the techniques we have covered. Now you are fully prepared to go out and creating some cool designs of your own!
VIP Download
Download the original .psd file for this tutorial here:

 Members Area Tutorial: Create an Incredible Typographic Illustration
 Members Area Tutorial: Create Awesome Glossy 3D Typography
 Members Area Tutorial: Create A Human/Robot Hybrid In Photoshop

Leave a comment
0 Comments:
No comments have been posted yet. Be the first!
Leave a Comment: