
Members Area Tutorial: Create a Mixed Media Effect in Photoshop
Resources Used In This Tutorial
- Grunge Paper Texture
- Watercolor Texture
- Rough Pastels Texture
- Abstract Paint 2
- FanExtra Premium Detailed Watercolor 1 Brush Set
- High Res Watercolor Brush Set
- Woman Portrait
- Paint Smudges 1
- Thick Paint
- Blue Grunge Texture
- Paint Smudges 2
- Paint Smear 1
- Paint Smear 2
- Paint on Canvas
- Paint on Canvas 2
- FanExtra Premium Brush Set: Blend Lines
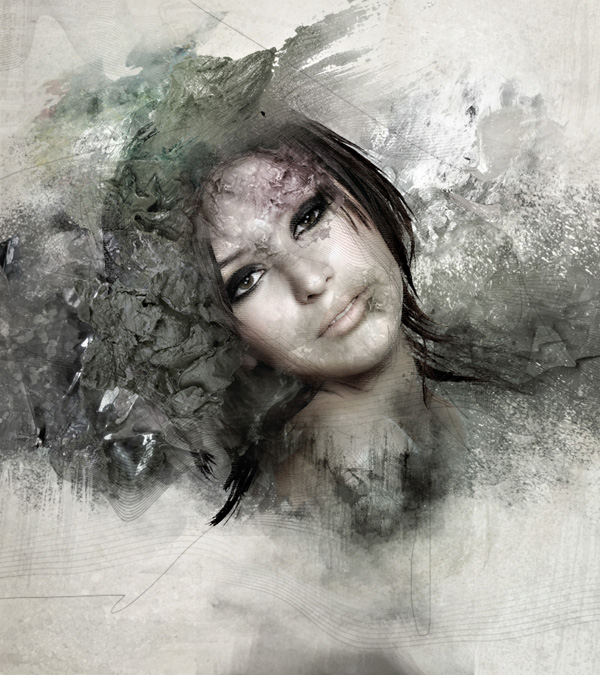
Final Image
Here is a preview of the image that we are going to be creating:
Step 1
Start by creating a new document (800X900px).
As we want to try and capture a realistic mixed media piece only using Photoshop, we’re going to work by layering up a whole lot of visual elements. Bear in mind whilst reading this tutorial that a lot of the emphasis will be on you being able to use your own judgement as to what looks good. This is a subtle process, so it’s important to gradually layer up your composition, rather than overdo it.
Right! Lecture over, let’s do this!
Start by pasting in your grunge paper texture, resizing it to fit your canvas:

Now we want to sharpen our background texture slightly, as we want the details of our composition to be sharp. Often Photoshopped works lack professionalism because they’re slightly blurry (this loss of quality is common in Photoshop). Whilst a very subtle sharpening may not seem to make much difference ultimately it all counts!
We’re going to sharpen our image in a non-destructive way, so that we can go back and edit our sharpening settings at any point (or undo them if we need).
Go to filter>convert for smart filters. This will convert your texture layer into a smart object. Then go to filter>sharpen>unsharp mask. Apply the settings shown below:
Unsharp Mask Settings:
Amount: 50%
Radius: 3.0px
Threshold: 0 levels

Now apply a hue/saturation adjustment layer. For this tutorial always apply a clipping mask to your adjustment layers, unless otherwise specified.
Hue/Saturation Adjustment Layer Settings:
Hue: 0
Saturation: -60
Lightness: +50

Step 2
Now to apply some base lighting to our image.
Create a new layer called ‘base lighting highlights’. Select a large, soft paintbrush, and choose ‘fffaf1′ as your brush color. My art teacher always told me to avoid using absolute white, or absolute black where possible, as it causes your images to look flat. Using off white with a hint of another color actually works wonders!
Paint the color across the center of your canvas in a diagonal stroke:

Now reduce this layer’s opacity to 35% to make the effect more subtle:

Now create a new layer called ‘base lighting shadows’.
Use a large, soft paintbrush (color: 221f1d) (notice I’m not using 100% black). Paint across the edges of your canvas, to create a vignette type effect:

Now reduce this layer’s opacity to 7%.

Step 3
Now we want to start adding a few more details to our background to make it more grungy and realistic.
Paste in the watercolor texture from the resources for this tutorial, positioning it in the bottom left of your canvas:

Now apply a layer mask, and use a medium, soft black paintbrush to mask off the edges of your watercolor image:

Now reduce this layer’s opacity to 15% to make the effect really subtle. Then apply a hue/saturation adjustment layer to blend it with your main background better.
Hue/Saturation Adjustment Layer Settings:
Hue: 0
Saturation: -85
Lightness: +15

Step 4
Now paste in your rough pastels texture layer, resizing it to cover your entire canvas:

Now reduce this layer’s opacity to 7% and apply a hue/saturation adjustment layer.
Hue/Saturation Adjustment Layer Settings:
Hue: 0
Saturation: -65
Lightness: +35

Step 5
Paste in your abstract paint texture image:

Now apply a layer mask and mask off the left edge and left/bottom corner:

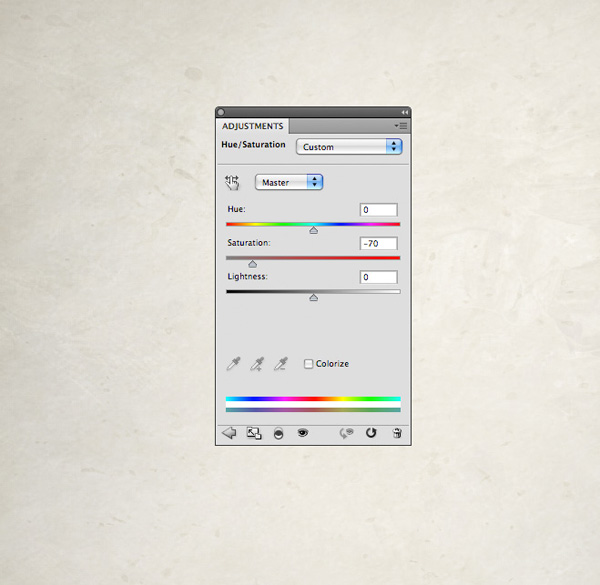
Now reduce this layer’s opacity to 5% and apply a hue/saturation adjustment layer:
Hue/Saturation Adjustment Layer Settings:
Hue: 0
Saturation: -70
Lightness: 0
Step 6
Now download the FanExtra watercolor brush set from the resources for this tutorial.
Create a new layer called ‘watercolor shadows background’. Apply several of the brushes over your canvas using a black paintbrush:

Now reduce this layer’s opacity to 15%.
Go to filter>sharpen>unsharp mask.
UnSharp Mask Settings:
Amount: 60%
Radius: 4.0 pixels
Threshold: 0 levels
This should help just sharpen up your watercolor marks a little:

Now duplicate this layer. With the bottom layer change the blend mode to ‘overlay’. This should give your brush strokes slightly more definition, and a slightly warmer color:

Create a new layer called ‘watercolor highlights background’. Repeat the last step, this time using a white watercolor paintbrush:

Now create a new layer called ‘bolder watercolor marks’. Download the FanExtra High-Res Watercolor Brush Set from the resources for this tutorial. Apply several of the brushes over your canvas, using a large black paintbrush.

Now change this layer’s blend mode to ‘overlay’. Also apply a layer mask and mask off some of the harsher edges of your watercolor brushes:

Step 7
Now paste in the photo of your woman. Position her in the center of your canvas.
You’ll notice that she has quite a lot of hair, including lots of stray hairs. This is typically very difficult to extract, so today I’m going to show you a handy technique in CS5 to help with this. If you don’t have CS5 there are alternate methods to be used, but I find this method slightly easier than other methods.
Start by using the ‘quick selection tool’ to create a rough selection around your woman:

Next, if you’re using CS5 you’ll notice a button saying ‘refine edge’ in your options bar. Click it and apply the settings shown below:
Edge Detection: Check the ‘smart radius’ box, and apply a radius of 30px
Shift Edge: -20%
Output: Check the ‘decontaminate colors’ box and set the amount to 70%.
Out to: Be sure to select ‘new layer with layer mask’.
Don’t hit ok yet though! You’ll notice that if you hover over your canvas there is a brush type shape where your cursor is. This is used to manually tell photoshop where stray areas of your image are (in this case hair). Use the ‘brush’ to brush around the edges of your woman’s hair, being sure to include any stray flicks of hair. As you paint in these areas you’ll see the hair reappear that was previously hidden.

The image below shows the extracted image. You’ll have to play with the refine edge settings a bit to get it just right but this is a great technique to use for hair extraction. The great thing is that your image has now been extracted to a new layer, complete with layer mask. This means that if your refine edge process has masked off too much of your woman’s hair, you can simply go in with a white paintbrush and reveal areas of the hair that have been masked off:

Step 8
Now go to edit>transform>flip horizontal to flip your woman. Once you have done this position here in a suitable place on your canvas.
Next, select one of your watercolor brushes and then select the layer mask. Using a black watercolor brush mask off the bottom of your woman’s torso area, creating a cool grungy edge to the bottom of the woman:

Now apply a hue/saturation and levels adjustment layer (remember, throughout this tutorial apply clipping masks to your adjustment layers).
Hue/Saturation Adjustment Layer Settings:
Hue: 0
Saturation: -70
Lightness: 0
Levels Adjustment Layer Settings:
17 / 0.91 / 233


Step 9
Now paste in the paint explosion image.
Position this layer beneath your ‘woman’ layer.

Now reduce this layer’s opacity to 70%. Apply a layer mask, and use a soft black paintbrush to mask off the edges of your paint explosion, blending it smoothly into your main background:

Now apply a hue/saturation adjustment layer:
Hue/Saturation Adjustment Layer Settings:
Hue: 0
Saturation: -95
Lightness: 0

Step 10
Now create a new layer called ‘watercolor backdrop’.
Paste in one of your watercolor images, positioning it behind your woman layer.

Now reduce this layer’s opacity to 69%. Apply a layer mask and use one of your watercolor brushes to mask off the edges of your image:

Now apply a hue/saturation adjustment layer.
Hue/Saturation Adjustment Layer Settings:
Hue: 0
Saturation: -95
Lightness: 0

Step 11
Now duplicate your ‘woman’ layer. We’re going to apply a few filters in order to give more of an artistic look to her.
Go to filter>convert for smart filters. This will make your duplicate woman a smart object, so this process is non-destructive.
No go to filter>brush strokes>dark strokes. Apply the settings shown below:
Dark Strokes Filter Settings:
Balance: 7
Black Intensity: 7
White Intensity: 5

Now reduce this layer’s opacity to 20% and change it’s blend mode to ‘multiply’.
Also apply a hue/saturation and levels adjustment layer.
Hue/Saturation Adjustment Layer Settings:
Hue: 0
Saturation: -70
Lightness: 0
Levels Adjustment Layer Settings:
17 / 0.91 / 233


Step 12
Now duplicate your woman layer again, making this duplicate your top layer.
This time apply an angled strokes filter (filter>brush strokes>angled strokes).
Angled Strokes Filter Settings:
Direction Balance: 50
Stroke Length: 15
Sharpness: 3
Reduce this layer’s opacity to 20% and change it’s blend mode to multiply. Then apply the same adjustment layers as your underlying filter layer, with the exact same settings:


Step 13
Finally, duplicate your ‘woman’ layer for a third time, moving this duplicate to be your top layer. Go to filter>artistic>rough pastels.
Rough Pastels Settings:
Stroke Length: 6
Stroke Detail: 4
Texture: Canvas
Scaling: 100%
Relief: 20
Light: Bottom

Now keep this layer’s blend mode as ‘normal’, but reduce it’s opacity to 20%. Once again, apply the same adjustment layers as your other filter layers, with the same settings:

Step 14
Now create a new layer called ‘painted hair’. Use some of your watercolor brushes to paint in some black strands of hair extending from the end of your woman’s hair. You don’t want anything too intense, but rather a subtle extension of the hair strands. I ended up reducing this layer’s opacity to 65% to make the effect more subtle:

Step 15
Now paste in one of your paint layers, positioning it in the top left of your canvas:

Now apply a layer mask, and use a medium sized, soft, black paintbrush to mask off the edges of your paint area:

Currently the paint area is a little too colorful, so apply a hue/saturation layer.
Hue/Saturation Adjustment Layer Settings:
Hue: 0
Saturation: -60
Lightness: 0

Step 16
Now repeat this technique, using all of the rest of your paint images. You can see some of my process for this below:


This part of the composition will largely be up to your own judgement in positioning and blending the various images. Here are some tips to work with though:
1. Don’t overdo it! Remember to keep your composition fairly elegant and artistic. You don’t want anything to stand out as overly bold or eye catching – the main focus should still be your central woman.
2. If something is standing out too much, you can always reduce it’s layer opacity, or better yet mask off the areas that are too bold.
3. If you’re not happy with the color of your paint, either change the hue of this layer, or if you want more control apply a color balance layer.
The images below show my continued progress applying and blending paint layers:


Step 17
Now we want to apply some paint effects over the woman’s face.
Start by opening up one of your paint smear images in a new document.
Duplicate your paint image. Then with the duplicate layer selected go to image>adjustments>levels. Adjustment your image’s levels to give more contrast between your red paint and the white background. You want to do this so that the paint is easier to extract from the background:

Now go to select>color range. Using your eye dropper tool, click on the white part of your background. Then set your ‘fuzziness’ amount to 200.
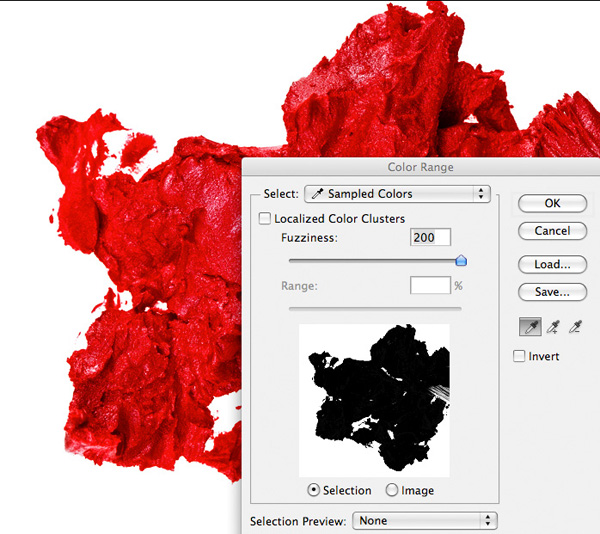
Now hit ok. Your selection will be in place, but it will be your background that’s selected. Go to select>inverse to invert your selection so that your paint is now selected:

Now with your selection still in place be sure to select your original paint layer in your layer’s palette. After all, we want to use the original paint, not this super high contrast layer!
Copy and paste this paint selection into your original document, resizing and positioning your paint over your woman’s face:

Now apply a layer mask and mask off the edges of your paint areas, as well as the parts obscuring your woman’s eye. If you want to achieve more of a rough edge to your paint area mask of the edges using a watercolor brush:

Now apply a hue/saturation and levels adjustment layer to your paint layer:
Hue/Saturation Adjustment Layer Settings:
Hue: 0
Saturation: -90
Lightness: 0
Levels Adjustment Layer Settings:
26 / 0.87 / 244


Now repeat this technique, building up several more areas of paint over your woman’s face:

Step 18
To help build up the mixed media look create a new layer called ‘sketch lines’. Grab a regular paintbrush, set to black, 1px, and around 65% opacity. This step is easier if you have a wacom, but if like me you’re confined to using a mouse it also works, as it’s very rough.
Proceed to draw very rough lines over the top of your composition. Use your judgement as to what looks good, but don’t go overboard with it. I chose to add a grungy, rough sketched outline around the woman’s face, as well as a few stray lines over my background:

Step 19
Now download the FanExtra Blend Lines brush set from the resources for this tutorial.
Create a new layer called ‘fractal lines’. Apply several of the brushes over your canvas at a reasonably low opacity. If any of the edges stick out as being to harsh, simply mask them off using a soft paintbrush.

Step 20
Now we’re going to add some overlay lighting to our image to give subtle tints of color.
Create a new layer called ‘lighting’. Then drag out several colored radial gradients. My gradients ranged from green (afdd12) to transparent and pink (d572d6) to transparent:

Now to make this colored lighting super subtle change your layer’s blend mode to ‘overlay’ and reduce it’s opacity to 7%:

Repeat this technique on a new layer, using blue to transparent radial gradients to build up a further level of lighting:


Finally, create a new layer called ‘white lighting’. Apply several white to transparent radial gradients over your canvas in areas you want to highlight:

Now reduce this layer’s opacity to 7%, but keep it’s blend mode at ‘normal’ (this helps achieve a softer light effect):

Step 21
Now create a new layer called ‘dodge/burn’. Go to edit>fill and fill your canvas with 50% gray. Then change this layer’s blend mode to ‘overlay’. This will hide your 50% gray fill, but let you paint black/white on top of your composition to dodge/burn it in a non-destructive way.
Use a soft black paintbrush at around 10% for your shadows, and a soft white paintbrush at around 10% for your highlights. In the end I reduced the opacity of this layer to 50% to make the effect more subtle (remember, we want to keep our image sharp and realistic!).
The images below show this layer at normal blend mode (100% opacity), and then overlay blend mode (50% opacity):

Step 22
Now it’s time to apply some final adjustment layers.
IMPORTANT: For these final adjustment layers DO NOT apply a clipping mask, as you have done with all your other adjustment layers. This is because you want these adjustments to effect your entire composition:
Apply a gradient map, levels and curves adjustment layer:
Gradient Map Adjustment Layer Settings:
Gradient: default black to white gradient
Layer Opacity: 20%
Levels Adjustment Layer Settings:
0 / 1.00 / 240
Layer Opacity: 40%
Curves Adjustment Layer Settings:
Layer Opacity: 30%
(for curve settings see below):


Step 23
Finally, we want to give our overall composition a final sharpening.
To do this, go to layer>flatten image. Once your image has been flattened select your entire canvas (option+a) and hit ‘copy’. Then in your history palette undo the flattening process, so you have all your layers back.
Now paste your copied image onto a new top layer.
Go to filter>convert for smart filters. This will let you apply filters in a non-destructive way.
Now go to filter>sharpen>unsharp mask.
Unsharp Mask Filter Settings:
Amount: 30%
Radius: 25.0 pixels
Threshold: 10 levels

And We’re Done!
You can view the final outcome below. I hope that you enjoyed this tutorial and would love to hear your feedback on the techniques and outcome.
VIP Download
Download the original .psd file for this tutorial here:

 Members Area Tutorial: Combining Extraction Techniques to Create a Unique Photo-Manipulation
 Members Area Tutorial: Design a Frightening, Textured Photo Manipulation
 Members Area Tutorial: Design a Grungy Rock Poster Using a Non-Destructive Workflow

Leave a comment
0 Comments:
No comments have been posted yet. Be the first!
Leave a Comment: