
Members Area Tutorial: Create A Dark Photo Manipulation of A Devil Woman
In this advanced design lesson you will learn how to photo manipulate a dark image of a devil woman.
You will master various photo manipulation techniques such as portrait/photo retouching, manipulating a natural landscape, creating a dark cloudy atmosphere, digital painting, image blending, multiple adjustments, advanced masking and many more.
There’s a ton of actionable, professional tips to learn in this lesson, so let’s get started!
Final Image
As always, this is the final image that we’ll be creating:

Step 1
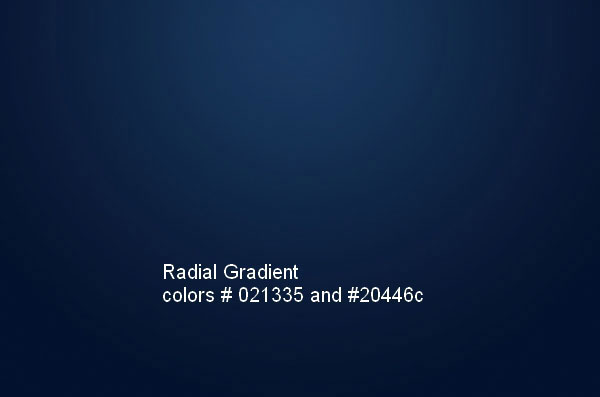
Create a new document with size about 1500×1000 px and fill with any colors you like (I use black). Press Cmd/Ctrl+Shift+N to make a new layer and choose G to active Gradient Tool. I use Radial Gradient with colors # 021335 and #20446c:
Step 2
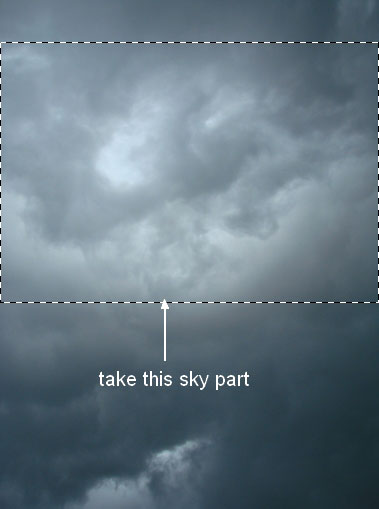
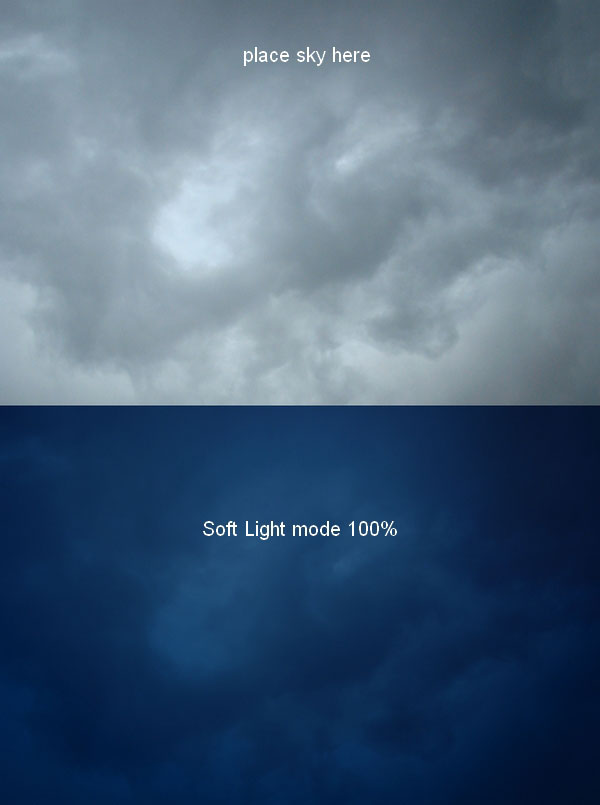
Open sky stock. I use Retangular Marquee Tool to make a selection on sky part then use Move Tool (V) to drag it into our black canvas, resize (Cmd/Ctrl+T) and change the mode to Soft Light 100%:
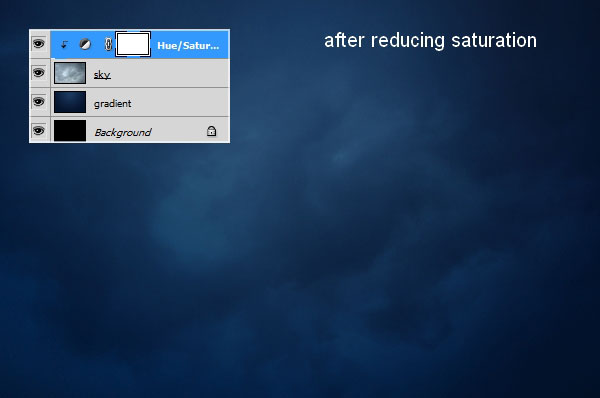
Step 3
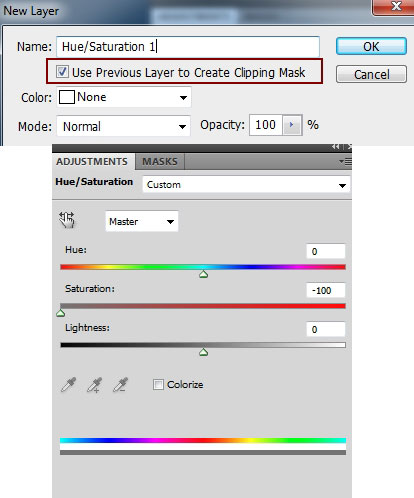
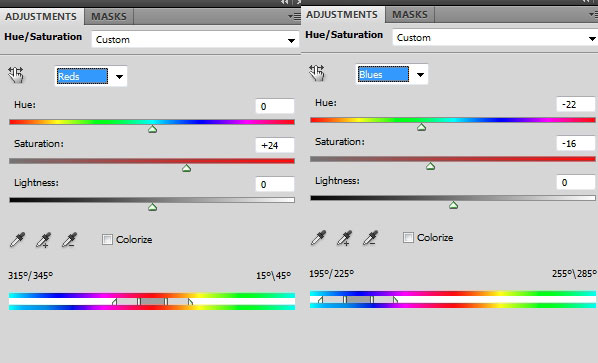
I use an adjustment layer with Clipping Mask to desaturate the sky. Go to New Layer-New Adjustment Layer-Hue/Saturation:
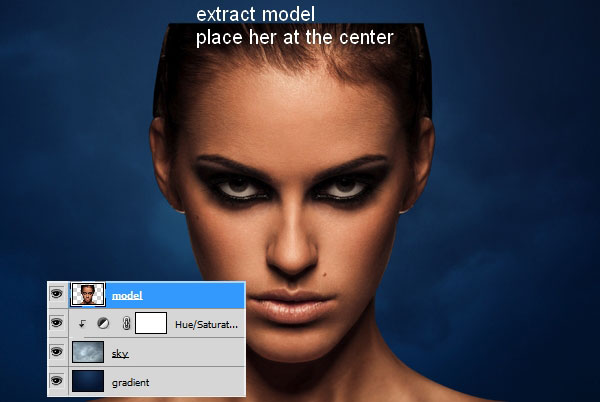
Step 4
Extract model and place her at the middle section of our image after resizing:
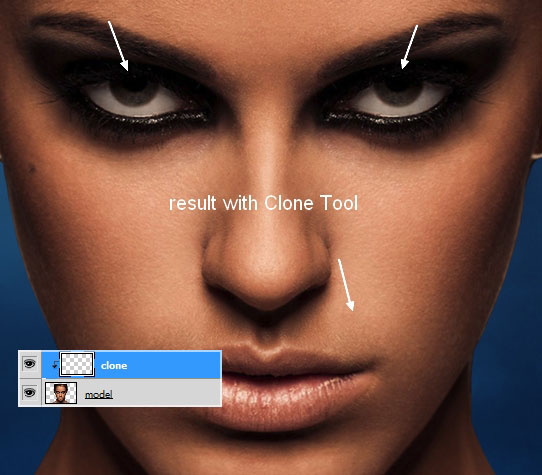
Step 5
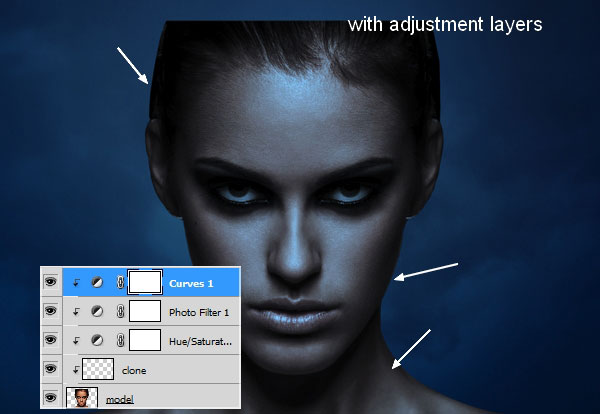
There are something I don’t want on her face so I make a new layer (Clipping Mask) and use Clone Tool (S) to remove it:

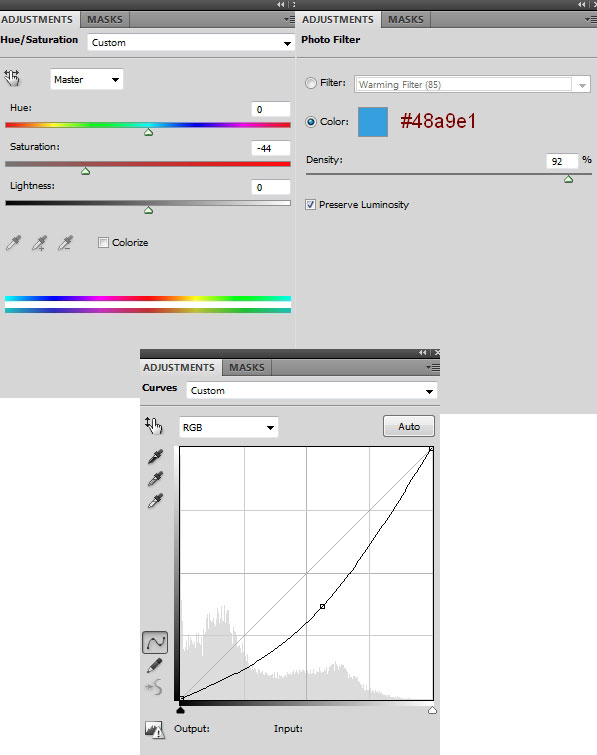
Step 6
I use some adjustment layers: Hue/Saturation, Photo Filter, Curves (Clipping Mask) to change color and brightness of model to be fit background:
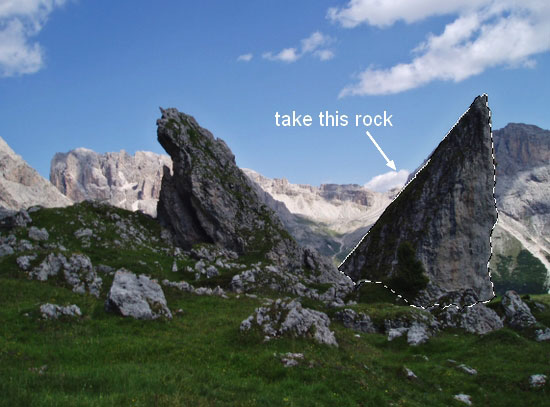
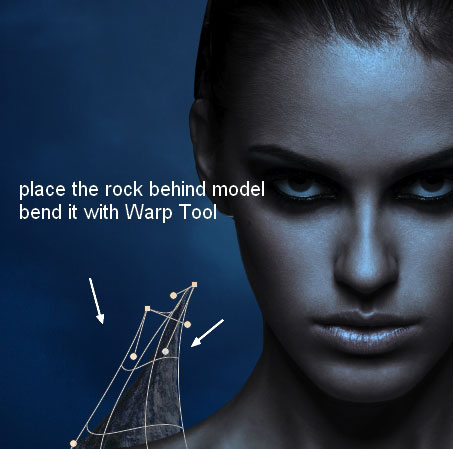
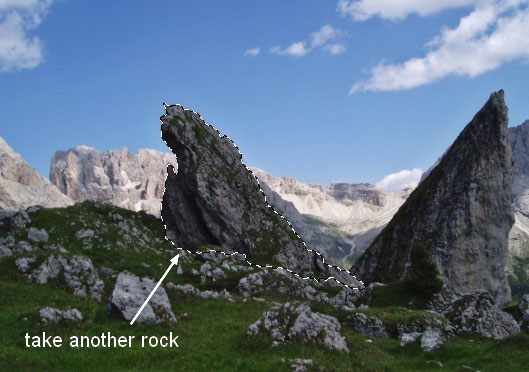
Step 7
Open rock stock. I cut out the one on the right, place it behind the model. I want the rocks to have an evil look so I use Warp Tool to distort it to be sharper (Edit-Transform-Warp), remember to convert it to Smart Object before transforming. I set this layer under model one.
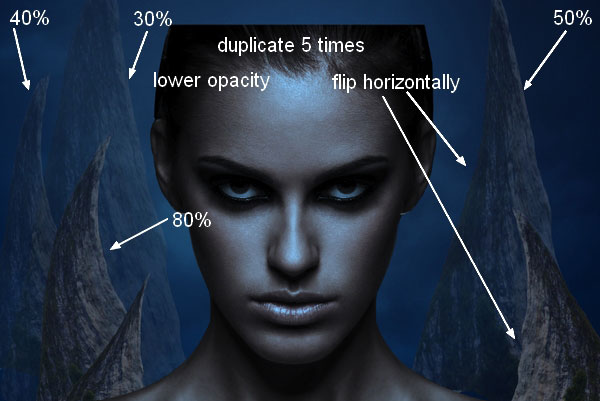
Duplicate this layer five times, resize, tweak them with Warp Tool to get different looks. I position them around model, flip two horizontally (Edit-Transform-Flip Horizontal) and move them to the right. I lower opacity 4 of them to 80, 50%, 40% and 30%:
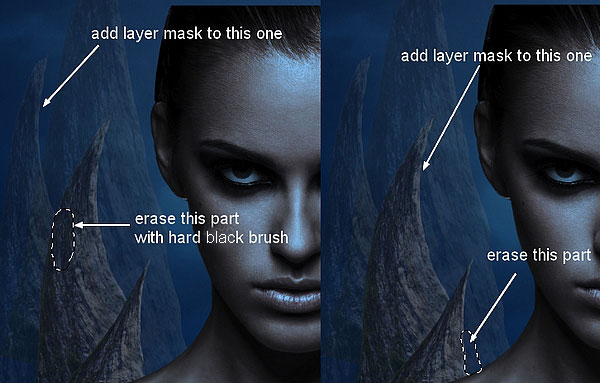
Step 8
Click the second button at the bottom of Layer Pallete to add mask to two lowered opacity layers. Use hard black brush to remove unwanted parts:
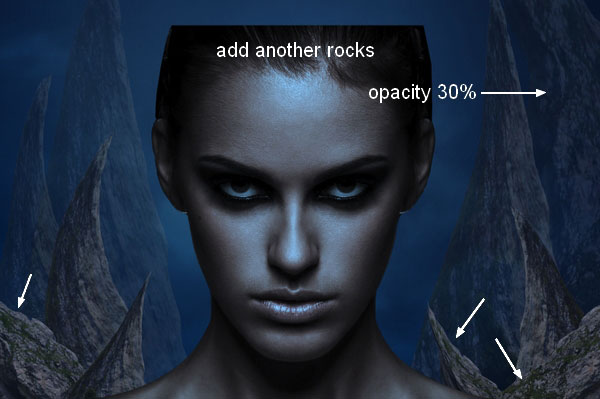
Step 9
Isolate another rock from the stock and move it into our picture. I use Warp Tool again to vary rock forms, duplicate and put them between rocks in previous steps. I lower opacity of the one at the right corner to 30%:
Step 10
Make all rocks layers selected then hit Cmd/Ctrl+G to make group for them. Change the mode of this group from Pass Through (default group mode) to Normal 80%. I name these layers from 1 to 10. On 10 layer, go to Layer-New Adjustment Layer-Curves:


Step 11
Create a new layer (still under model one), set foreground and background to #94b2dc and #213d5e. Go to Filter-Render-Clouds:

Lower opacity to 80% and use layer mask with soft black brush, opacity and flow about 30-50% to remove most of cloud effect. You can see how I did it on layer mask and result on picture:

Step 12
I duplicate this layer and change the mode to Multiply 100%. I applied layer mask again:

Duplicate this layer again and put the mode as Normal 50%:

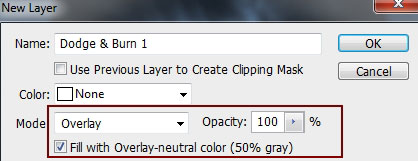
Step 13
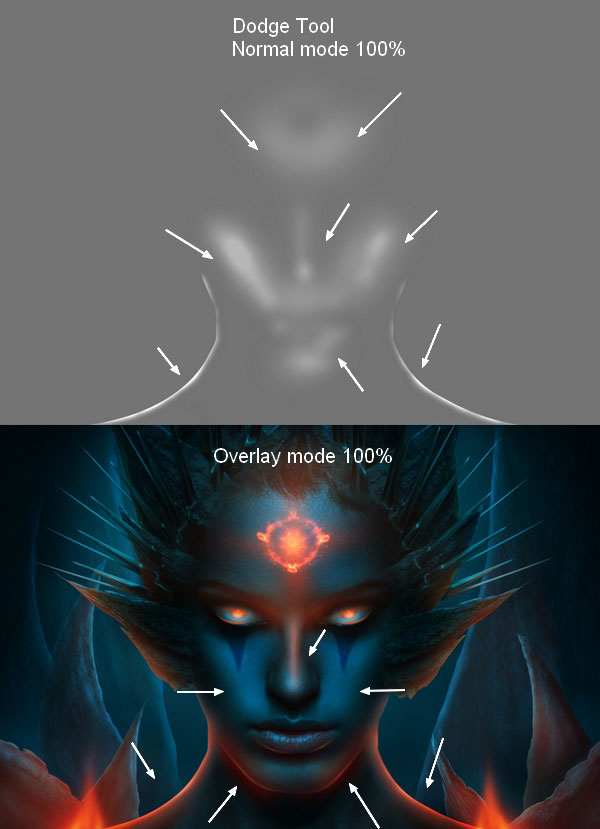
I want to make a main light source come straight behind model so the rocks should be changed shadow and highlights. To do it, I make a new layer, change the mode to Overlay 100% and fill with 50% gray:
Hold the Cmd/Ctrl key while clicking 10 thumbnail layer from rocks 1 group to load its selection. Take Dodge Tool with Highlights Range, Exposure about 20-30% to brighten and Burn Tool with Midtones Range, Exposure about 20-30% to darken this rock. Use same method with another rocks in this group. You should choose very small brush (I use 1-3 px) to take care of the tiny details. You can see how I applied these tools with Normal mode and result with Overlay mode. I use layer mask with this layer to remove unwanted effect:


Step 14
I make another Dodge and Burn layer with the same purpose:

Step 15
I add a Hue/Saturation layer to reduce saturation of background a little:

Step 16
Make a new layer above Hue/Saturation one (still under model one). Choose Radial Gradient with default colors (black and white) and set the mode to Screen 60%. This step is to add light behind model.

Step 17
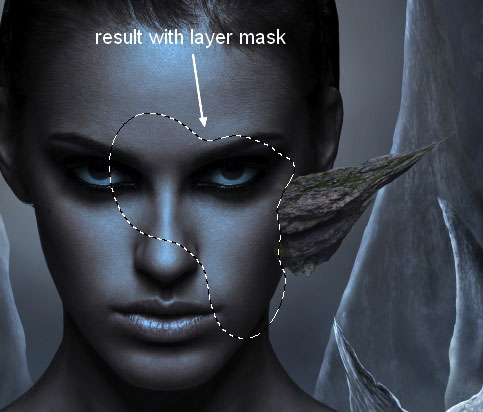
Open rock stock again. I choose the left rock and bend it with Warp Tool, situate it at the right of model face. Put this layer above model ones.

Use layer mask to remove unecessary parts and blend it with the face:
Duplicate this layer and flip it horizontally, move to the left, apply layer mask to get a similar look below:

Step 18
I choose the right one from rock stock and did the same with the left one. I duplicate it seven times and tweak them with Warp Tool and position them around model head, use layer mask to blend them with the head:

I make group for these layers (call this group “rocks 2″) and name them from 1 to 10.
Step 19
As the main light comes from behind model so the rocks on model head should get some luminosity. I use a new layer with same settings in step 13 and brighten their contours as well as darken some their details:

Step 20
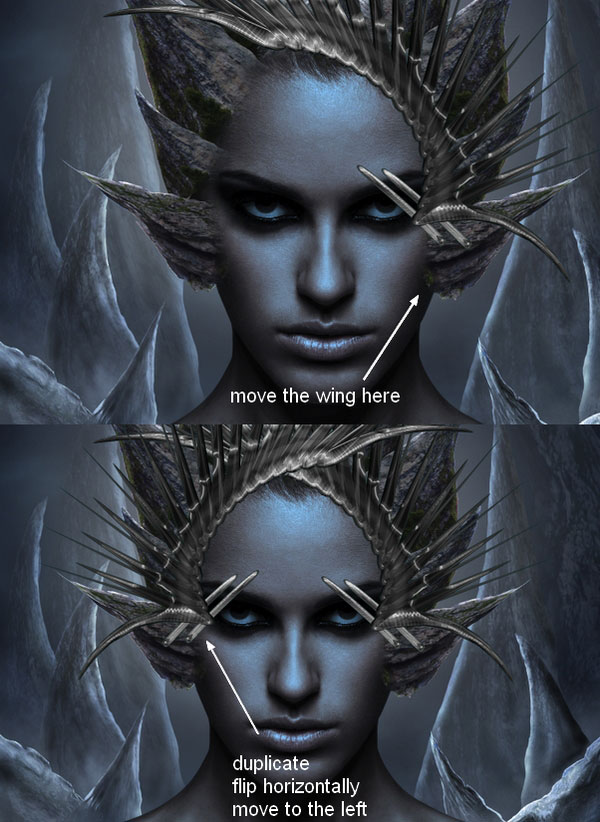
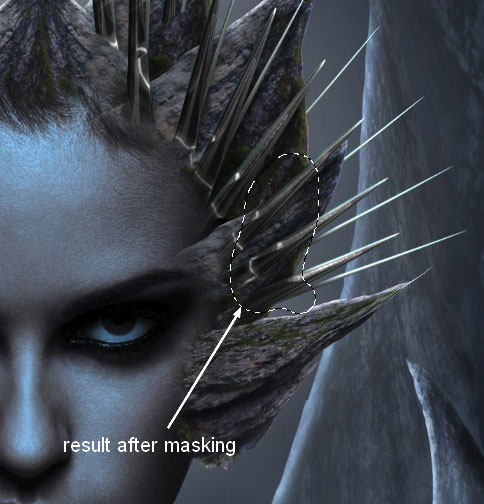
Open wing stock. As it has transparent background so you just need to use Lasso Tool to make a selection of a wing half and drag it into our picture, place it at the right of model head. Use Cmd/Ctr+T to transform then duplicate it, flip horizontally and move to the left:

Add layer mask to these wing layers. Use black brush with hardness from 50-90% to carefully remove some parts of these wings to make them inserted between rock ones.


Step 21
Make two new layers under wing ones. Use soft black brush with opacity about 50-60% to paint under the wings parts to make shadow of them on the rocks.
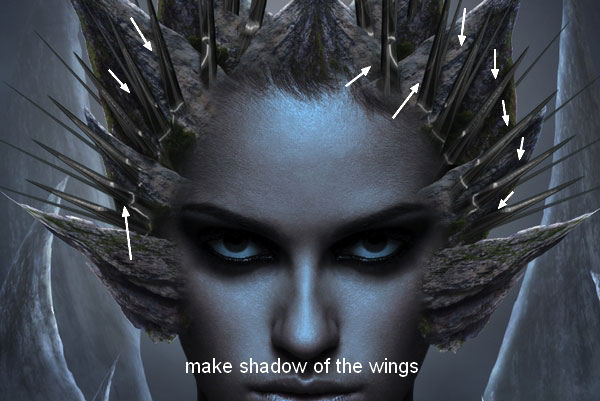
Call these layers “wing 1″, “wing 2″.
Step 22
In this step we’ll add light to the wings. Double click wing layers, choose Blending Options:
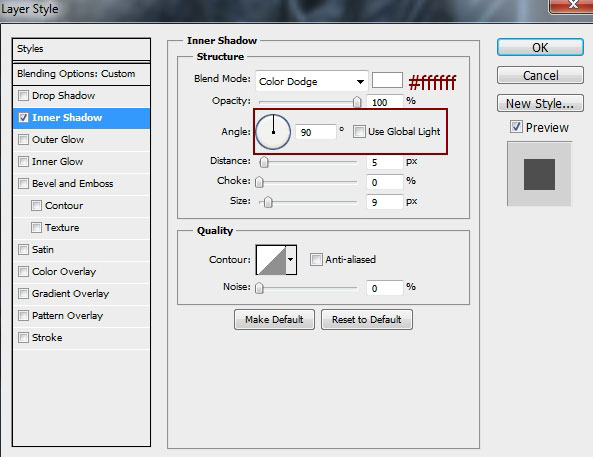
There are some unwanted light parts after this step:
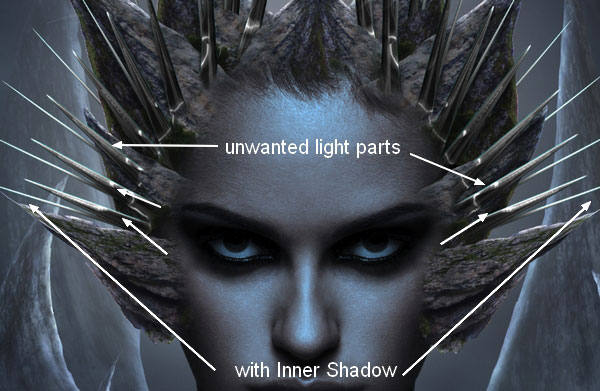
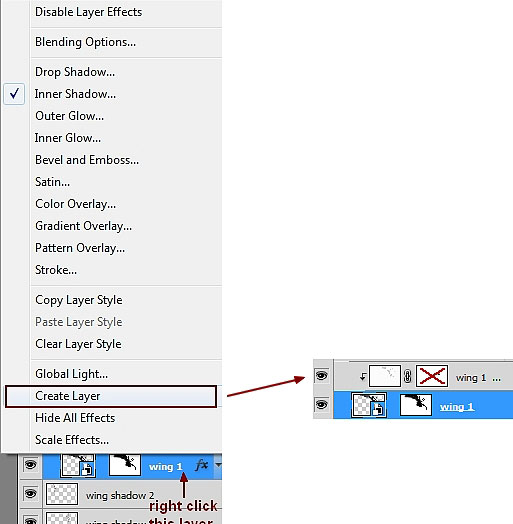
To fix it, right click wing 1 layer to reveal layer effects in the panel, choose Create Layer. Now the Inner Shadow effect appears as a normal layer with Clipping Mask above wing 1 one. We can add layer mask to it and remove unwanted light indicated above:
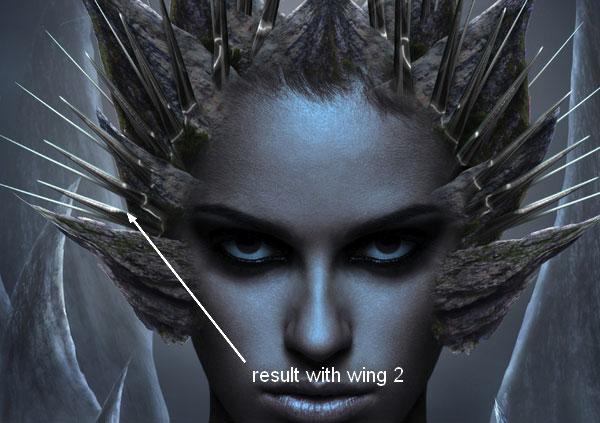
Do the same with wing 2:
Step 23
Make group for these wings as done with rocks 1 (remember to change the mode of this group to Normal 100%). Create a Photo Filter layer within this group as I want to change color of them a little:

Step 24
In some of next steps this step we’ll focus on retouching and adding effect to model face. Create a new layer on the top. Use Pen Tool to draw two eye shapes and fill it with color #245665, then lower opacity to 70%:
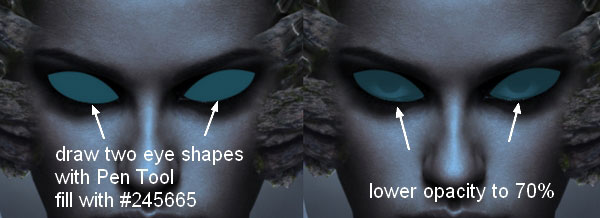
I use layer mask to blur the hard edges:
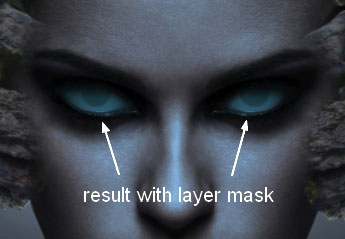
I call these layers “eye fill 1″ and “eye fill 2″.
Step 25
Make a new layer and I use soft brush with color #bde3fa to paint inside the eyes and put the mode to Overlay 100%:

Continue with a new layer and brush with color #e5f4fd for the eyes. I change the mode to Soft Light 100%:

Step 26
Make a new layer with same settings in step 13. I use Dodge Tool to make some highlights for the eyes:

Step 27
On a new layer, I use color #ff632e to add some red-orange tone to the eyes. Set the mode to Color 100%:

Step 28
Make a new layer and use Polygonal Lasso Tool to make a shape under the left eye like the image below shows and set feather for it as 2. Then fill it with color #3d6070 and change the mode to Hard Light 100%. Duplicate it to get a stronger effect:
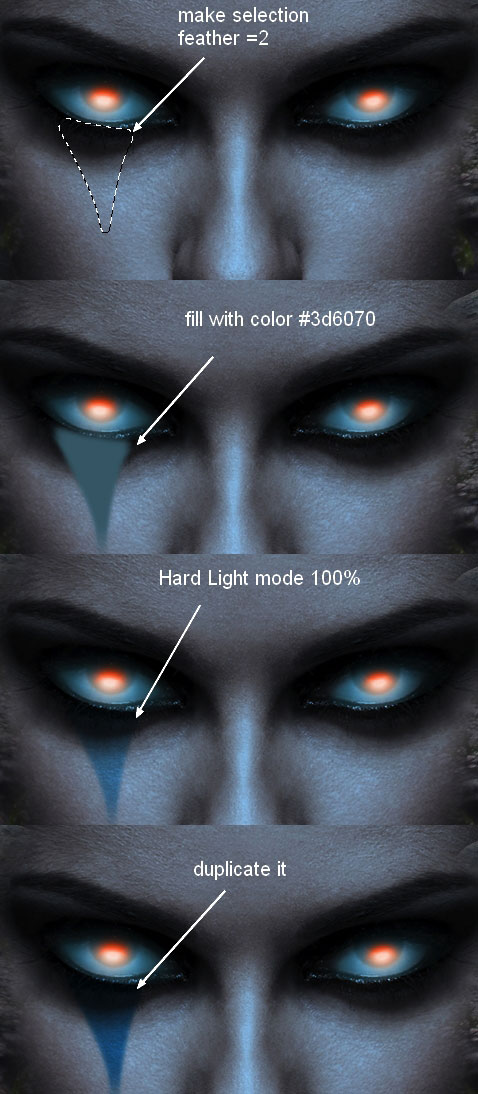
Do the same with another eye:

Step 29
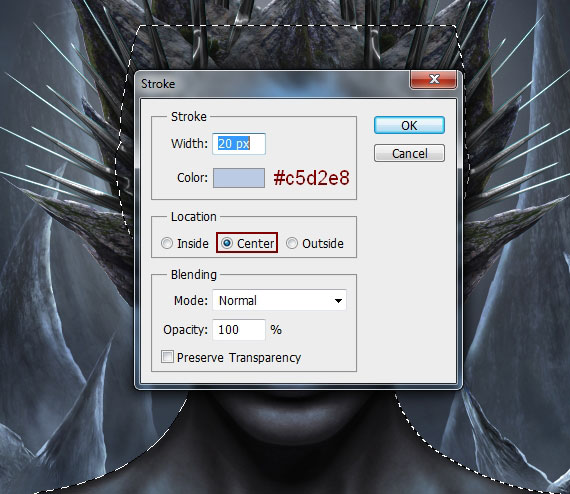
In this step we’ll make the model contour brighter (as it’s too dark against a bright background). Make a new layer on the top and load model selection as done in step 13. Go to Edit-Stroke and choose color #c5d2e8:
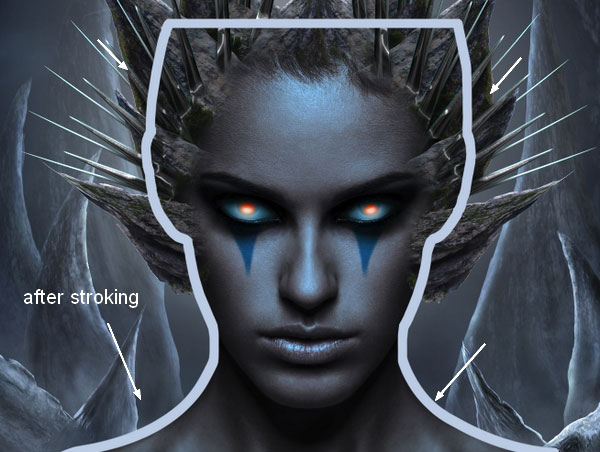
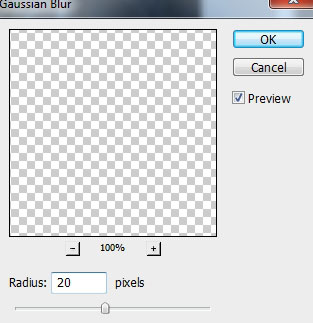
Go to Filter-Blur-Gassian Blur and choose radius as 20 px:

Load model selection again then click Add layer mask button, we will have the result:
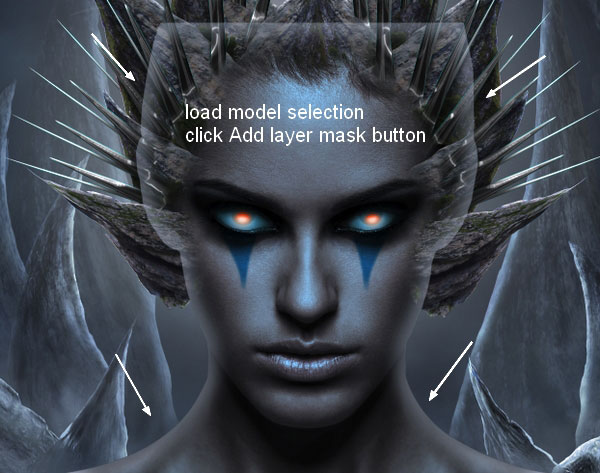
Use soft black brush to remove remained unwanted light effect and you should get a similar result below:

Step 30
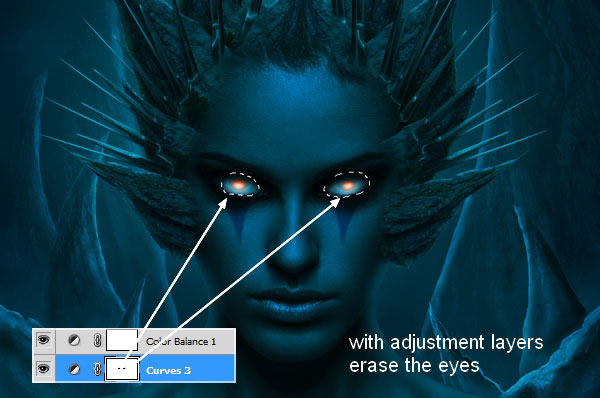
I create some adjustment layers on the top (Curves, Color Balance) to change color and darken overall picture:
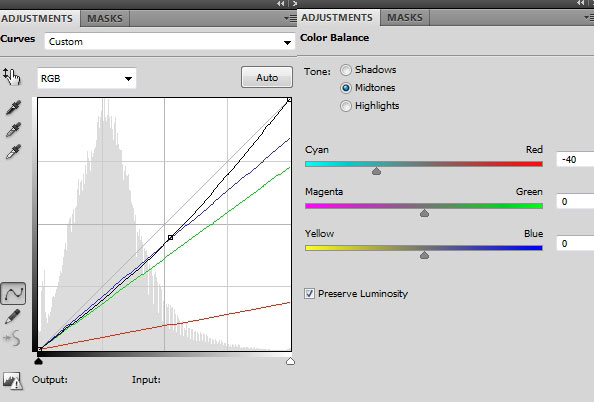
I use black brush to erase the eyes on Curves layer mask to store the effect made before:
Step 31
Move light 1 stock onto model forehead, resize and bend it a little with Warp Tool. Then change the mode to Screen 100% and use layer mask to remove hard edges remained and blur some details:

Duplicate this layer, flip it horizontally and move to the left. Mask it to get a similar result below:

Step 32
Add light 2 into the center of the light created in previous step and put the mode to Screen 100%. Remove unecessary parts with layer mask:
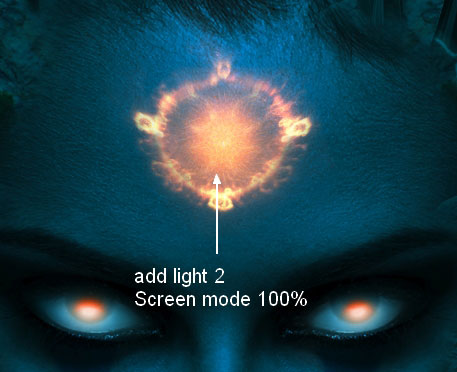
I name these layers from “light 1″ to “light 3″.
Step 33
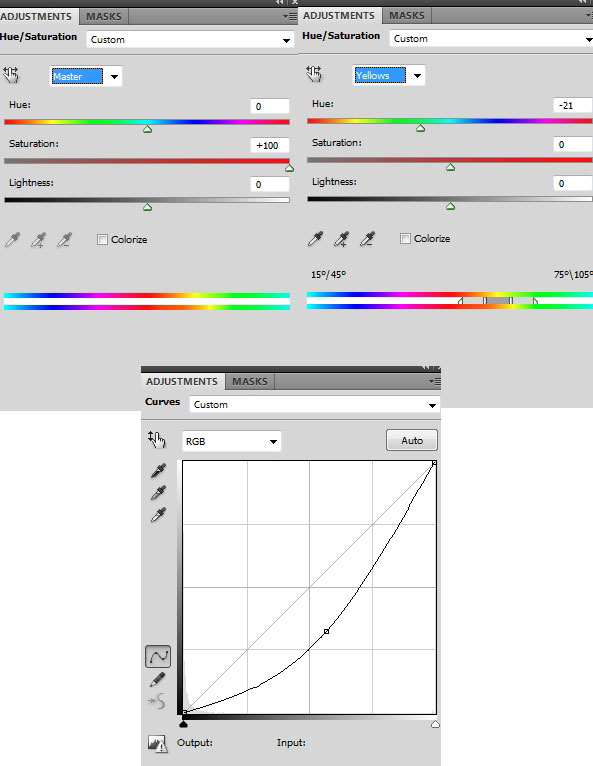
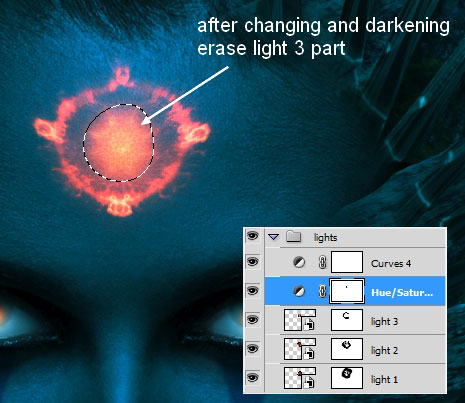
Make group for these layers and remember to change the mode to Screen 100% to keep the same effect like before grouping. Now add two adjustment layers within this group (Hue/Saturation and Curves) to darken and add more red tone to the effect:
Erase light 3 part on Hue/Saturation layer mask:
Step 34
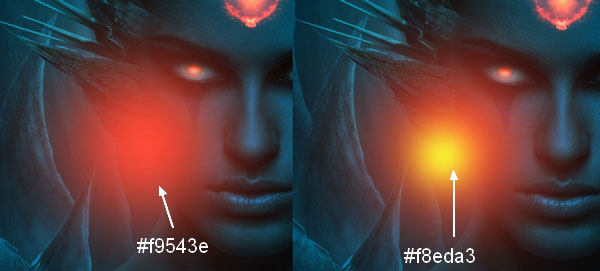
Now it’s time for one of my most favorite stages of this tutorial. Create a new layer on the top. Change brush color to #f9543e and #f8eda3 and spot on the picture:
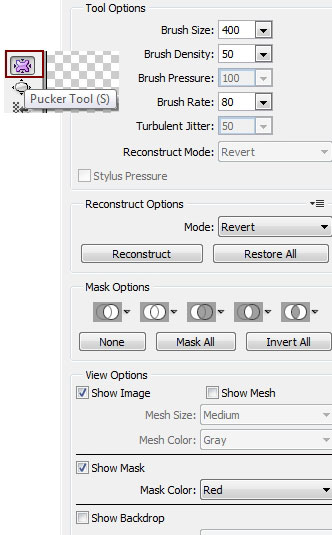
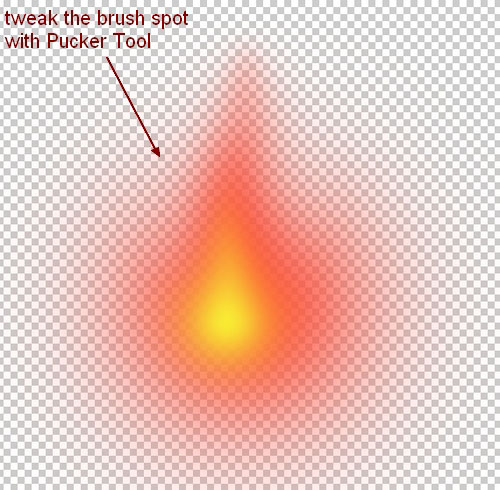
Go to Filter-Liquify and choose Pucker Tool with settings below:
Tweak the brush spots to get a look of look of a flame:

Step 35
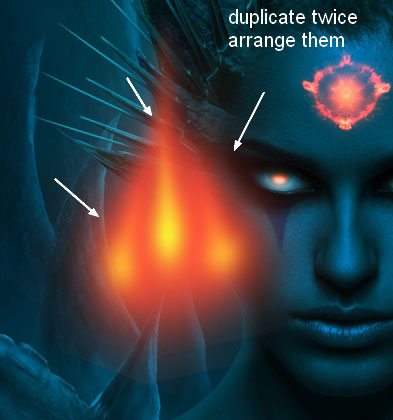
Duplicate this layer twice, resize and position them to get a similar look like below:
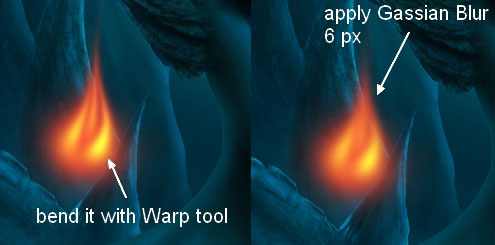
Merge all these layers and use Liquify tool again to bend it more. Apply Gassian Blur with 6 px and resize this flame with Cmd/Ctrl+T.
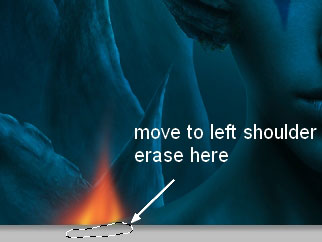
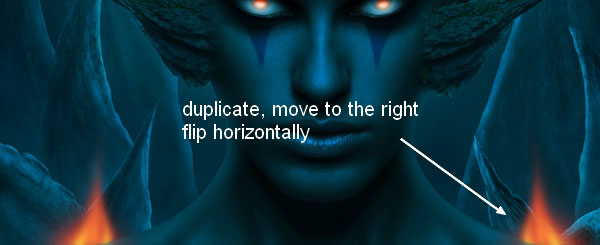
I move it to the left shoulder and use layer mask to remove the part covering the shoulder. Duplicate it , flip it horizontally and move to the right side:
Step 36
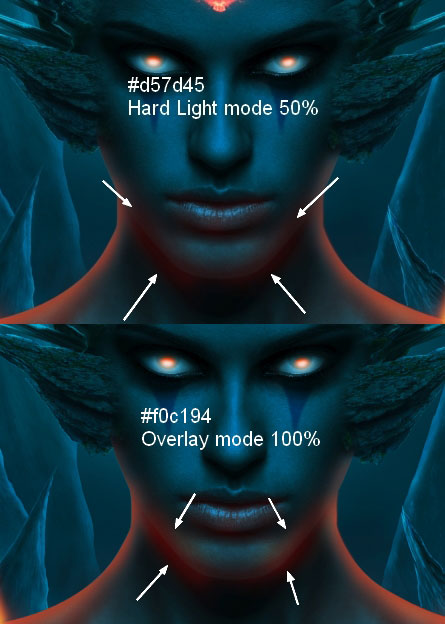
Make a new layer under lights group. Use soft brush with color #d57d45 to paint along model shoulder contour to create light effect from flames on model . Change the mode to Hard Light 100%:

New layer, I use this brush again to paint around model neck,chin and lips. I set this layer to Hard Light 50%, then continue with a new layer with brush color changed to #f0c194. Paint again on that part and put the mode to Overlay 100%:
Step 37
Create a new layer and set foreground to #d57d45. Use Pen Tool to draw two paths along chin contour, then stroke it with brush 3 px (remember to check Pen Pressure options with brush settings). Apply Gassian Blur with 2 px for them:
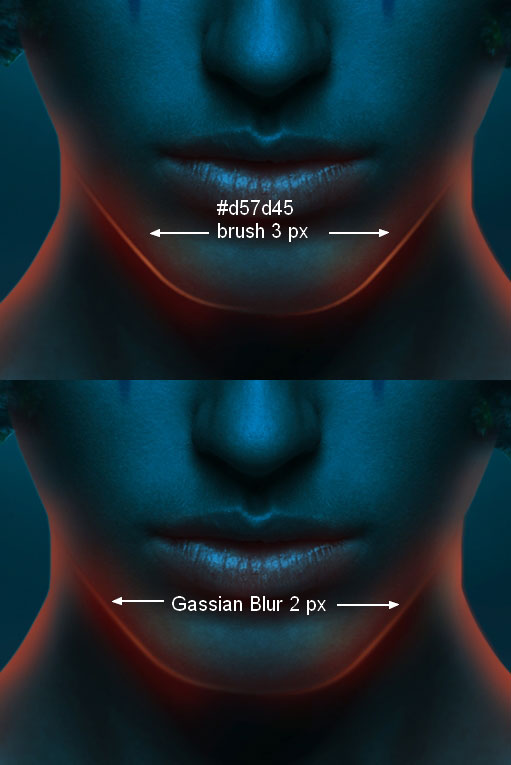
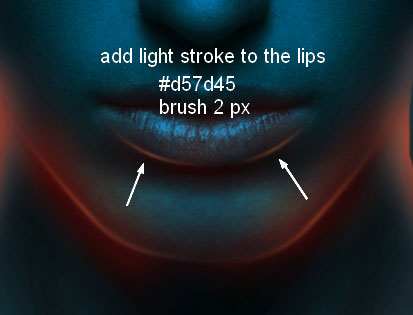
Do the same with lips but with brush 2 px:
Step 38
Create a new layer and use soft brush with color #c89a7c painting on some rocks and wing parts on model head (which are near the flames). I put the mode to Hard Light 100%:

On a new layer, I use same brush to paint on rocks on background following the rules “The further the less”. I change the mode to Hard Light 70%:

New layer and I use color #ff632e for brush. I paint over the rock parts and set the mode to Hard Light 100%:

Add light stroke to rocks near model cheeks with color #ff632e, brush 3 px then put the mode to Overlay 100%:

Step 39
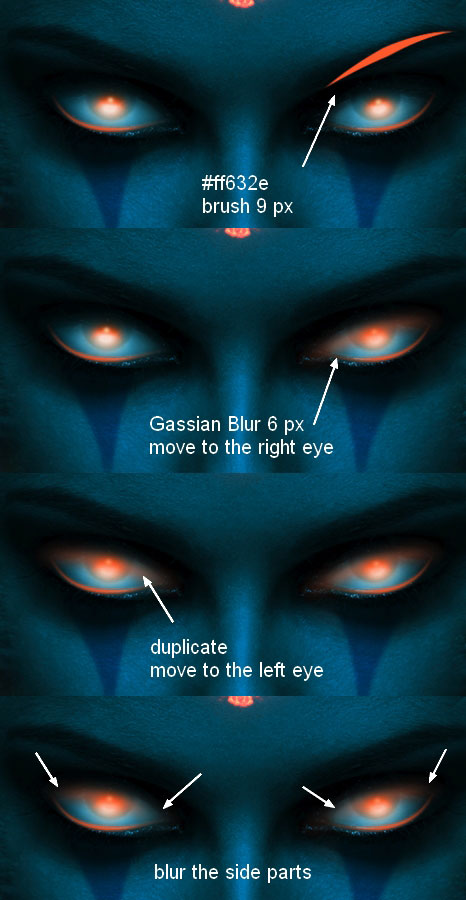
Add light stroke to the eyes with same method in step 37 and color #ff632e, brush 2 px, Gassian Blur 1 px:

I use same brush with size 9 px to make some eyes blobs:

Step 40
I make another layer with a new stroke, color #ff632e, brush 9 px then apply Gassian Blur with 6 px. Move it onto the right eye and duplicate it, flip it horizontally and add to the left one. I use layer mask to blur the side parts:
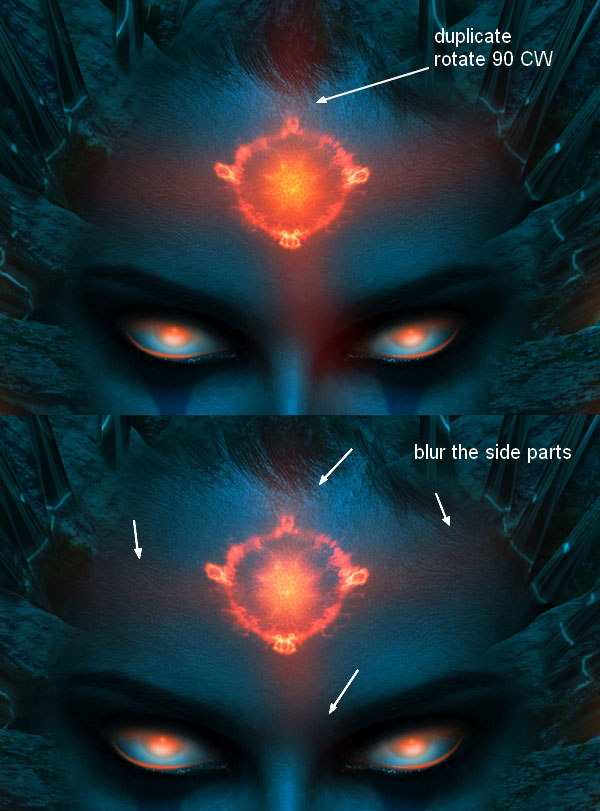
Step 41
I duplicate this blurred stroke, change the mode to Hard Light 100% and use Cmd/Ctrl+T to make it larger:
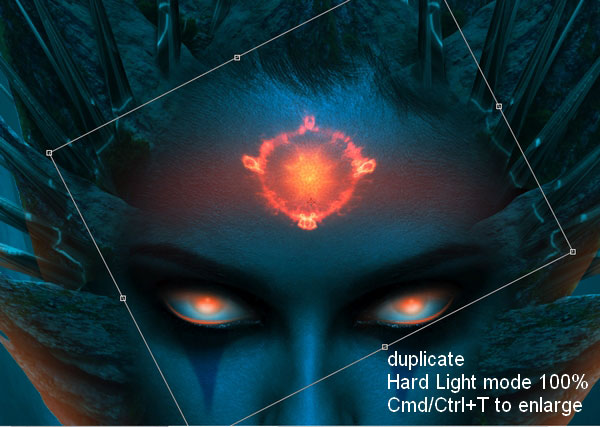
Duplicate this layer and rotate it 90 CW. Use layer mask to blur the side parts:
Step 42
On a new layer, I use soft brush with color #ff632e to paint over forehead part and set the mode to Linear Dodge 100%:

I use same brush and paint on the top of the nose and alter the mode to Hard Light 20%:

Step 43
I create three layers on the top. On the first I use color #ff632e to paint on nose part and put the mode to Hard Light 100%. On the second which is set to Overlay mode 30% I use color #f0c194 to brighten nose again. On the last I add nose stroke with color #ff632e, brush 3 px, and apply Gassian Blur 1 px:

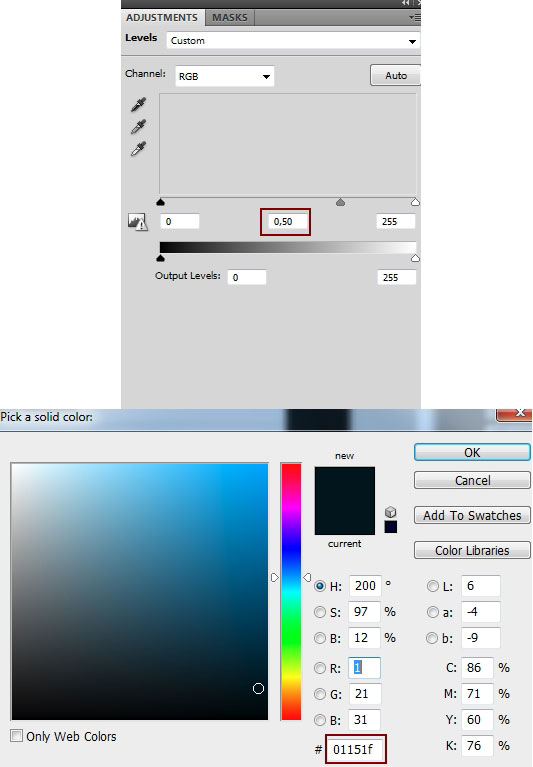
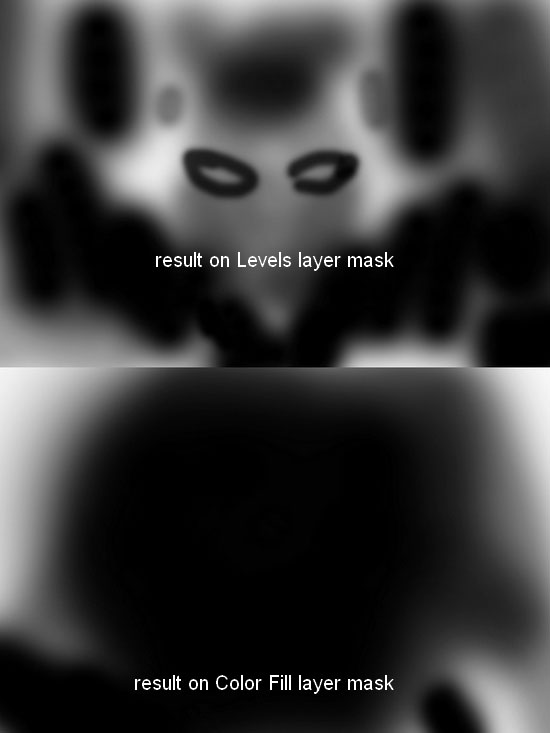
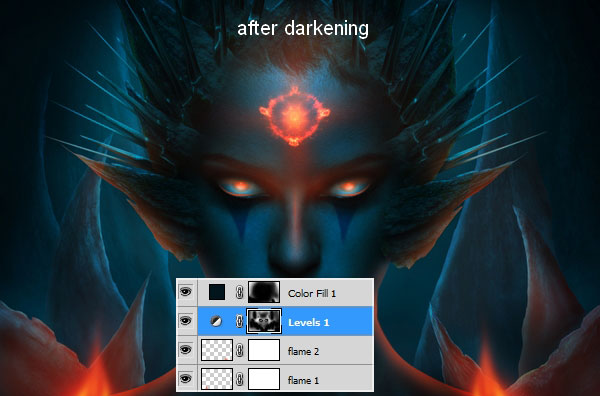
Step 44
I create a Color Fill layer and a Levels layer on the top to add more contrast to our picture. I put the mode of Color Fill layer to Overlay 100%. On two these layers masks, I use soft black brush to remove unwanted dark areas:
Step 45
I make a new layer and use Dodge tool to brighten more some details and face:
Step 46
Final step: I use a Hue/Saturation to make the red effect stronger, also match blue make up under model eyes with the rest:
And We’re Done!
You can view the final outcome below. I hope that you enjoyed this tutorial and would love to hear your feedback on the techniques and outcome.
Member File Download
Download the original .psd file for this tutorial here:

 Members Area Tutorial: Create a Dark And Surreal Photo Manipulation “Volcano Spirit”
 Members Area Tutorial: Create A Dark Ghostly Scene Photo Manipulation
 Members Area Tutorial: Create the Surreal Photo Manipulation ‘Twisting Water’

Leave a comment
0 Comments:
No comments have been posted yet. Be the first!
Leave a Comment: