
Members Area Tutorial: Recreate a High-End Photo Shoot On a Limited Budget
In today’s tutorial you’re going to learn something a little different.
We’re going to cover some incredibly practical, basic tips that you can apply in order to create your own cost-effective photo manipulations from scratch. Not everyone has access to professional photography studios, and today you’ll learn how you can product high-end looking results on a very limited budget.
This includes everything from correctly setting up a photo shoot, to moving into Photoshop and covering post-production essentials. You’ll work with lighting, detail removal, color correction and photo manipulation.
Final Image
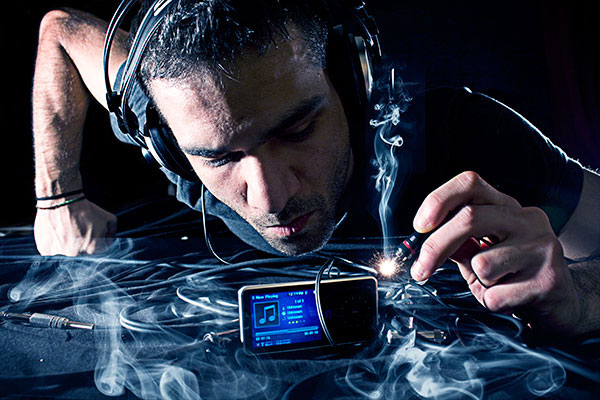
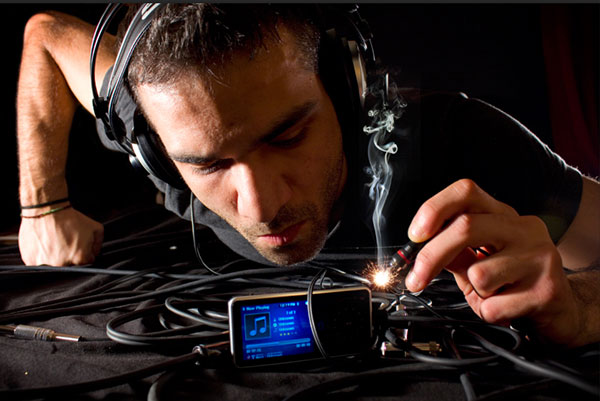
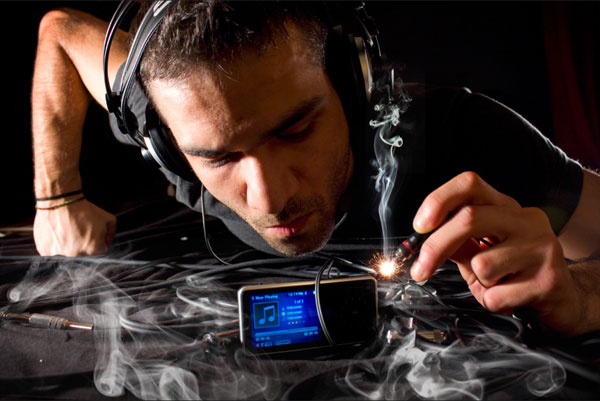
As always, this is the final image that we’ll be creating:
Resources Used In This Tutorial
Step 1: Organizing Your Photo Shoot
First of all we are going to need 2 light sources (when I say light source I mean anything that you can afford, from a single 150 watt halogen lamp to professional studio equipment). For this project I used:
- 2 x 150 watt halogen lamps
- A black canvas
- An mp3 player
- A headshet
- Cables
The next thing that you want to do is set up the scenery. The image below will help you understand what I mean.
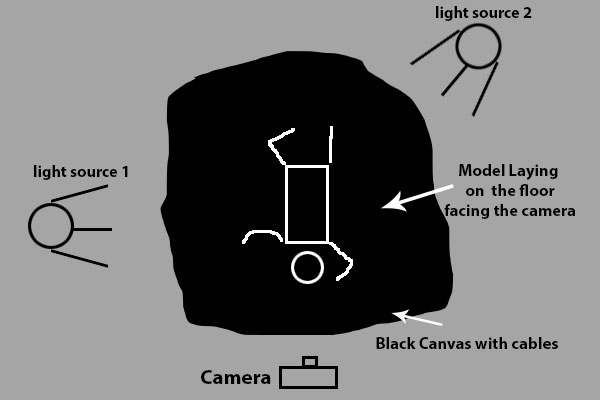
As you can see we placed the “Light source 1” to the side of the model and the 2nd “light source” as a backlight. Now, if you have a decent DSL camera I suggest that you turn it to auto and take the shot. If you are a more advanced photographer you can switch to manual and use the parameters I used to take the photo.
F/5 , ISO 250, 1/50 s , Focal Length 18mm
And this is the result:
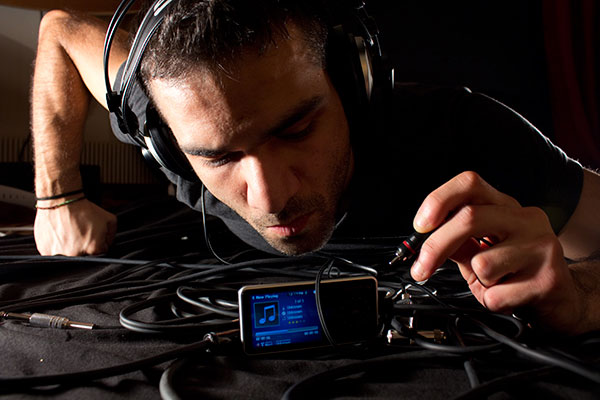
You can notice the yellow tones on the skin. That was caused due to the halogen lamps. On the next step we will fix the colors and add elements in order to achieve a more professional result.
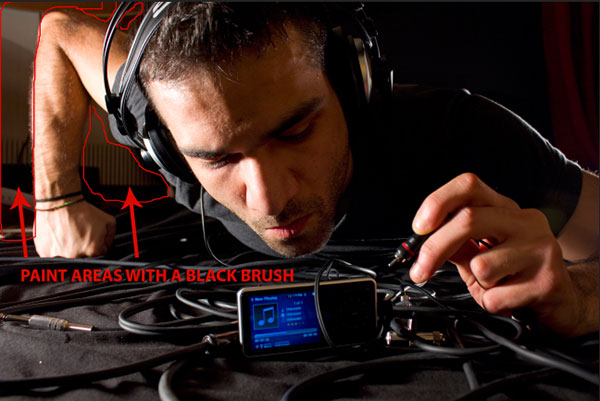
Step 2: Fixing the background
In this step all we need to do is just paint the background with black color. Choose a nice soft black brush and start painting these areas
After you’re done use softly paint all the sides of the photo to create a vignette effect. Like this:
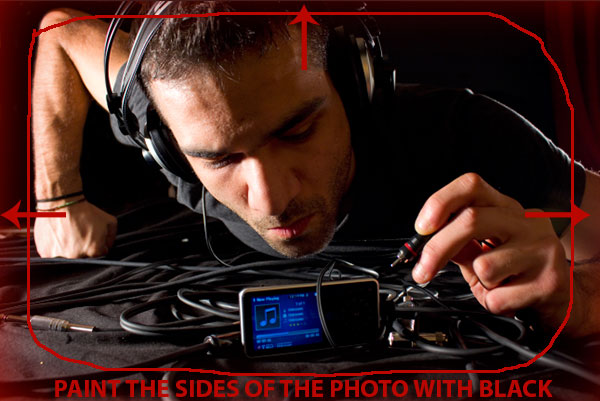
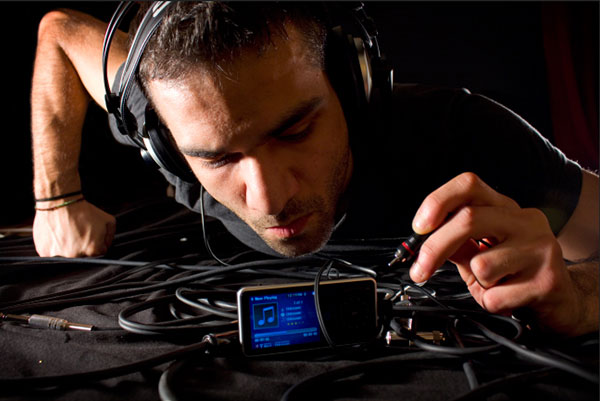
When you’re done the result should be similar to this:
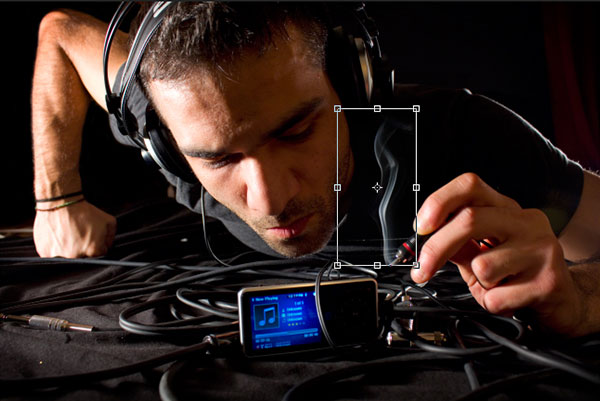
Step 3: Lighting the Focal Point
As the mp3 player is going to be the focal point of this composition we need to draw attention to it using artificial lighting.
Create a new layer. Now take a small white soft brush and add a stroke in the Center of the MP3 Player.
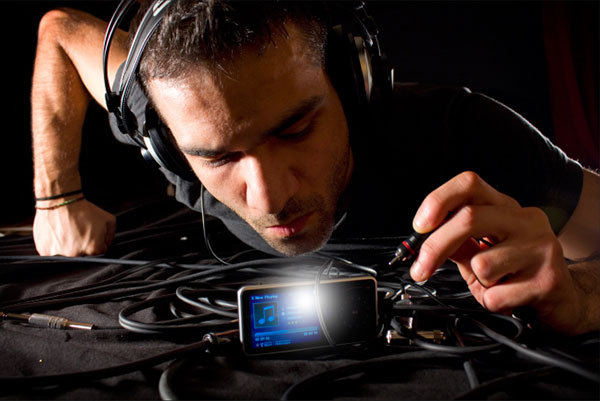
Now change the Blending mode to Overlay.
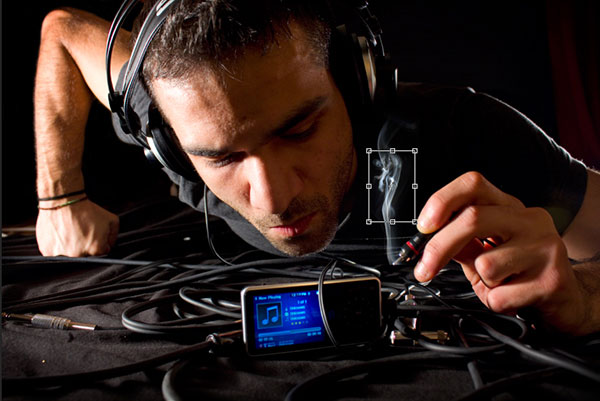
Step 4: Adding Smoke
Open the image ‘Smoke_V1_1020′ from the Media Militia package. Paste the smoke into your main composition and set this layer’s blending mode to Screen. Resize the image and place the smoke here (be sure to erase any hard edges that may appear on the smoke images)
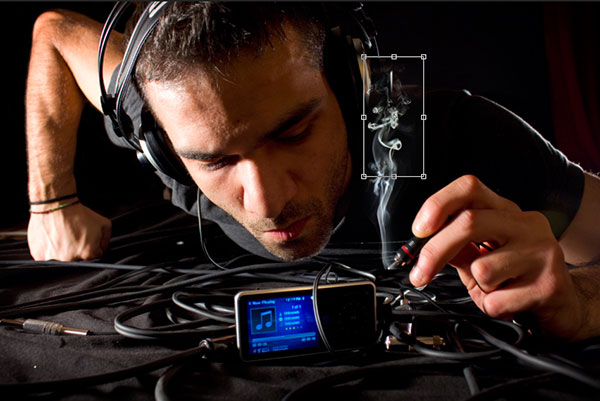
Next open the image Smoke_V1_1036 set blending mode to screen, scale down and place it here:
Open the Smoke_V1_1011 image set blending mode to screen, scale down and place it on the top of the other images like this.
Step 5: Adding The Spark
Now open the image of the sparkle from the resources section for this tutorial. Scale it down, set “Screen” as blending mode and place it here.
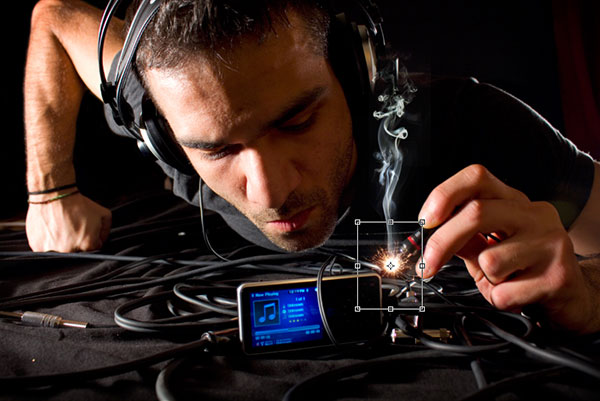
This is what we’ve done so far:
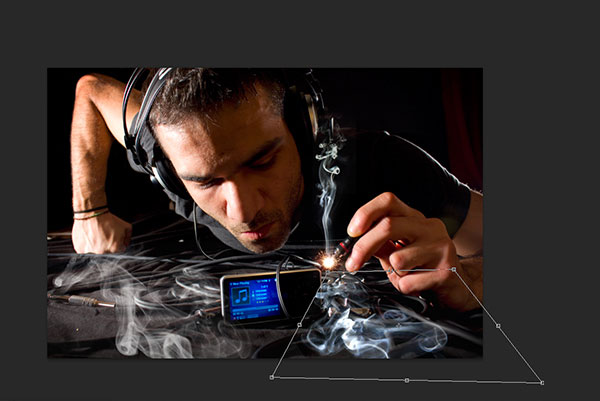
Step 6: Using perspective to add more smoke to the Enviroment
Open the image Smoke_V1_1035 from the Media Militia pack and set blending mode to screen. Hit Ctrl+t (or command + t on mac) to go to free transform mode and then right click and select “distort”.
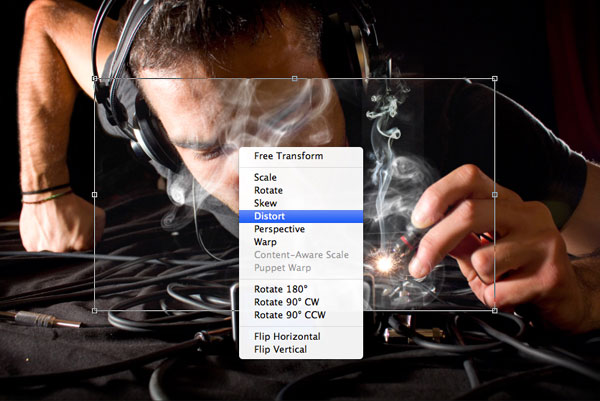
Now place the image to the left and try to achieve a perspective as shown in the picture below.
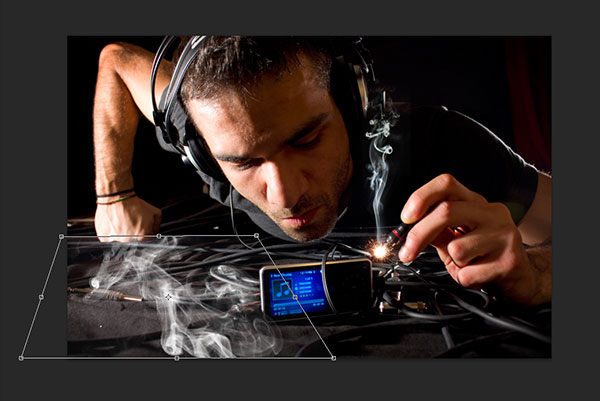
When you’re done set the opacity of the layer to 75% (again make sure to erase all the hard edges with the eraser tool)
We will follow the same procedure with a different picture now. Open Smoke_V1_1032. blending mode to screen. Hit Ctrl+t (or command + t on mac) to go to free transform mode and then right click and select “distort”. Now place the image to the right and try to achieve a perspective as shown in the picture below.
when you’re done set the opacity of the layer to 75%. This the result so far.
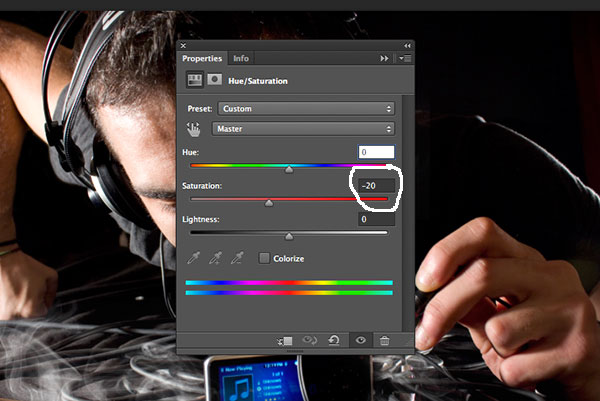
Step 7: Color Correction
On top of all layers now set a “hue and saturation” adjustment layer. Go to Layer-> New adjustment Layer -> Hue/saturation and set saturation to -20.
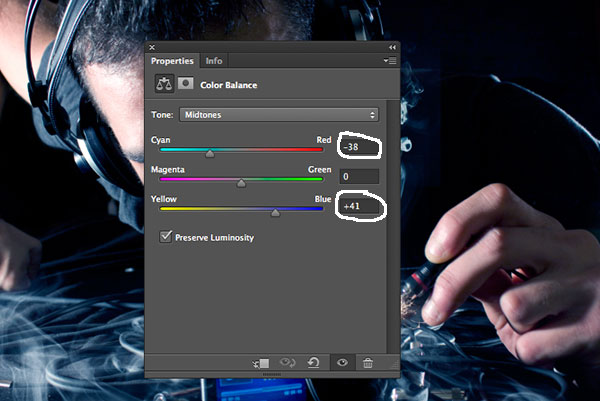
Go to Layer-> New adjustment Layer -> Color Balance and insert these parameters.
Again go to Layer-> New adjustment Layer -> Brightness/contrast and set brightness to 20.

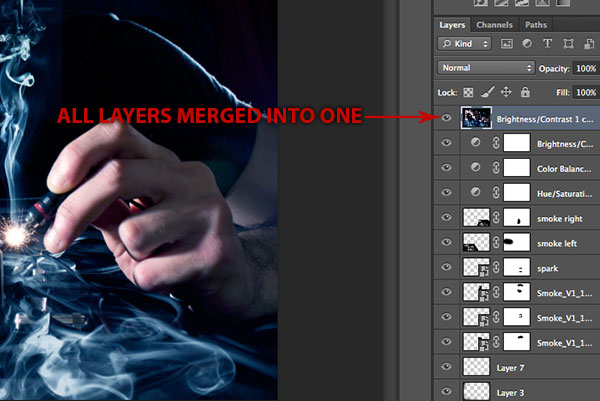
Step 8: Sharpening
Go to Select -> All Layers, then Layer->Duplicate layers (click ok to the window that pops up) and then Layer -> Merge Layers. Now you should have all the layers merged into one single layer.
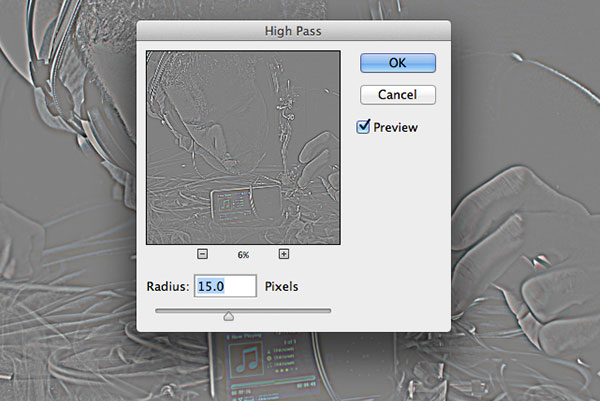
Now go to Filter-> Other-> High Passand insert a 15 pixel radius.
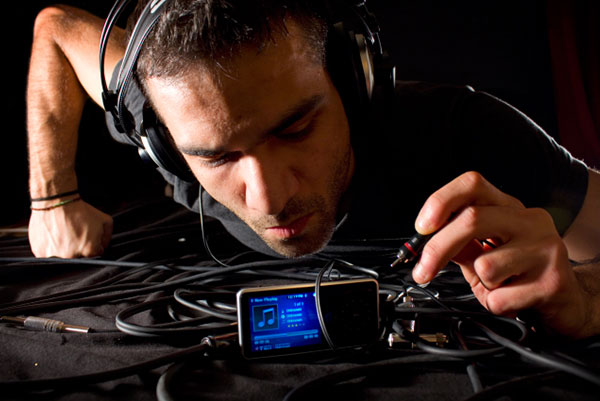
Now simply set the blending mode to overlay. This is the result!
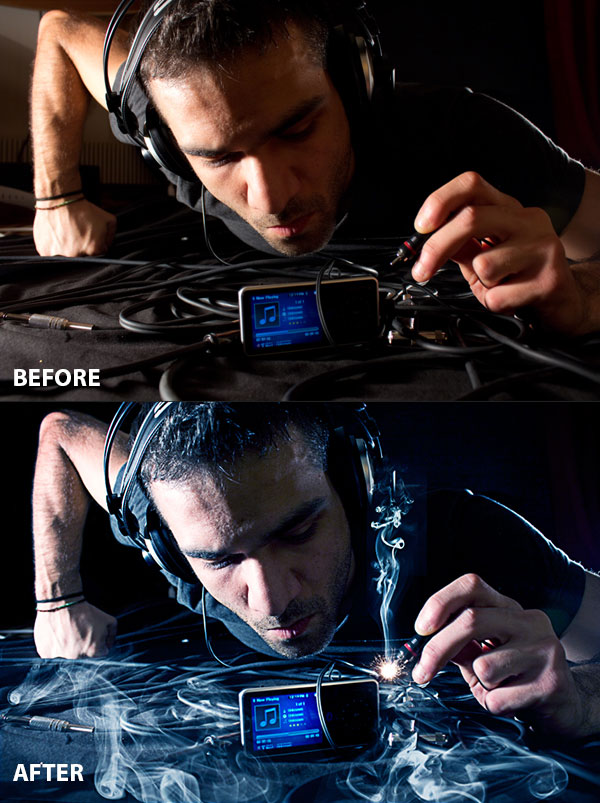
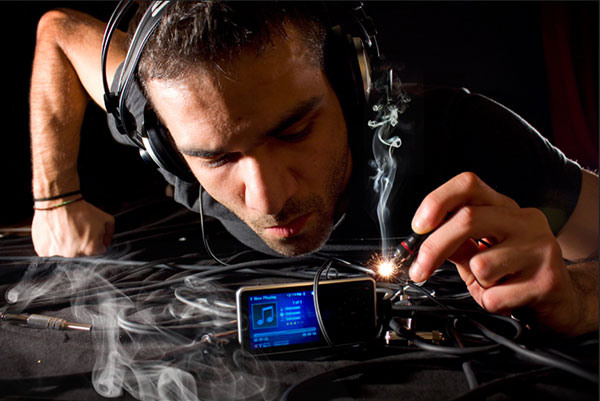
And We’re Done!
You can view the final outcome below. I hope that you enjoyed this tutorial and would love to hear your feedback on the techniques and outcome.
Member File Download
Download the original .psd file for this tutorial here:

 Members Area Tutorial: Learn How to Photo Manipulate an Ancient Shrine
 Members Area Tutorial: Combining Extraction Techniques to Create a Unique Photo-Manipulation
 Members Area Tutorial: Construct a Detailed, Realistic Scene Using Advanced Photo Blending

Leave a comment
0 Comments:
No comments have been posted yet. Be the first!
Leave a Comment: