
Members Area Tutorial: Photo Manipulate a Complex Lion King Warlord Scene
In this tutorial we are going to create a mutant warlord who conquers the kingdoms and hangs the skull of the king in his court which shows his brutality.
This tutorial covers many interesting topics such as:
-Digitally painting the hair, beard and Fur.
-Designing and creating the Throne.
-Face morphing.
-Skin texture painting.
-Intense lighting and shadow effects.
and many more interesting techniques.
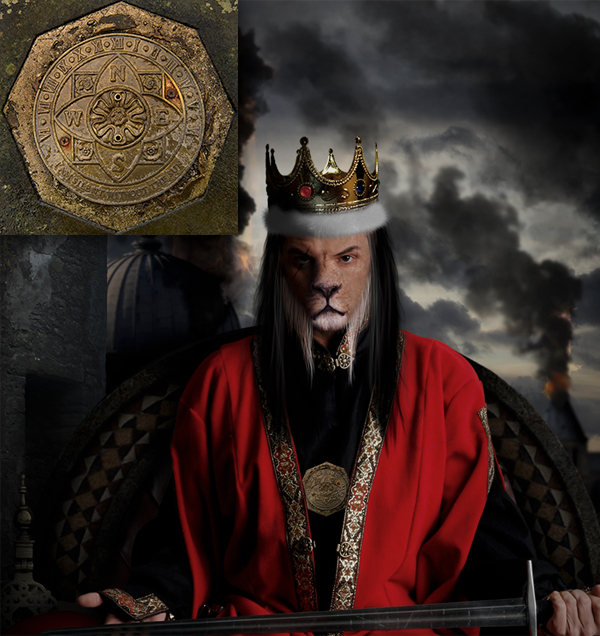
Final Outcome:
As always, this is the final image that we’ll be creating:

Resources Used In This Tutorial
- King – Marcus J Ranum
- Court Hall – faestock
- Skin Brush – nathies-stock
- Clouds – sxc.hu
- Hair Brush – para-vine
- Crown 1 – sxc.hu
- Lion – sxc.hu
- Building 3 – sammykaye1sstamps
- Building 2 – sxc.hu
- Building 1 – sxc.hu
- Scratch Brush – poisondropstock
- Born Fire – sxc.hu
- Ornaments – kuschelirmel-stock
- Locket – sxc.hu
- Lion Knob – sxc.hu
- Crown 2 – sxc.hu
- Throne Design Element – sxc.hu
- Cushion – sxc.hu
- Fire – psdbox
- Smoke – psdbox
- 3D Throne – zememz
- Skull – Jagged eye
- Stick – sxc.hu
- Frame – sxc.hu
Step 1
1) Import the image of the old court house on to the Photoshop canvas.

2) Using the Burn Tool (O) darken the edges of the pillars as shown.

Step 2
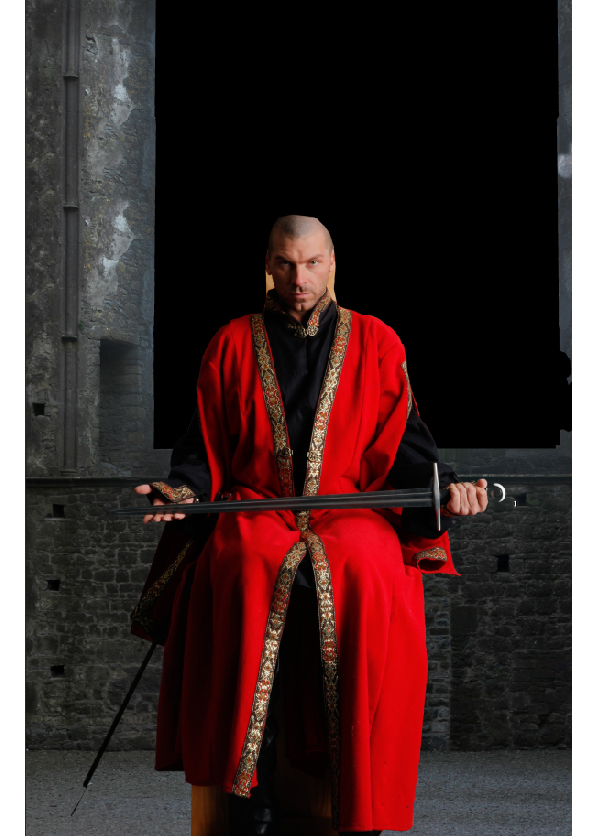
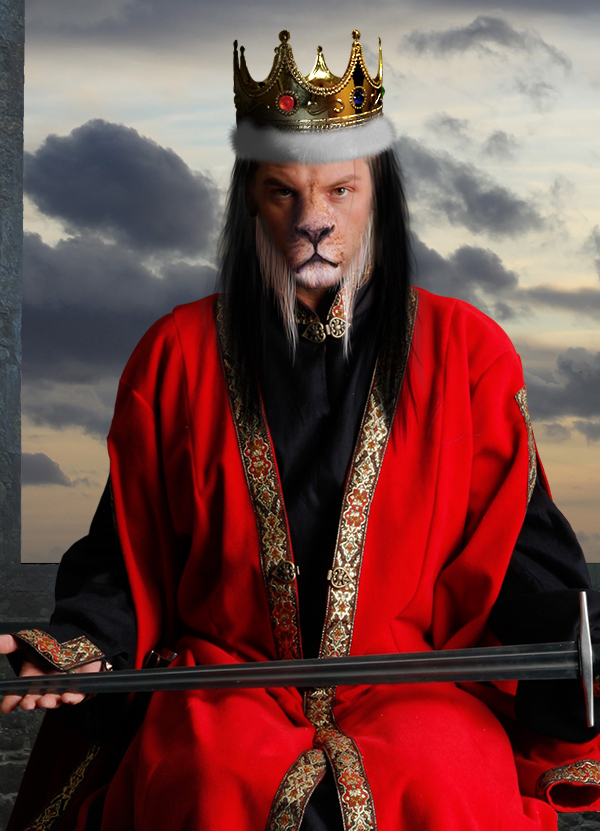
Now import the image of the king on to the canvas and place it in the center as show.
Note: While cutting the king’s image from the original, there is no need to be accurate while cutting the head and neck part, because they will be covered with Hair and the Crown later in the procedure.
Step 3
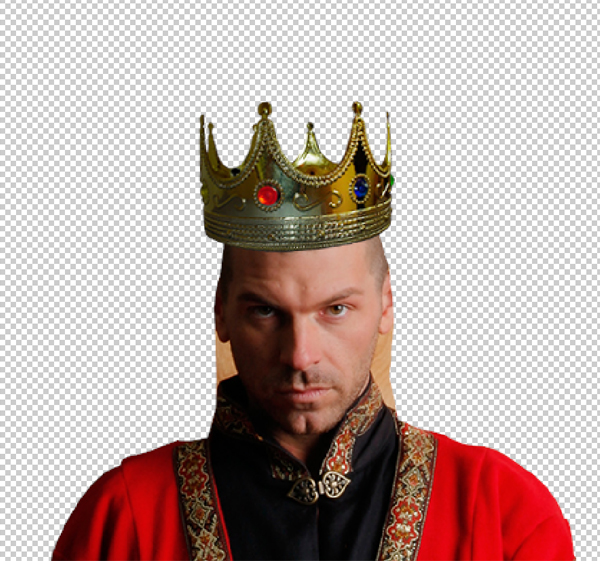
In this step we will be placing the crown on the king’s head.
1) Import the image of the crown on to the canvas and place it on the king’s head.
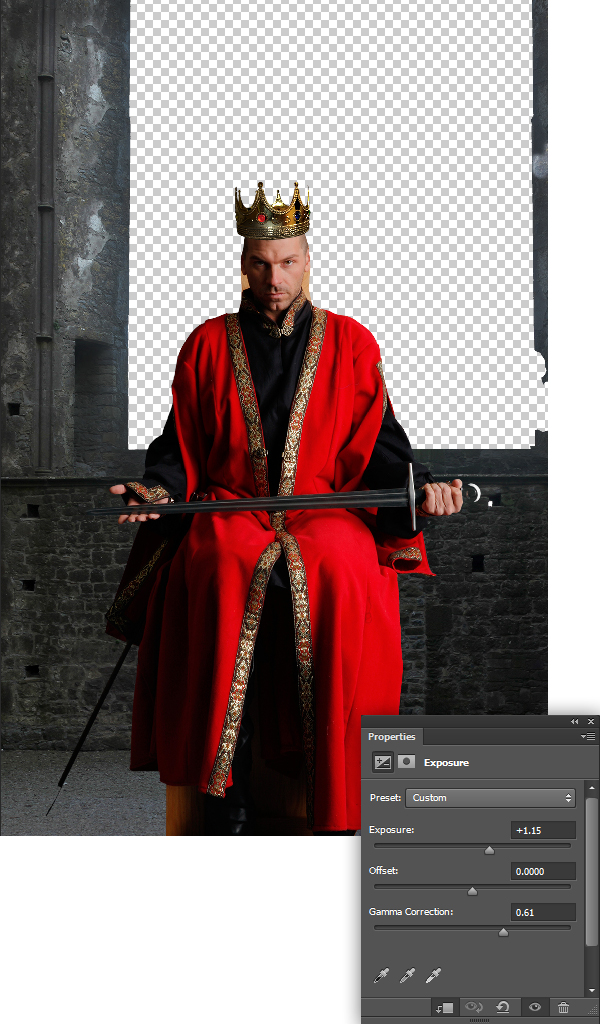
2) Create a Curves adjustment layer to the crown layer and set the RGB curves as shown.

3) Using Hue/Saturation adjustment layer to the crown set the Saturation level to -46.

4) Now by using the Exposure Adjustment layer to the crown set the Exposure to +1.15 and Gamma Correction level to 0.61.
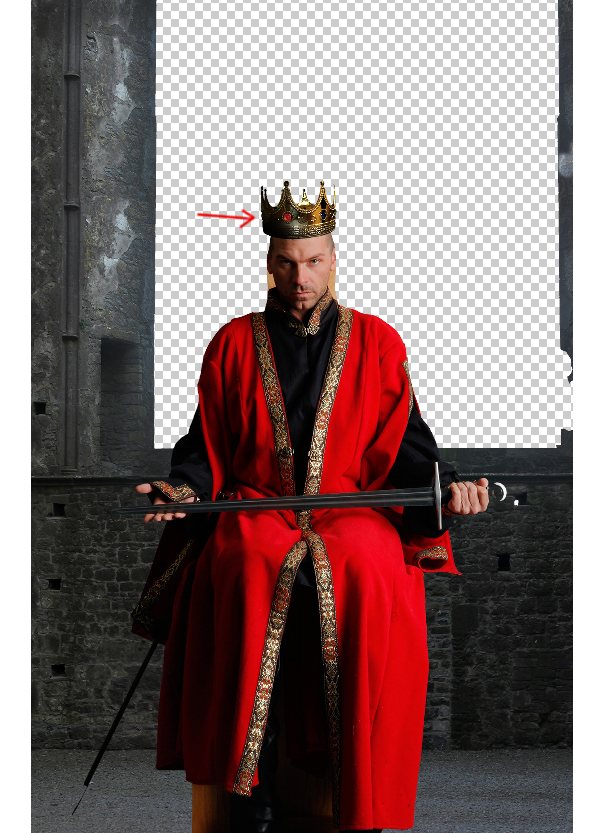
5) Now paint the dark shadow on the left side of the crown as shown.
Step 4
In this step we will be digitally painting the fur to the crown.
1) Using the brush tool paint a random fur round fur bush. The goto Edit>Define Brush Preset and name the brush as “Fur Brush”.
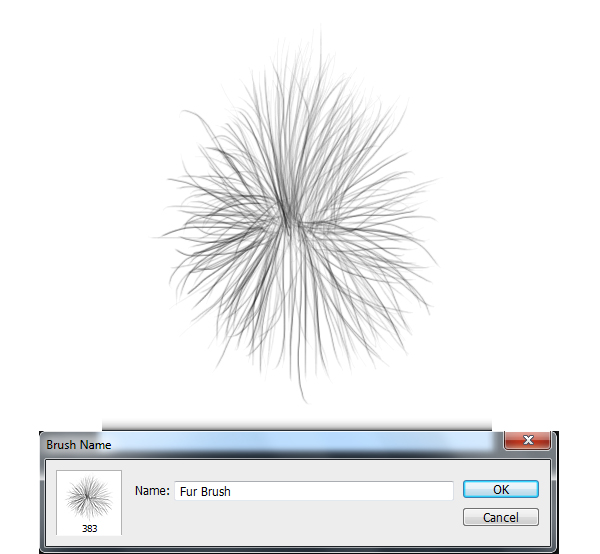
2) Select the Fur brush from the Brushes Palette and paint the fur as shown with white paint.

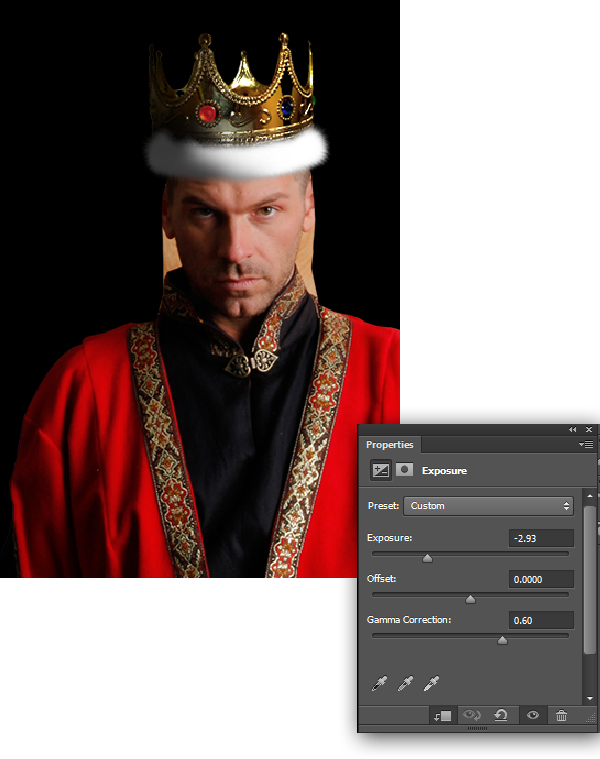
3) Now duplicate the fur layer and hide the main fur layer. Then erase the duplicated layer into half as shown.

4) Unhide the main fur layer. Then select the duplicate fur layer and add an Exposure Adjustment layer then set the Exposure level to -2.36 and Gamma Correction to 0.60.
5) Now slightly reduce the brightness of the main fur layer by setting the Exposure level to -0.50 and Gamma Correction to 0.75.
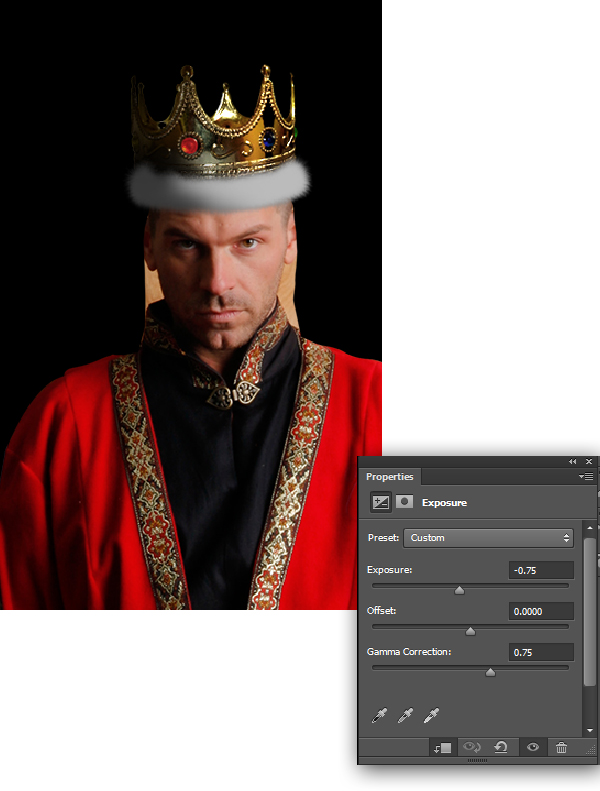
6) Now by using the fur brush paint very thin fur over lapping on the dark side of the fur.
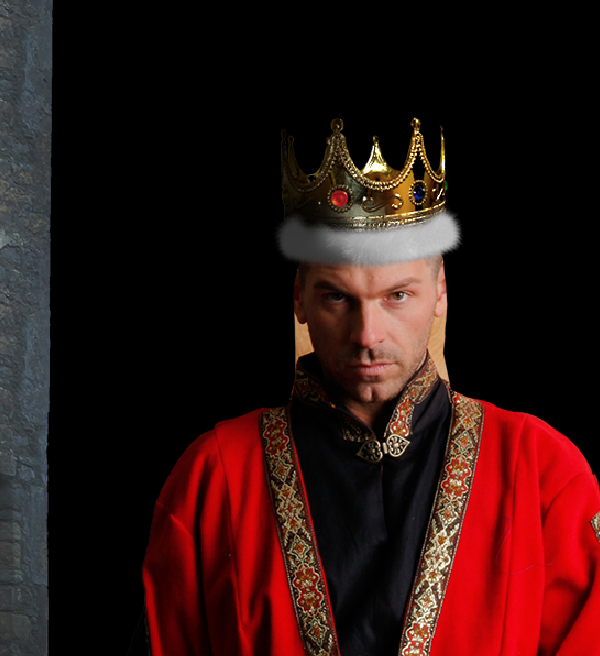
Step 5
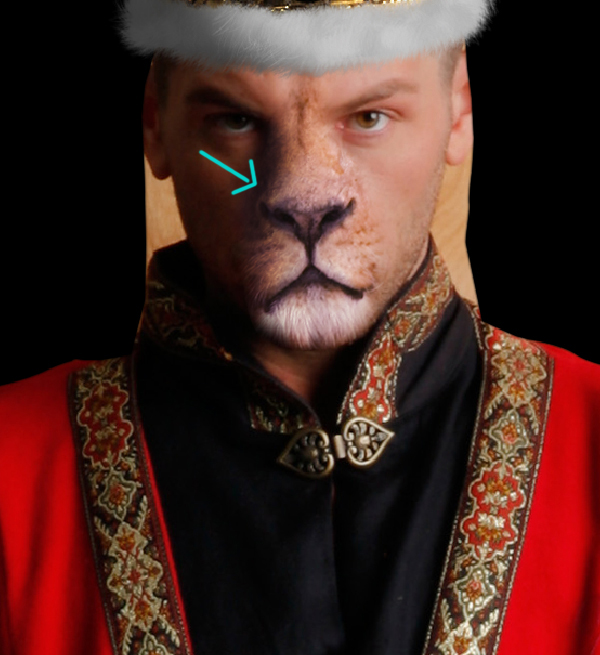
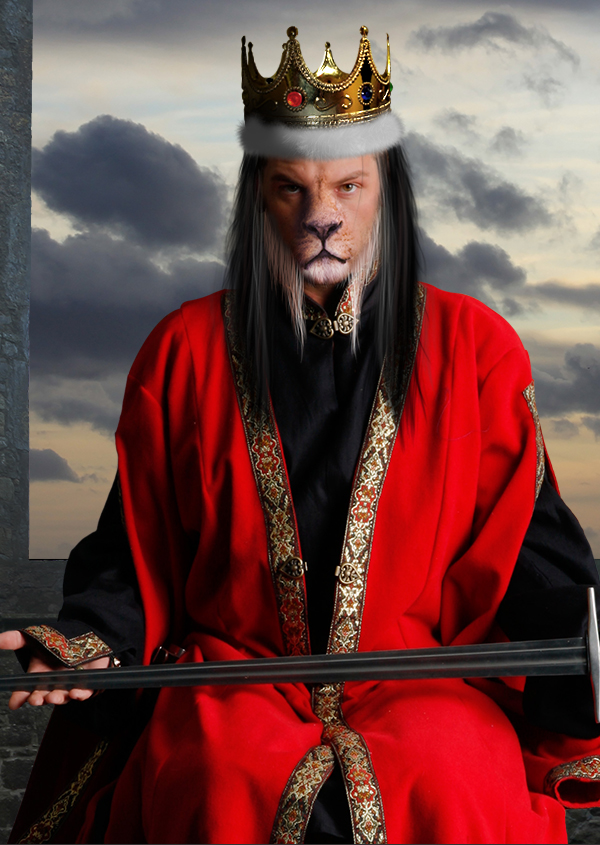
In this step we are going to morph the king’s face with a lion’s face.
1) Cut the nose and mouth part of the lion and place it on the king’s face as shown. Name this layer as “Lion Jaw”.

2) Using the Curves color correct the lion jaw layer as shown.

3) Now by using Exposure Adjustment layer to the Lion Jaw layer set the Exposure to -0.05.

4) Again by using another Curves adjustment layer color correct the lion jaw layer to match the king’s skin.
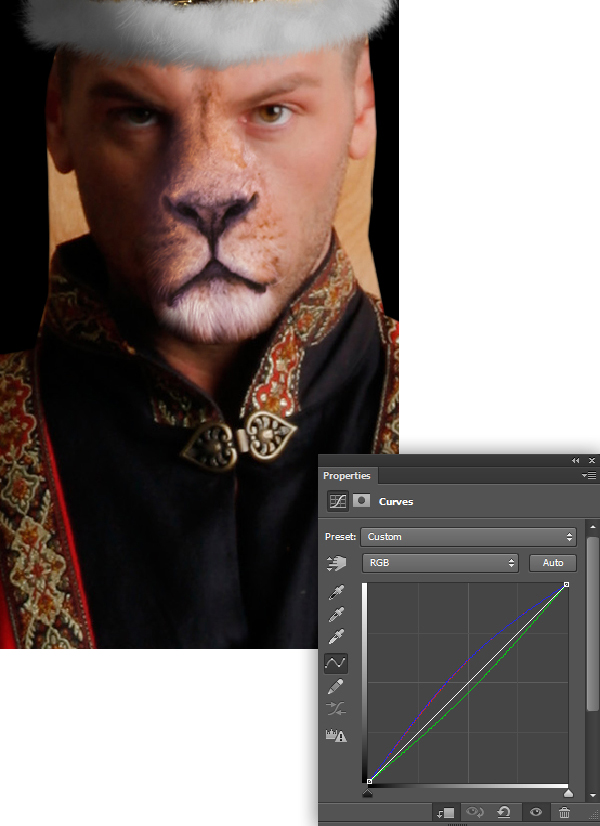
5) Select the Burn Tool (O) and darken the right side of the nose as shown.
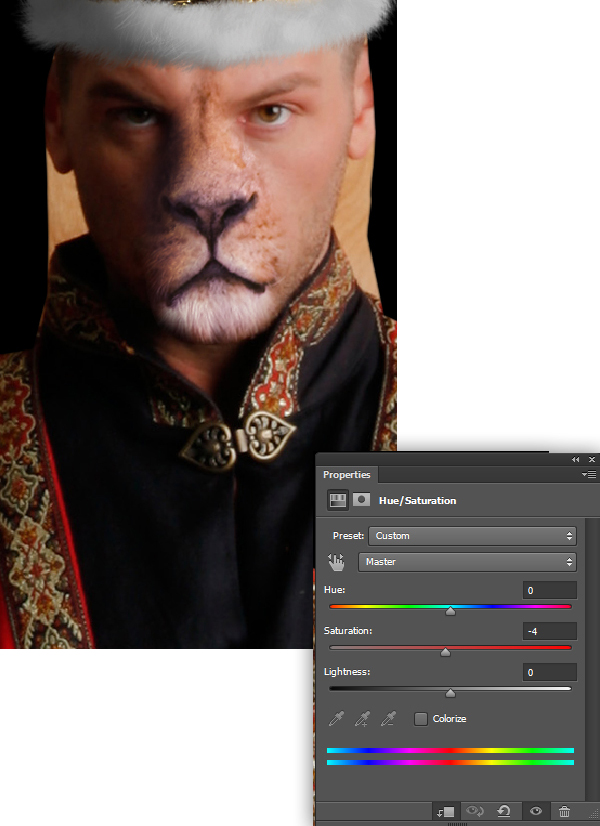
6) Add a Hue/Saturation Adjustment Layer to the Lion Jaw layer and set the Saturation level to -4.
Step 6
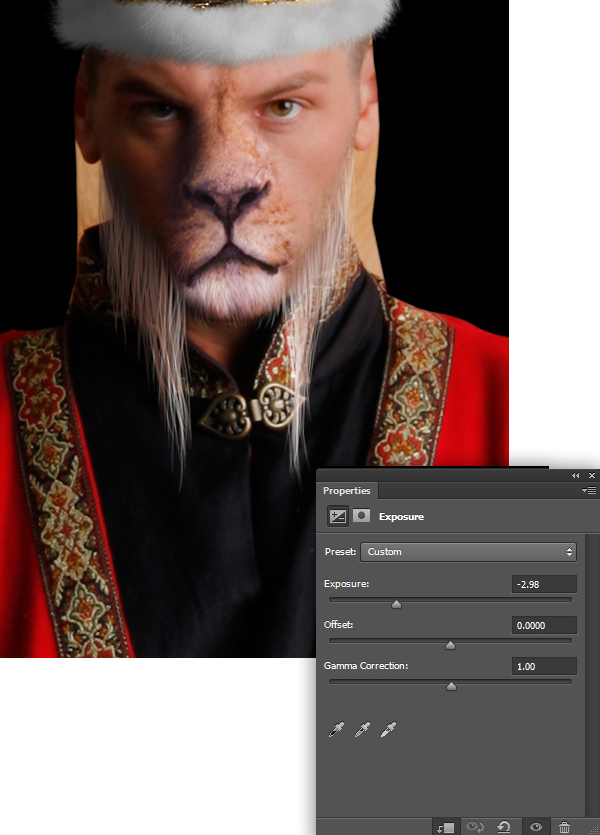
In this step we will learn how to paint hair and digitally paint White beard to the king’s face.
1) For this step you will need a pressure sensitive pen tablet. You can see the result of the stroke using a pressure sensitive and non-pressure pen tablets. To get perfect hair details you need to draw consecutive random strokes as shown.

2) Create a new layer above the Lion Jaw layer for the beard. Then by using the previously explained technique paint white beard in the king’s face as shown.

3) Now create a new layer beneath the beard layer and paint the color #94685a along the jaw line of the king’s face.

4) Now separate the right side of the beard into a new layer and reduce the Exposure to -2.98 to match the lighting on the face.
Step 7
Import the image of the sky and place it under the court hall layer.

Step 8
In this step we are going to paint dark long hair to the king.
1) Select the hair brush and start drawing repeated random strokes as show. While drawing the hair it is mandatory that you draw the stroke all the way from Top or else it might disturb the streamline flow of hair.

2) Using the Black color paint the long dark hair as shown in a new layer placed above the King’s layer.
3) Now by using the color #252424 paint the grey hair as shown.

4) Select the white color and paint the hair as shown close to the face.
Step 9
In this step we are going to paint the skin to match with rough skin texture of the lion.
1) Select the skin Brush and paint the skin as shown on the face with the color #d4845a.

2) Now paint dark skin tone on the face as shown using the color #a65941.

3) Now de-saturate the digital skin layer to -28 using Hue/Saturation Adjustment layer.

Step 10
In this step we are going to darken the eye brows and create dark circles around the eyes.
- Select the Burn Tool (O) and darken the area around the eyes and also darken the eye brows as shown.

Step 11
In this step we are going to add some details to the face.
1) With the Brush size set to 5% paint a scar on the right side of the face as shown using Black color.

2) Now darken the eyeballs using the Burn Tool to make them look more intense.

3) Now paint slight hair details to the eyebrow as shown to make it look thick.

Step 12
Using the scratch brush paint the scratches on the sward as shown.

Step 13
In this step we are going to add a building in the background.
1) Import the image of the dome and place it on the left side of the scene.
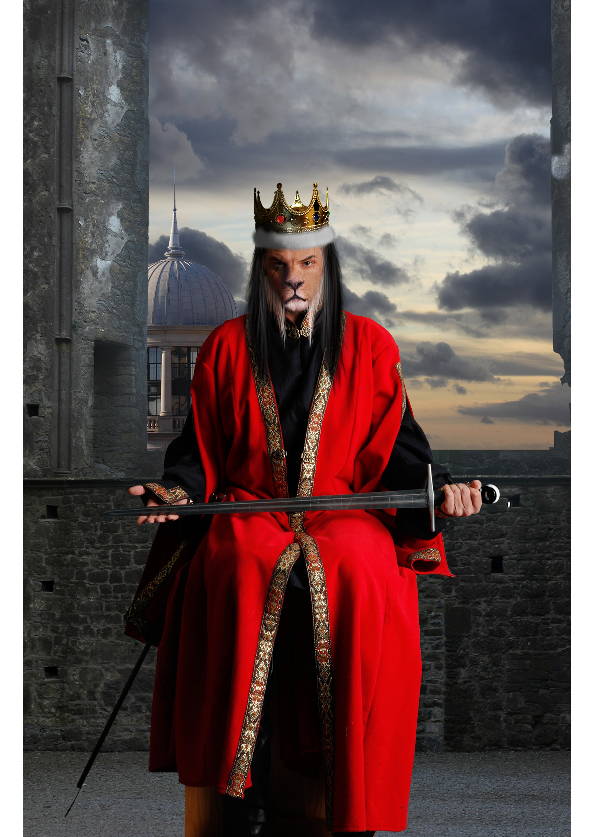
2) Cut a portion of dome of the building to create a destruction effect.

3) Now by using the Exposure Adjustment layer to the Dome1 layer, set the Gamma correction level to 0.58.

Step 14
In this step we are going to create a couple of destroyed and burning building structures in the background.
1) Create a new layer behind the Dome1 layer and paint the inner dome and structure frame as shown in the cut portion.

2) Now by using the smoke brush paint black smoke as shown.

3) Import the image of fire and place it under the smoke layer and set its Blending Mode to Screen.

4) Merge both Dome 1 and Smoke layers and add a Gaussian Blur of Radius 0.9px.

5) Similarly create a couple more buildings in the scene as shown.

Step 15
In this step we are going to color correct the scene using Adjustment layers.
1) Create a Hue/Saturation adjustment layer above all layers and set the Saturation level to -31.

2) Now create an Exposure Adjustment layer and set the Exposure level to -0.21 and Gamma Correction to 0.77.

Step 16
Before going into the making of the throne paint a rough sketch of the throne with distinct colors to separate every part of the throne.

Step 17
In this step we are going to create the hand cushion of the throne.
1) Paint the red hand cushions of the throne as shown with the help of Pen Tool (P).

2) Cut the image of the lion head from the door. Then by using the Patch Tool (J) remove the ring in the lion’s mouth.

3) Place the lion head on the right hand cushion as shown.

4) Now duplicate the lion head layer and place it on the other hand cushion.

5) Add an Exposure Adjustment layer to the lion head2 layer and set the Exposure level to -0.38 and Gamma Correction to 0.66.
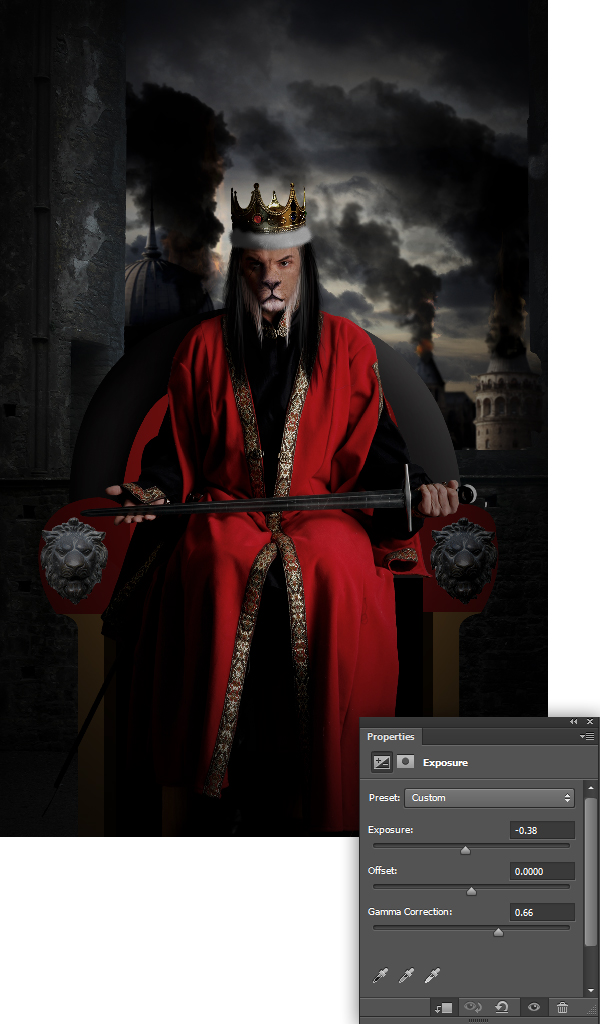
6) Similarly color correct the other lion head using the Exposure Adjustment layer with same values as before.

7) Using the Soft Round brush paint dark shadows on the cushion as shown.

Step 18
In this step we are going to add a traditionally designed component to the throne.
1) Cut the image of the royal door knob and place on the two end of the throne as shown.

2) Now paint dark shadows on the left side of the design as shown.

3) Now group both the design components into a folder and add an Exposure Adjustment layer to the folder and set the Exposure level to -0.21 and Gamma Correction to 0.68.

4) Then add a Hue/Saturation Adjustment layer to the Design Elements folder and set the Saturation level to -64.

Step 19
In this step we are going to create a leather cushion behind the king’s back.
1) Cut the image of the leather cushion and place it behind the king’s back as shown.


2) Create a new layer and paint dark shadow on the cushion as shown.

Step 20
In this step we are going to create the front legs of the throne.
1) Cut the leg of a metal chair and place it on both sides of the throne as shown.


2) Now paint dark shadows on both the legs from left as shown.

3) Now group the throne legs into a folder and add an Exposure Adjustment layer and set the Exposure level to -0.17 and Gamma Correction to 0.77.

Step 21
In this step we are going to add another design component to the throne.
1) Cut the marked design portion of the frame and place it on the throne as shown.


2) Now add dark shadow to the design components to match with the lighting.

3) Group all the design components into a folder and add an Exposure Adjustment layer to the folder. Then set the Exposure level to -38 and Gamma Correction to 0.83.

Step 22
In this step we are going to create a design within the arc.
1) Cut the marked area of the metal chair and place it on the throne as shown. Then by using the Puppet Warp (Edit>Puppet Warp) place multiple pivot points and bend the design to the shape of the arc.


2) Now duplicate the arc design and complete the arc.

3) Merge both the arc design layers and add an Exposure Adjustment layer and set the Exposure to -0.34 and Gamma Correction to 0.79.

4) Create a new layer above the arc design layer and paint dark shadow as shown.

Step 23
In this step we are going to create some jewellery on the king.
1) Cut the image of the designed metal piece and place it on the king as shown.
2) Now paint the dark shadow on the locket as shown.

3) Now import another locket and place it above the previous locket.

4) Create an Exposure Adjustment layer to the second locket and set the Exposure to -0.05 and Gamma Correction to 0.70.

5) Now color correct the second locket using the Curves.

6) De-saturate the second locket to -45 using the Hue/Saturation Adjustment layer.
7) Create a new layer above the second layer and paint the dark shadow as shown.

![]() Similarly create another locket on the king.
Similarly create another locket on the king.

Step 24
In this step we are going to create fire specs flying around in the scene from right.
1) Import the image of the born fire and place it on the right side of the scene.

2) Then set the Blending Mode of the layer to Screen.

3) Create a new layer above the fire layer and paint in the color #e79f05 as shown.

Step 25
In this step we are going to create a skull hung on to a stick.
1) Import the image of the stick on to the canvas and place it as shown in the scene.

2) Now import the image of the skull on to the canvas and place it on the top of the stick.


3) Using the Exposure Adjustment layer to the skull, set the Exposure to -0.23 and Gamma Correction to 0.77.

4) Create a new layer above the skull layer and paint dark shadow on the left side of the skull and the stick as shown.

Step 26
To show that the skull hug to the stick is the skull of a dead king we are going to place a crown on the skull.
1) Import the image of the crown on to the canvas and place it on the skull as shown.

2) Now add an Exposure Adjustment layer to the crown layer and set the Exposure level to -0.07 and Gamma Correction to 0.75.

3) Using the Hue/Saturation adjustment layer set the saturation level of the crown to -44.

4) Now create a new layer above the crown layer and paint dark shadow on the crown to match with the lighting of the scene.

5) Merge all the layers of the dead king skull and add a Gaussian Blur of Radius 0.7px.

And We’re Done!
You can view the final outcome below. I hope that you enjoyed this tutorial and would love to hear your feedback on the techniques and outcome.

Member File Download
Download the original .psd file for this tutorial here:

 Members Area Tutorial: Photo Manipulate a Complex Surrogate Scene
 Members Area Tutorial: Photo Manipulate an Atmospheric Warrior Scene
 Members Area Tutorial: Photo Manipulate a Futuristic Female Android

I attempted to use the ‘Search’ function and found that it would not respond. For example, I entered ‘Lion King’ and the result field remained blank. i.e. that field did not confirm a search had taken place with something like: “search term not found”.
Hi Garry,
Thanks for pointing this out. We’re aware of this issue and it will be fixed with our upcoming redesign in the next few weeks. Currently the search form does work on the homepage, but for some reason not within post pages.
If you need to search for a specific post you can do so from the homepage though.
I hope this helps and sorry for the inconvenience.