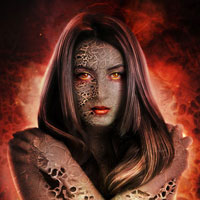
Create a Fantastically Textured Flaming Portrait
In today’s design lesson we will create a fantastically textured flaming portrait.
You will learn how to convert a regular portrait photo into a heavily textured, fantasy outcome. Within the lesson you’ll master skin retouching, painting custom hair, advanced image blending, filter application and lighting effects.
FanExtra Member Download
Download the original .psd source files for this tutorial here, available exclusively for FanExtra members:
Please note that this tutorial is not a members only tutorial and is publicly available at our blog PSDFAN.com. It is provided here for ease of access for FanExtra members:
Final Image
As always, this is the final image that we’ll be creating:

Resources Used In This Tutorial
Step 1
For earlier steps of this tutorial we will do some retouching and give basic overall texture on the model. Here is the image we will create:


Step 2
Start by opening the model image in photoshop. We will resize the image first. To do this purpose, go to image > image size and set the size of the model image as follow:

Step 3
Duplicate the image by hitting the Ctrl+J. Invert the duplicate by hitting Ctrl+I.

Then, with the duplicate image still selected, go to layer > smart object > convert to smart object. This will change the image into a smart object layer indicated by a smart object indicator on lower right corner of the thumbnail.

Next set the blending of the duplicate to overlay at 100% opacity.

step 4
Now go to filter > other > high pass. Set the amount of the radius to 6.0 pixels.

With the duplicate layer still selected, click the layer mask icon in the bottom of the layer panel to give this layer a layer mask.

Step 5
With the duplicate layer still selected, click the layer mask icon in the bottom of the layer panel to give this layer a layer mask.

Then mask the areas around the eyes, lips, nose and hair of the model. Use a very soft brush set to 30-40 opacity to mask the areas.

Here is the result so far:

Step 6
As we can see the skin lost its natural texture because of the high pass effect. It looks very soft.

We will give back the texture for the skin. To do this, firstly hit Shift+Ctrl+Alt+E to stamp all the layers. This will create a single layer above all the other layers. I named this layer model. Convert this model layer into a smart object layer. Then go to filter > others > custom. Set this filter blending option to normal at 50-60% opacity.

Here is the result should be:

Step 7
Now go to layer > new adjustment layer > hue/saturation. Set this adjustment layer to multiply at 17% opacity :

Here is the result should look:

Step 8
In this step we will colorize the lips. Select the lips of the model as the following:

With the lips still in selection, go to layer > new adjustment layer > hue/saturation as follows:

Set this adjustment layer to normal blending at 60% opacity:

Duplicate the adjustment layer and set the duplicate to overlay blending at 45% opacity to get the result as the following:

Step 9
Hit Shift+Ctrl+Alt+E to stamp all the layers and create a new single layer on the topmost position in the layer panel. Select the model image of the stamp layer and clean out its background.

Step 10
Go to layer > new adjustment layers > hue/saturation. Make sure to give this adjustment layer a clipping mask. Set this layer to normal at 50 % opacity.

Give another hue/saturation layer with a clipping mask above the first one. Set this layer to normal at 100% opacity.

And this is the result should we have:

Step 11
Open the rock texture in the document. Place it above the two hue/saturation layers.

Create this texture layer a clipping mask and set its blending to overlay at 40-45 opacity.

Finally, fill the selection ( Shift+F5) with color of #873fa0.

Step 12
Then, go to filter and give this texture image high pass filter as follows:

Here is the result we should have now:


Finally, duplicate the texture layer and set the duplicate to soft light blending at 40% opacity. Here is the result:

Step 13
Open again the texture image in the document and place it above the other texture layers. Scale its size and locate it in the right part of the model’s face:

Create this texture layer a clipping mask and hide the unneeded parts by masking them.

Then, give this texture image high pass filter:

Set this texture layer to overlay at 100% opacity to get the result like the one here:

Duplicate the texture layer and set the duplicate to soft light blending at 100% opacity. Here is the result we should have now:

Step 14
In this step we will create some high light in the hair. Create a new layer by hitting Shift+Ctrl+N. Give this new layer a clipping mask, set its mode to overlay and fill it with 50% gray color:

Activate the dodge tool in the tool panel. Set the tool to highlight with opacity of 100%. Choose one of the hair brushes as the brush of the tool.

Now activate the pen tool. With the new layer still selected, create a curve path on the hair. Right click on the path to show the path command options. Choose stroke path and use the dodge tool as the tool to stoke. Make sure to check the simulate pressure

This is the result:

Do the same way to add more and more highlight on the hair.

After creating the desired highlight, duplicate the highlight layer and set the duplicate to soft light at 100% opacity to get the result as the one here:

Step 15
We are done with the model. Now we will proceed to create a background for the model. Create a new document with the following size:

Step 16
Fill the document ( Shift+F5 ) with black and paint a big soft white spot in the center of the document:

Step 17
Create a new layer and paint some pink color on this new layer.

Set this new layer to overlay at 80% opacity:

Step 18
Open the texture image in the document. Scale its size and locate it to fit the document:

Set the layer to multiply at 100% opacity and mask some part of the texture as indicated by the selection in the screenshot below. Here is the result we have:

Step 19
Now we will add some fire to the document. Firstly, cut out one of the flames from the flame image stock. Add the cut out to document. Set this flame layer to screen blending at 100% opacity.

Create color balance adjustment layer with a clipping mask above the flame layer:

This is the flame will look now:

Duplicate the flame layer and flip it horizontally to get the result like this one:

Step 20
Open the model to the document.

Step 21
Create a new document above the model. Create a clipping mask for this new layer. I named this layer white. Take the brush tool in the tool panel. Choose a very soft round brush set to about 10-20% opacity. With white color, paint some highlight on the model:

On different layers, paint more white highlight. To get the best result try to vary the blending of each layer among normal, screen and overlay.

Step 22
Create another new layer with a clipping mask above the white layer. On this new layer paint more highlight. Use the color of #fc5203 to give some reddish tone.

Step 23
Open again the rock texture in the document. Place this texture layer above the highlight layers.

Mask some part of the texture:

Duplicate the texture layer some times. Scale the sizes of the duplicates and arrange them in such way that they appear as the background for the overall scene. Mask unneeded parts of the duplicates. Set their opacities varied to 10-15% opacity normal blending.

Step 24
In this step we will alter the color of the model’s eyes. Go back to select the model layer. Select the one of the model’s eyes. Hit Ctrl+J to duplicate the eye. Then, move the duplicate to the top most position in the layer panel. Convert this eye layer into a smart object.

Now, with the eye layer still activated, go to image > adjustment > variations. Click more yellow option some times to give yellowish tone for the eye. Some more clicks on the more red option for the reddish tone. Finally, give few click on lighter option to give brighter tone. Click ok if we have find the best result.

Next, set the variation blending option to color dodge at 100% opacity.

Finally, set the eye layer to overlay at 100% opacity.

Do the same to alter the color for the other eye:

Step 25
Duplicate the texture image used in previous step 18. Move the duplicate to the top most position (above all the other layers) in the layer panel. Set this duplicate to overlay blending at 45% opacity. Mask a bit on the areas of the face and body. Use a very soft round brush at opacity of 20-30 %.

Duplicate the texture image one more time. Set this duplicate to overlay at 45% opacity. Mask almost the whole texture layer affecting the scene except the areas around the model’s stomach and lower part of the scene.

Step 26
In this step we will set overall color adjustment for the scene. To do this purpose, we will give the scene curve adjustment layer:

Set the curve to normal at 100% opacity. Duplicate the curve layer and set the duplicate to normal at 80% opacity:

Step 27
Create another new layer above the curve layers. With soft brush color paint some black color on the lower part of the scene:

Step 28
We should adjust the color of the model’s lip. To do this, make selection on the lips as we do in previous step 8. After creating the selection, give hue/saturation:

Set this hue/saturation to over lay at 100% opacity.

Duplicate the layer and set the duplicate to soft light at 75% opacity.

Step 29
In this step we will give more highlight to the eyes. Firstly, create a new layer and on this new layer create a square filled with black. Set this layer to color dodge.

Paint yellow lines on the lower eyelid. Here is the normal layer and the result in color dodge blended:

Duplicate the eyelid layer one time to get the brighter result.

Step 30
Again, create a new layer and make a black square on this new layer. Give this black square lens flare filter by going to filter > render > lens flare:

Set this layer to color dodge. Make sure to position the flare on the eyeball.

Add the same flare to the other eye.

Step 31
Again, create more new layer filled with black and set the layer to color dodge. Take the brush tool. Choose a very soft round brush set to 5-10% opacity. Paint some with color and yellow on the areas around the body. Here is the normal layer for our reference.

And this is the result in color dodge blending. Now we have some flame effect on the rock.

Step 32
We will give more light to the flame created in the step 31. To do this, create a new layer on which we create a square filled with a flare in it like the one in the previous step. Then, alter the shape of the square by warping it. Finally, place the altered flare where needed.

Set the layer to color dodge to get the result like the one here

Duplicate the flare layer as many as needed. Alter the shapes of the duplicates by warping them. Place each of them where needed:

And We’re Done!
You can view the final outcome below. I hope that you enjoyed this tutorial and would love to hear your feedback on the techniques and outcome.

FanExtra Member Download
Download the original .psd source files for this tutorial here, available exclusively for FanExtra members:
Please note that this tutorial is not a members only tutorial and is publicly available at our blog PSDFAN.com. It is provided here for ease of access for FanExtra members:

 Create a Lone Ranger Photo Manipulation
 Create a Fantasy Space-Age Light Angel Scene
 Members Area Tutorial: Create a Beautiful Mixed Media Portrait in Photoshop

Leave a comment
0 Comments:
No comments have been posted yet. Be the first!
Leave a Comment: