
Members Area Tutorial: Photo Manipulate a Floating, Burning Stone Monument
In today’s lesson you’re going to learn how to create a floating, burning stone monument, in this advanced photo manipulation tutorial.
Despite the complex outcome, you can follow along a series of practical, easy-to-follow steps to create this piece.
You’ll learn how to blend various photographic elements together seamlessly, how to create stunning fiery light effects, how to convert a regular person into a stone monument and much more!
Let’s get started!
Final Image

Resources Used In This Tutorial
Step 1
Create a new file with a width of 2800px and a height of 3500 px at 300 dpi (Dots per Inch). Background Contents should be White.
Step 2
First off, let’s open Stormy Sky 3 in Photoshop. We will be using sky from this stock image so we will need to transfer it to our main canvas and change it’s layer name to “Sky”.

Next, activate the Transform tool (Ctrl/Cmd +T), then while the “Sky” layer is selected and then resize it as shown below:

The result should be similar to this:

Step 3
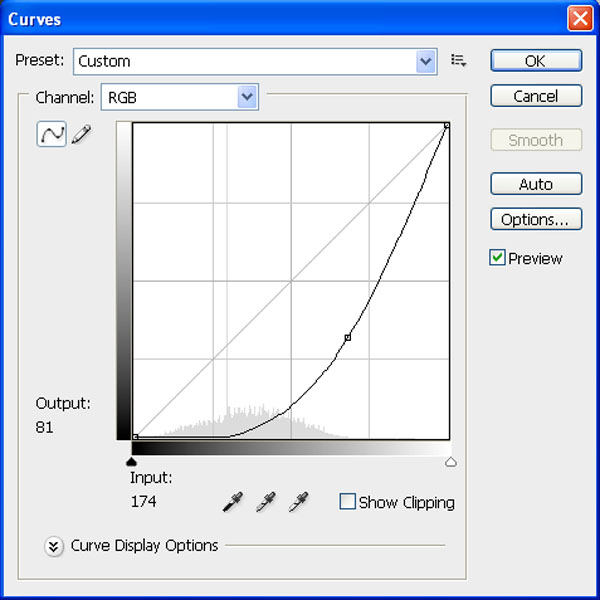
Now create new Curves adjustment layer from the bottom of layers palette. Press Alt+left click in between 2 layer’s (sky layer and Curves) to make a mask.
When the Curves box opens, input the following:

Now create new Hue/Saturation adjustment layer from the bottom of layers palette. Press Alt+left click in between 2 layer’s (sky layer and Hue/Saturation) to make a mask.
When the Hue/Saturation box opens, input the following:

Now create new Brightness/Contrast adjustment layer from the bottom of layers palette .Press Alt+left click in between 2 layer’s (Sky layer and Brightness/Contrast) to make a mask.
When the Brightness/Contrast box opens, input the following:

The result should be similar to this:

Now activate new layer and name it “back light” .
Now activate Brush tool (B) with these settings :
Brush size: 400px
Hardness: 0%
Opacity: 40%
Flow: 100%
Color: #ffffff
Now paint over the highlighted area.

The result should be similar to this:

Step 4
Now activate a new layer and name it “Mountain 1″ .
Now activate Brush tool (B) with these settings :
Brush size: 400px
Hardness: 0%
Opacity: 40%
Flow: 100%
Color: #000000
Proceed to randomly paint a mountain shape.

First off, let’s open our ‘Lava’ image in Photoshop. We will be using lava texture from this stock image so we will need to transfer it to our main canvas.

Create a clipping mask. See as below :

The result should be similar to this:

Now add more layers of Lava texture.

Step 5
Now Create new hue/saturation adjustment layer from the bottom of layers palette. Press Alt+left click in between 2 layer’s (Lava layer and hue/saturation) to make a mask:
When the hue/saturation box opens, input the following:

Now Create new Color balance adjustment layer from the bottom of layers palette. Press Alt+left click in between 2 layer’s (Lava layer and Color balance) to make a mask.
When the Color balance box opens, input the following:

Now Create new Brightness/Contrast adjustment layer from the bottom of layers palette. Press Alt+left click in between 2 layer’s (Lava layer and Brightness/Contrast) to make a mask.
When the Brightness/Contrast box opens, input the following:

Select the mask for your Brightness/Contrast adjustment layer.
Activate the Brush tool (B) with these settings :
Brush size: 400px
Hardness: 0%
Opacity: 40%
Flow: 100%
Color: #000000
Now paint over the highlighted area.

Create a new Curves adjustment layer from the bottom of layers palette. Press Alt+left click in between 2 layer’s (Lava layer and Curves) to make a mask.
When the Curves box opens, input the following:

Now select mask layer of Curves.
Now activate Brush tool (B) with these settings:
Brush size: 400px
Hardness: 0%
Opacity: 40%
Flow: 100%
Color: #000000
Now paint over the highlighted area.

Now we can see we get somthing like a lava rock mountain:

Step 6
Now activate a new layer and name it “Mountain 2″ .
Now activate Brush tool (B) with these settings :
Brush size: 400px
Hardness: 0%
Opacity: 40%
Flow: 100%
Color: #000000
Now randomly paint a mountain shape.

Use Lava texture and make a mask with mountain 2 layer like we have done in previous steps .

Step 7
Now Create new hue/saturation adjustment layer from the bottom of layers palette. Press Alt+left click in between the 2 layer’s (Lava layer and hue/saturation) to make a mask:
When the hue/saturation box opens, input the following:

Now create a new Color balance adjustment layer from the bottom of layers palette. Press Alt+left click in between 2 layer’s (Lava layer and Color balance) to make a mask.
When the Color balance box opens, input the following:

Now Create new Brightness/Contrast adjustment layer from the bottom of layers palette. Press Alt+left click in between 2 layer’s (Lava layer and Brightness/Contrast) to make a mask.
When the Brightness/Contrast box opens, input the following:

Now select mask layer of Brightness/Contrast .
Now activate Brush tool (B) with these settings :
Brush size: 400px
Hardness: 0%
Opacity: 40%
Flow: 100%
Color: #000000
Now paint over the highlighted area.

The result should be similar to this:

Step 8
Now activate a new layer and name it “Mountain 3″ .
Now activate Brush tool (B) with these settings :
Brush size: 400px
Hardness: 0%
Opacity: 40%
Flow: 100%
Color: #000000
Now randomly paint a mountain shape.

Now,let’s open the Lava Texture 5 in Photoshop. We will be using the Lava Texture 5 from this stock image so we will need to transfer it to our main canvas.
Click the Lava Texture 5 and press V to activate the Move Tool. Left-click the image and drag the image to the main canvas and change layer name to “Lava Texture 5″.

Use Lava texture and make a mask with mountain 3 layer like we have done in previous steps .

Now Create new hue/saturation adjustment layer from the bottom of layers palette.Press Alt+left click in between 2 layer’s (Lava Texture 5 layer and hue/saturation) to make a mask:
When the hue/saturation box opens, input the following:

Now Create new Curves adjustment layer from the bottom of layers palette.Press Alt+left click in between 2 layer’s (Lava Texture 5 layer and Curves) to make a mask:
When the Curves box opens, input the following:
The result should be similar to this:

Step 9
Go back to the “Sky” layer and select it with it’s adjustment layers then make a right click on sky layer and select duplicate .Then move all duplicate layer above mountain layers.See as below :

Now add vector mask from the bottom of layers palette .
Now activate Brush tool (B) with these settings :
Brush size: 400px
Hardness: 0%
Opacity: 40%
Flow: 100%
Color: #000000
Now paint over the highlighted area.

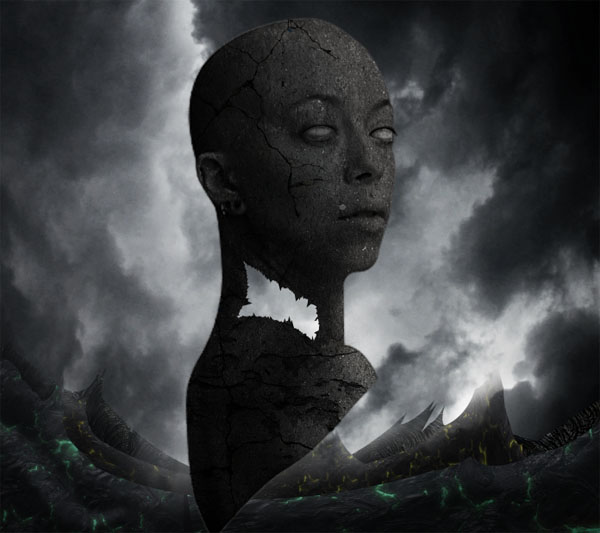
The result should be similar to this:

Step 10
First off, let’s open the ‘Turque’ image found in the resources section for this tutorial in Photoshop. We will be using the woman from this stock image so we will need to transfer her to our main canvas.
Use the pen tool to extract the woman from her background and drag the image to the main canvas and change layer name to “Girl”.

Next, activate the Transform tool (Ctrl/Cmd +T), then while the “Girl” layer is selected and then resize it as shown below:

Now make a duplicate of girl layer .Then goto filter and open “High pass” .
When the High Pass box opens, input the following:

When the Gaussian Blur box opens, input the following:

The result should be similar to this:

Now create new Levels adjustment layer from the bottom of layers palette .Press Alt+left click in between 2 layer’s (Girl layer and Levels) to make a mask.
When the Levels box opens, input the following:

Now desaturate the girl layer and merge it with levels layer .:

Step 11
Now, let’s open rock texture 1 in Photoshop. We will be using the rock texture 1 from this stock image so we will need to transfer it to our main canvas.
Click the rock texture 1 and press V to activate the Move Tool. Left-click the image and drag the image to the main canvas and change layer name to “Texture 1″.

Change the layer mode to “Overlay” .

Apply a clipping mask to your texture layer and the result should be similar to this: Merge the layer’s together.

Now Create new Brightness/Contrast adjustment layer from the bottom of layers palette. Press Alt+left click in between the 2 layer’s (girl layer and Brightness/Contrast) to make a mask.
When the Brightness/Contrast box opens, input the following:

Now Create new Curves adjustment layer from the bottom of layers palette. Press Alt+left click in between 2 layer’s (Curves layer and Brightness/Contrast) to make a mask.
When the Curves box opens, input the following:

This should darken your stone head object:

Now, let’s open the cracked paving slab texture in Photoshop. We will be using the cracke texture from this stock image so we will need to transfer it to our main canvas.
Click the cracked paving slab and press V to activate the Move Tool. Left-click the image and drag the image to the main canvas and change layer name to “cracke 1″.

Now activate Brush tool (B) with these settings :
Brush size: 400px
Hardness: 0%
Opacity: 40%
Flow: 100%
Color: #000000
Now paint over the highlighted area..

The result should be similar to this: .

Change it’s layer mode to “Multiply” .

Step 12
Now create new Levels adjustment layer from the bottom of layers palette. Press Alt+left click in between 2 layer’s (‘cracke 1′ layer and the Levels layer) to make a mask.
When the Levels box opens, input the following:

Now Create new Curves adjustment layer from the bottom of layers palette. Press Alt+left click in between 2 layer’s (Curves layer and cracke 1) to make a mask.
When the Curves box opens, input the following:

The result should be similar to this: .

Add more crack layers. See below for a reference:

Step 13
Now,make a new layer and name it “Stone eyes”.
Again open the rock texture 1 put it above girl layer and make selection of eye and delete the other part of the texture.

Now activate a new layer and name it “Eyes shadow” :
Now activate Brush tool (B) with these settings :
Brush size: 50px
Hardness: 0%
Opacity: 40%
Flow: 100%
Color: #000000
Now paint over the highlighted area.

The result should be similar to this:

Now activate a new layer and name it “Light part” .
Now activate Brush tool (B) with these settings :
Brush size: 200px
Hardness: 0%
Opacity: 40%
Flow: 100%
Color: #000000
Now paint over the highlighted area.

The result should be similar to this:

Step 14
Now lets go back to the girl layer and remove some part of his body.See as below :
Now activate new layer and name it “Neck back part” and fill #505050 as color .

The result should be similar to this:

Now activate Brush tool (B) with these settings :
Brush size: 100px
Hardness: 0%
Opacity: 40%
Flow: 100%
Color: #000000
Now paint over the highlighted area.

The result should be similar to this:

Step 15
Now, let’s open fire – shaedsofgrey in Photoshop. We will be using the fire from this stock image so we will need to transfer it to our main canvas.
Click the fire and press V to activate the Move Tool. Left-click the image and drag the image to the main canvas and change layer name to “fire”.

Next, activate the Transform tool (Ctrl/Cmd +T), then while the “fire” layer is selected and then resize it as shown below:

The result should be similar to this:

Now Create new Curves adjustment layer from the bottom of layers palette. Press Alt+left click in between 2 layer’s (Curves layer and fire) to make a mask.
When the Curves box opens, input the following:

The result should be similar to this:

Now, let’s open Sparks – emodrazo in Photoshop. We will be using the sparkls from this stock image so we will need to transfer it to our main canvas.
Click the sparks and press V to activate the Move Tool. Left-click the image and drag the image to the main canvas and change layer name to “sparks”.

The result should be similar to this:

Activate a new later and name it “Fire light” :
Now activate Brush tool (B) with these settings :
Brush size: 100px
Hardness: 0%
Opacity: 40%
Flow: 100%
Color: #674b3b
Paint over the highlighted area.

The result should be similar to this:

Step 16
Let’s return to our ‘girl’ layer and this time remove some parts from her head and the lower part of her body.

The result should be similar to this:

Now activate the pen tool and draw some random shapes .

Fill them with a black color.

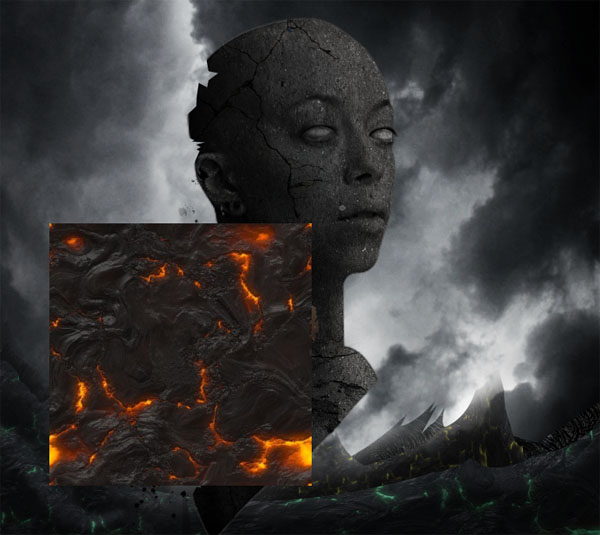
Now, let’s open the Lava in Photoshop. We will be using the Lava from this stock image so we will need to transfer it to our main canvas.
Click the Lava and press V to activate the Move Tool. Left-click the image and drag the image to the main canvas and change layer name to “Lava1″.
Now create a clipping mask with the lava texture.

The result should be similar to this:

Add some more shapes.

Step 17
Now, let’s open the Lava in Photoshop. We will be using the Lava from this stock image so we will need to transfer it to our main canvas.
Click the Lava and press V to activate the Move Tool. Left-click the image and drag the image to the main canvas and change layer name to “Lava1″.

The result should be similar to this:

Now add vector mask from the bottom of layers palette.
Now activate Brush tool (B) with these settings :
Brush size: 400px
Hardness: 0%
Opacity: 40%
Flow: 100%
Color: #000000
Now paint over the highlighted area.

The result should be similar to this:

Now Create new Curves adjustment layer from the bottom of layers palette. Press Alt+left click in between 2 layer’s (Curves layer and lava) to make a mask.
The result should be similar to this:

Now activate Brush tool (B) with these settings :
Brush size: 400px
Hardness: 0%
Opacity: 40%
Flow: 100%
Color: #f4be00
Now paint over the highlighted area.

The result should be similar to this:

Add more lava layers.

Step 18
Now activate a new layer and name it “tears”.
Now activate pen tool and draw tears.

Bring Lava stock and make a mask.

Now apply same effect with the other eye also.

Step 19
Now, let’s open the Abstract in Photoshop. We will be using the Abstract from this stock image so we will need to transfer it to our main canvas.
Click the Abstract and press V to activate the Move Tool. Left-click the image and drag the image to the main canvas and change layer name to “Stone circle”.

Next, activate the Transform tool (Ctrl/Cmd +T), then while the “Stone circle” layer is selected and then resize it as shown below:

Now add vector mask from the bottom of layers palette.
Now activate Brush tool (B) with these settings:
Brush size: 400px
Hardness: 0%
Opacity: 40%
Flow: 100%
Color: #000000
Now paint over the highlighted area.
The result should be similar to this:

Repet the same process create a mask with the lava layer.

The result should be similar to this:

Step 20
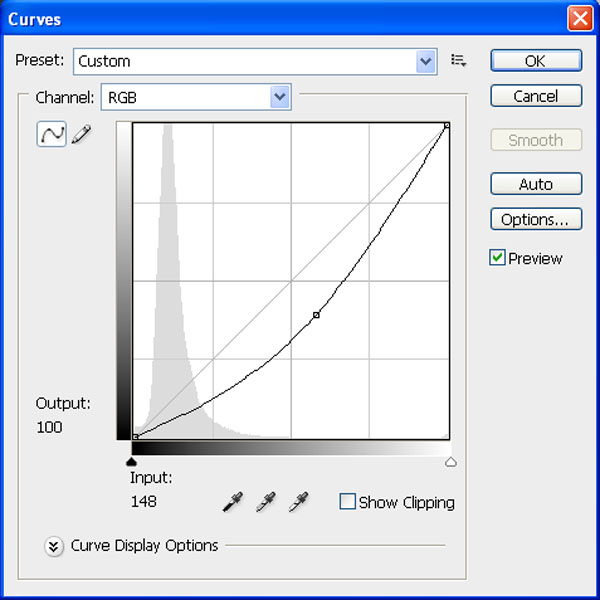
Now Create new Curves adjustment layer from the bottom of layers palette .Press Alt+left click in between 2 layer’s (Curves layer and Stone circle) to make a mask.
When the Curves box opens, input the following:

Now Create new Curves adjustment layer from the bottom of layers palette. Press Alt+left click in between 2 layer’s (Curves layer and Stone circle) to make a mask.
When the Curves box opens, input the following:

Now Create new Brightness/Contrast adjustment layer from the bottom of layers palette. Press Alt+left click in between 2 layer’s (Brightness/Contrast layer and Stone circle) to make a mask.
When the Brightness/Contrast box opens, input the following:

The result should be similar to this:

Step 21
Now open Lens correction.

When the Lens correction box opens, input the following:

The result should be similar to this:

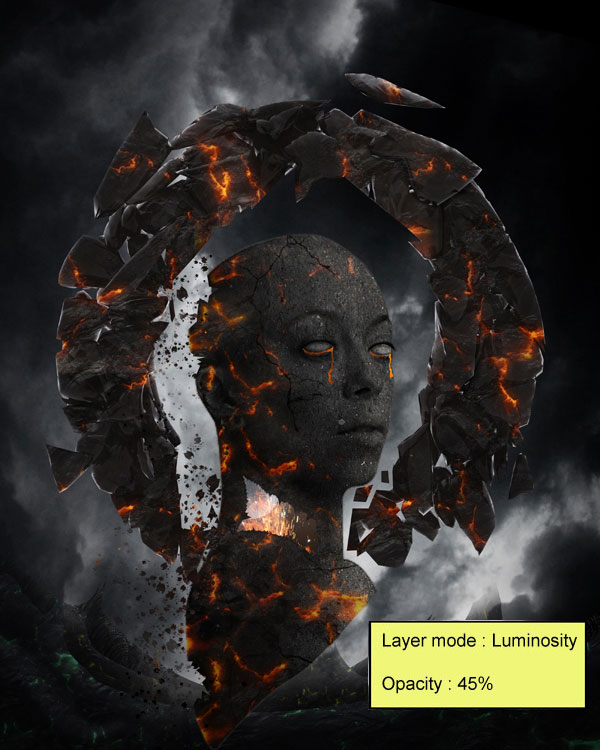
Now create a Gradient map adjustment layer which can be found by pressing on the Create New Fill/Adjustment layer button shown on the layer window:
When the Gradient map box opens, input the following:

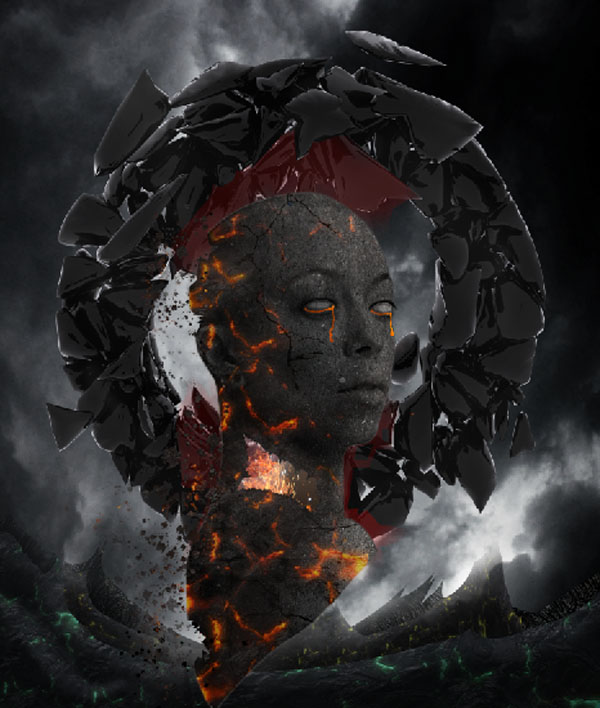
The result should be similar to this:
And We’re Done!
Here’s the final outcome we’ve created:

Member File Download
Download the original .psd file for this tutorial here:

 Members Area Tutorial: Photo Manipulate a Fantasy Floating Park Landscape
 Learn How to Create a Cyborg Warrior Being
 Members Area Tutorial: Photo Manipulate a Magical Desert Scene

Leave a comment
0 Comments:
No comments have been posted yet. Be the first!
Leave a Comment: