
Create An Emotional Sunset Scene Photo Manipulation
In this tutorial I’ll show you how to create a beautiful emotional sunset scene. We’ll work with manipulating techniques, blending, masking, painting and more.
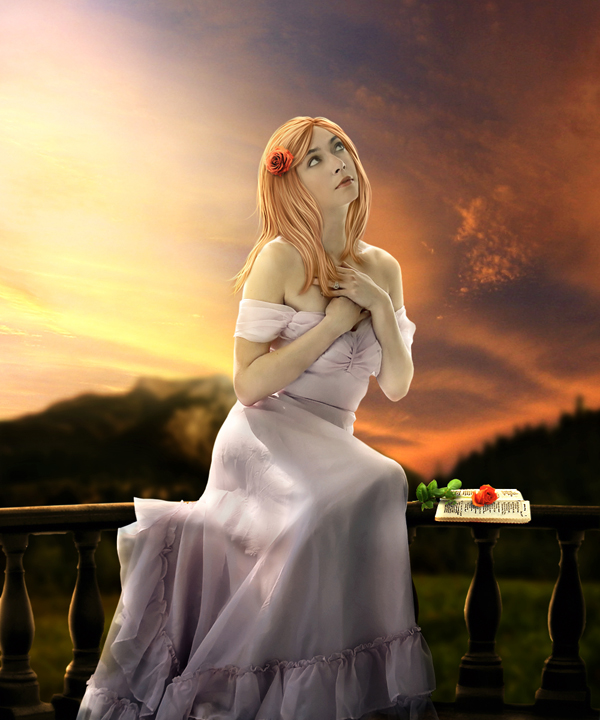
Final Image
As always, this is the final image that we’ll be creating:
Step 1
Create a new document and fill it with white ( or any color you like). I use the size of 1000×1200 px.
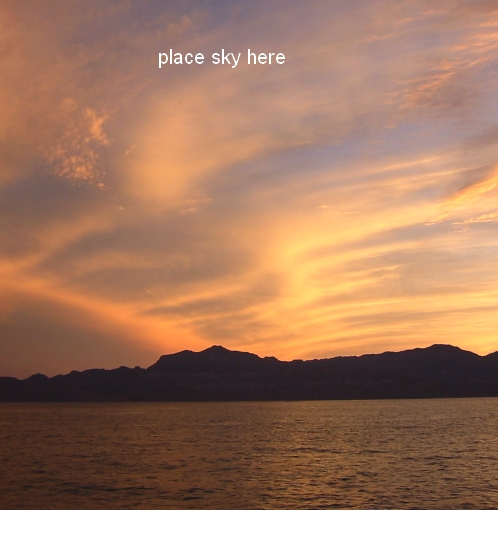
Open sky stock. Move it ( press M to active Move Tool) into the white canvas, resize ( use Cmd/Ctrl+T to do it) and place it as shown below:
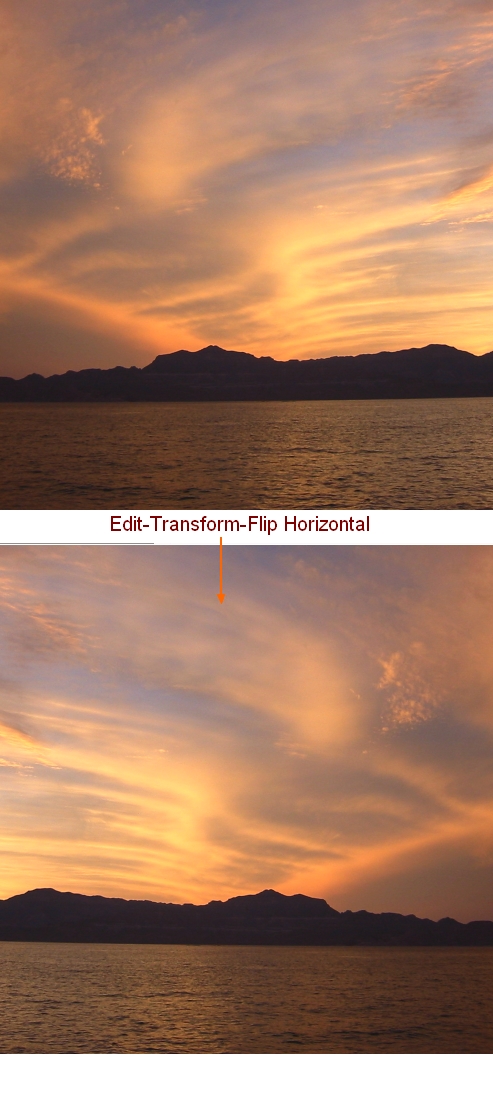
Flip it by choosing Edit-Transform-Flip Horizontal:
Step 2
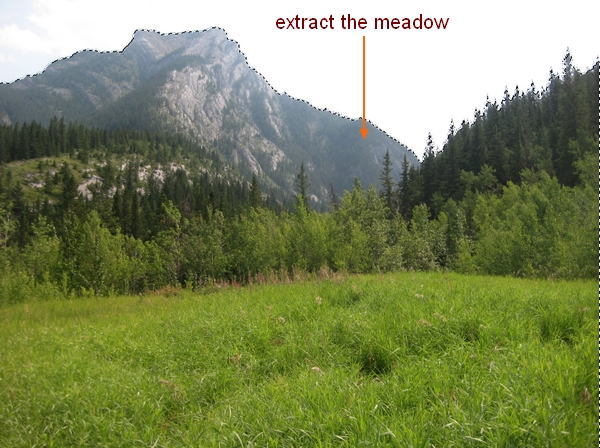
Open meadow image. Use Magic Wand Tool ( or any methods you’re familiar with) to extract the meadow from background). Drag it into our document and downsize to fit . Place it at the bottom of our picture:

Because the meadow is set as background so we will blur it to create some depth. On meadow layer, go to Filter-Blur-Gassian Blur and set radius as 5:

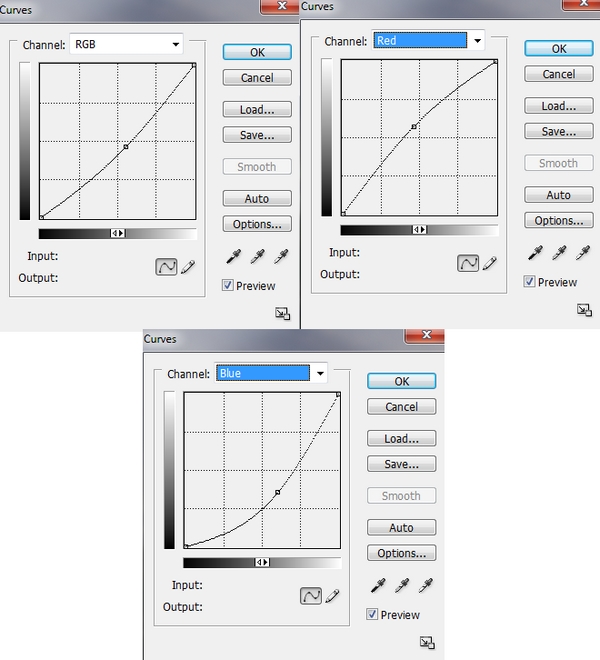
We can see that the contrast and color of meadow don’t match sky. To correct it, I use an adjustment layer with Clipping Mask for meadow. On this layer, go to Layer-New Adjustment Layer-Curves:


This is result we have:

Step 3
Open the stock with balcony. Cut it out and move it into our main picture and resize. Because it will be positioned at foreground so I only take its upper part:


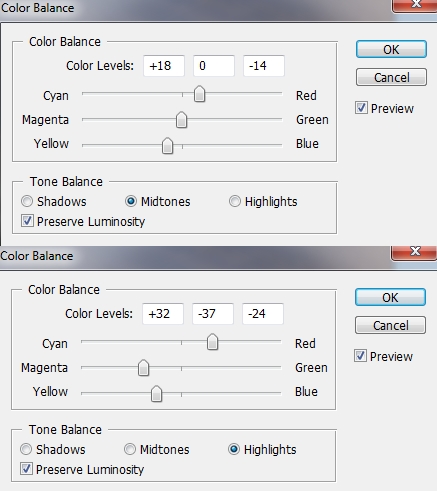
I add two adjustment layers ( with Clipping Mask) for balcony layer to change its color.
Curves:
Color Balance:

Step 4
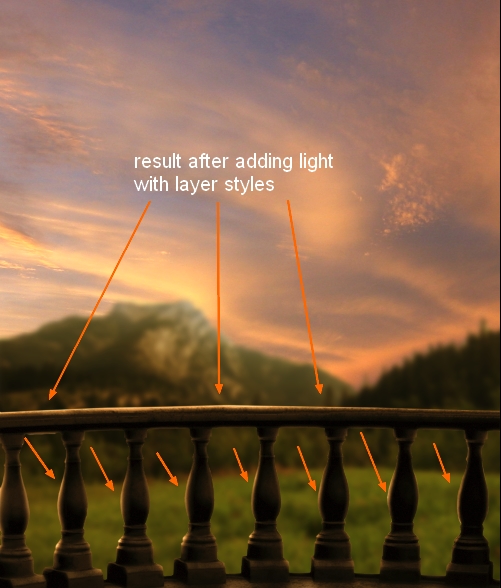
I want to make the main light source come from upper left so the balcony must get some reflected light. Right click balcony layer, choose Blending Options:
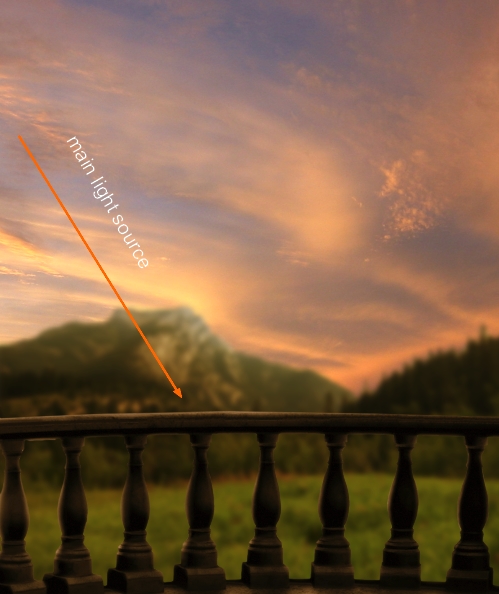
This what we have so far:
Step 5
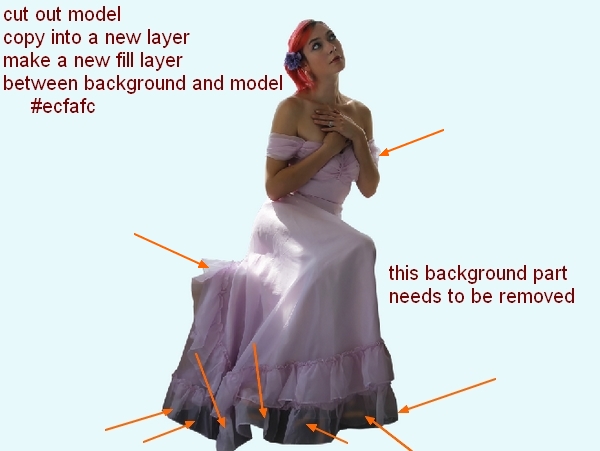
Open model stock. First use your favorite method to extract her from background. As you see I don’t take all her hair as I will paint a new one later. I make a new fill layer between extracted model and background with a light color (#ecfafc) but you can choose any bright colors you want. Also you can notice that some parts of background is still seen though transparent part of dress bottom, model arm, the back of dress and we need to remove them.
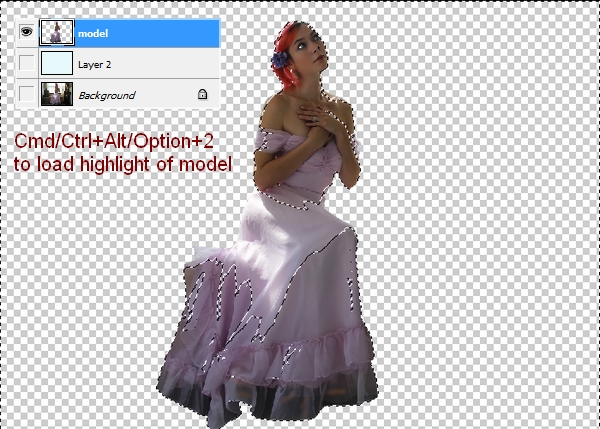
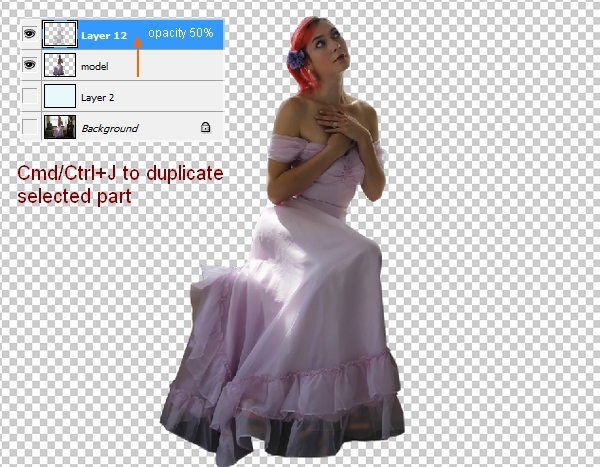
Now turrn off fill layer and background. Press Cmd/Ctrl+Alt/Option+2 to load bright part of model. Hit Cmd/Ctrl+J to copy this selection into a new layer and lower opacity to 50%:
Turn on all layers then add layer mask for model one. Hold Cmd/Ctrl while clicking on copied layer ( layer 12 on screenshot) to load its selection:
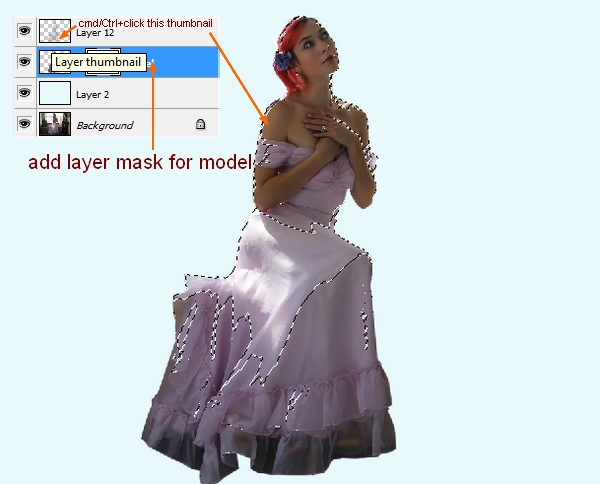
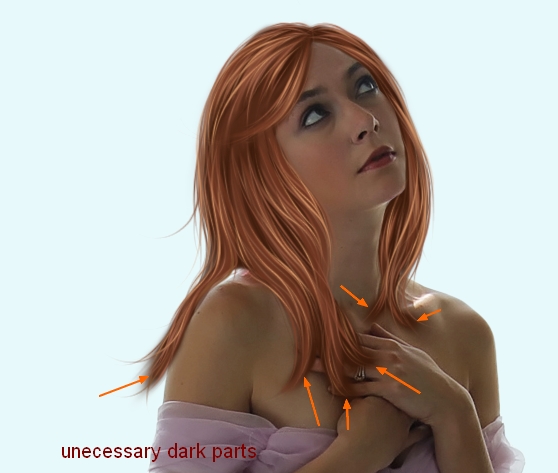
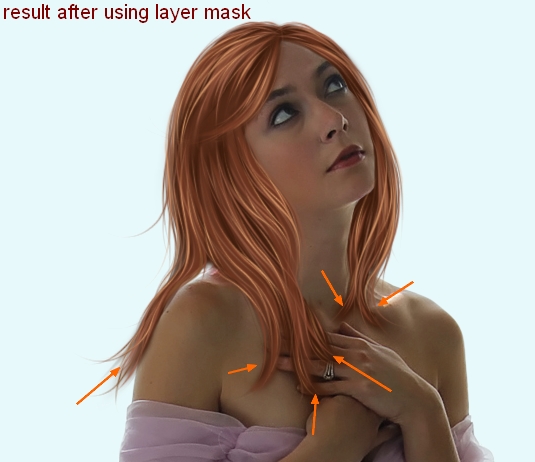
On model layer mask, use soft black brush with opacity and flow about 60-70% to paint within the dress bottom and brush with opacity about 30-40% for the part on model arm and the back part to remove the background ( as they are less transparent) avoiding the contour of dress. Here is my result:

Step 6
Since this step we’re going to paint a new hair for model (If you don’t want to draw you can use a hair Photoshop brush instead). As you may know painting hair is really a tricky job. I’ll try to express how I made this hair in the best way I can. Use a graphic tablet or you must have double patience (or more) with mouse.
We can’t use original hair as a reference so we have to paint a shape for this new hair. I recommend you to find a photograph with similar pose to look at and you can know how the hair shape should be. There are many kinds of hair style ( so many ways of painting) but for this tutorial purpose ( a young dreaming girl with a classic dress in a gorgegous twilight scene ) I decide to create a medium-length hair with very small curly strands falling naturally. Because model head bends gently to left side ( from viewers eyes) so the part on the left side must be a bit longer and the one on right side a bit shorter ( unless you want to draw a strange surreal hair or revolting one ![]() ).
).
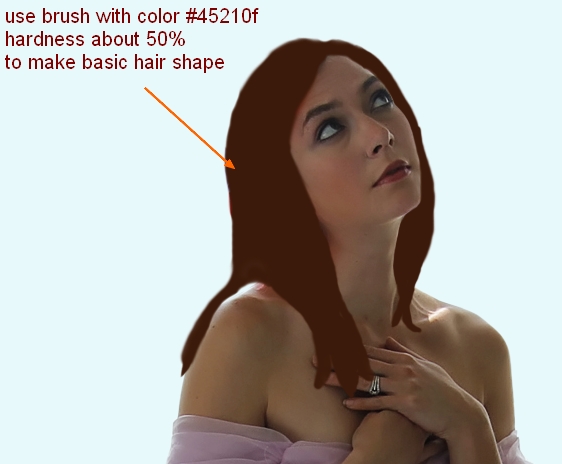
Create a new layer on the top. Use brush with a dark color to make a basic hair shape covering the original hair. I choose color #45210f and brush with hardness about 50%. You don’t need to draw a really neat and perfect edged one as we will add more element to it later.
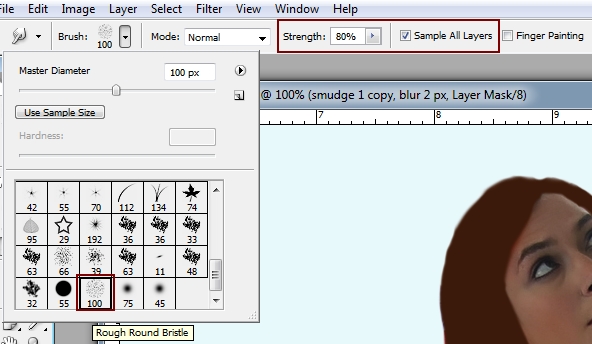
Make a new layer and choose Smudge Tool ( press R key). Go to brush menu and choose Reset Brushes and your brush will come back to default. Choose Rough Round Bristle brush with settings below for Smudge Tool:
Be sure to check the ‘sample all layers’ box to ensure that your smudging will effect your underlying layers.
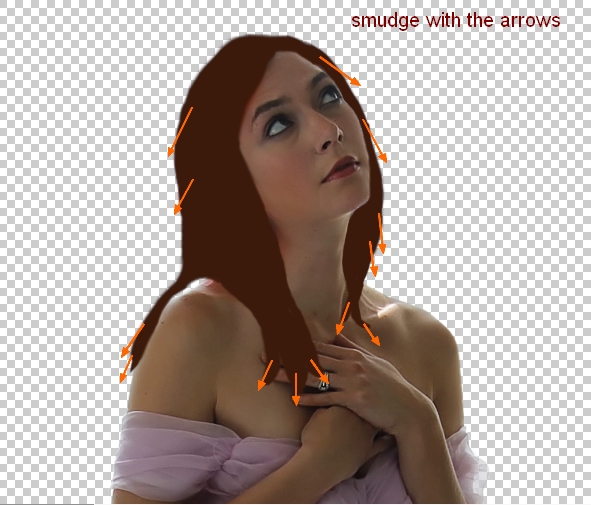
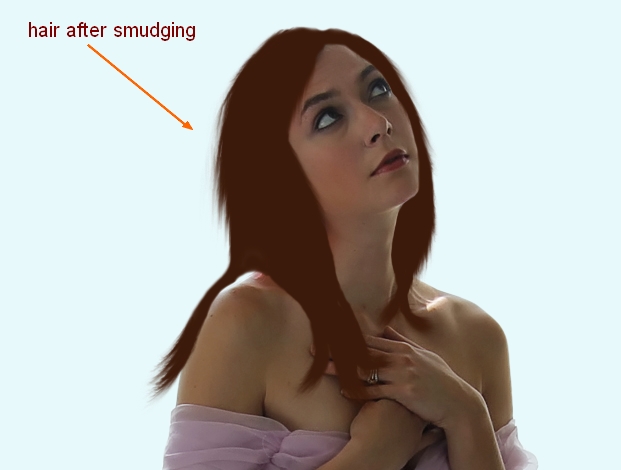
Lower size of this brush to about 30-40 px to fit the part that will be smudged. Turn off background, fill layer so they will not be impacted by smudging process. Use this brush tool to stretch out the hair shape and create some small and tiny hair strokes. It must follow the direction of the falling strands. You can see how I do it with the arrows below:
And my result after turning on fill layer:
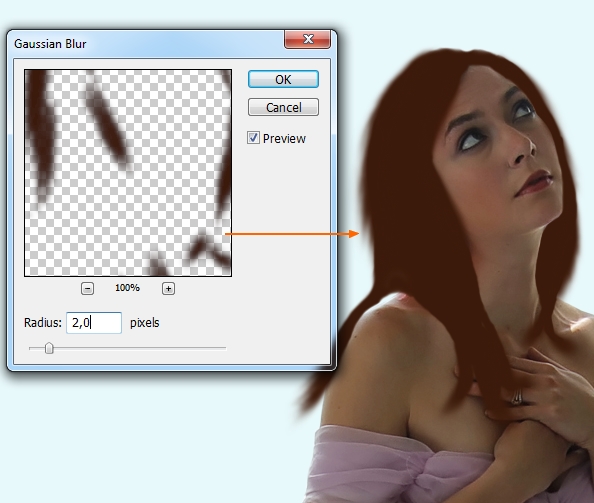
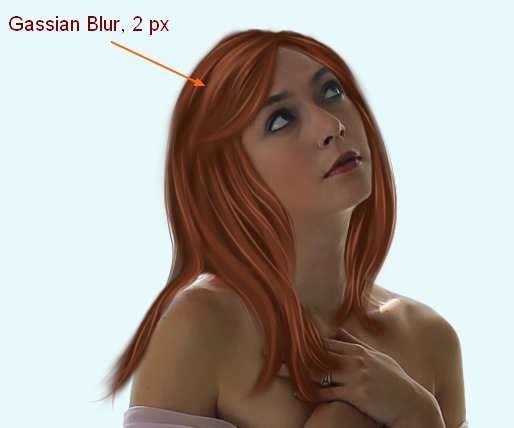
To soften the hair edges, on smudge layer, apply Gassian Blur with 2 px:
Step 7
Make a new layer and still keep brush color as #45210f. Choose another brush from brush drop down menu ( Spatter 24) and press F5 to make another settings for it:
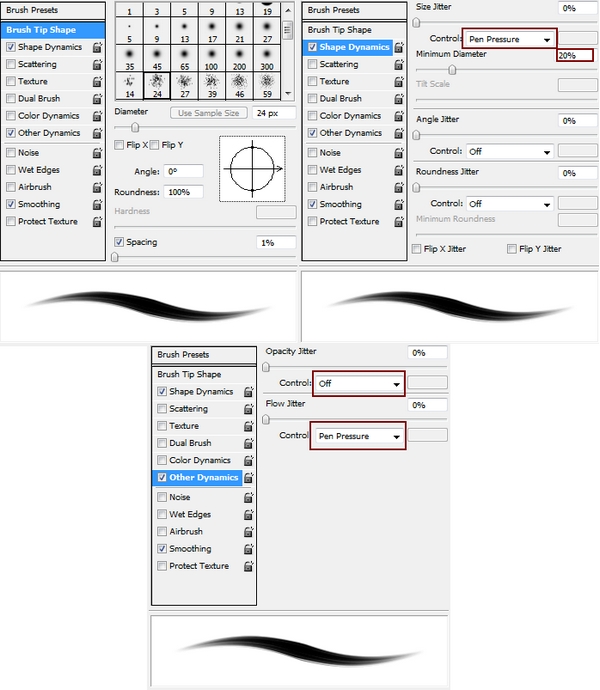
These settings only work if you’re using a graphic tablet. You can use Fade control instead of Pen Pressure for your mouse.
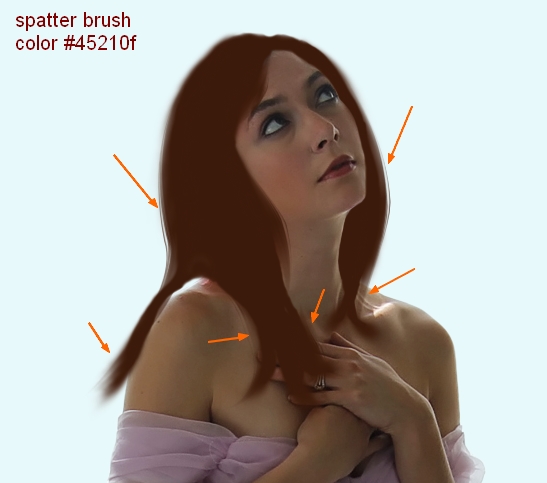
I use this brush to make the hair look fuller by painting along hair edges and vary brush size as some parts smaller than anothers . Press harder or softer if you want a bolder or lighter stroke. Then I add layer mask and erase any unwanted parts:
Step 8
In this step we will add basic strands for model. A very important thing that you don’t need to fill over the hair with many long individual strands that go from the top to the bottom as the hair is not only individual strands but the combination of the shapes between shadows and hightlights. When one part of the hair has nearly similar color or brightness or darkness, it looks smoother, more natural and you don’t need to draw too much. Leave some such spaces on the hair and it will create a depth.
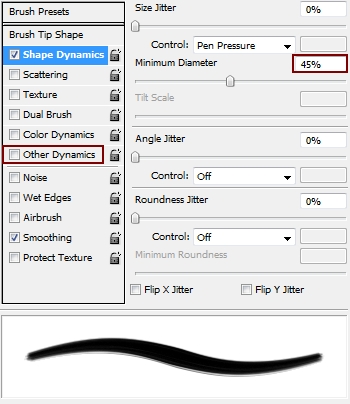
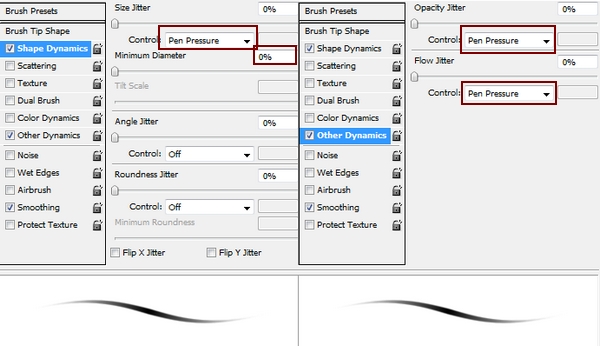
Create a new layer on the top and continue with spatter brush but change color to #5a301c ( lighter than basic shape) . Change settings for this brush ( change Minimum Diameter to 45% and uncheck Other Dynamics):
I vary brush size while painting over the hair. This step needs smooth strokes. It might be hard if you’re not familiar with your tablet but you can achieve with time and practice. Then I apply Gassian Blur with 0,5 px for these strokes:

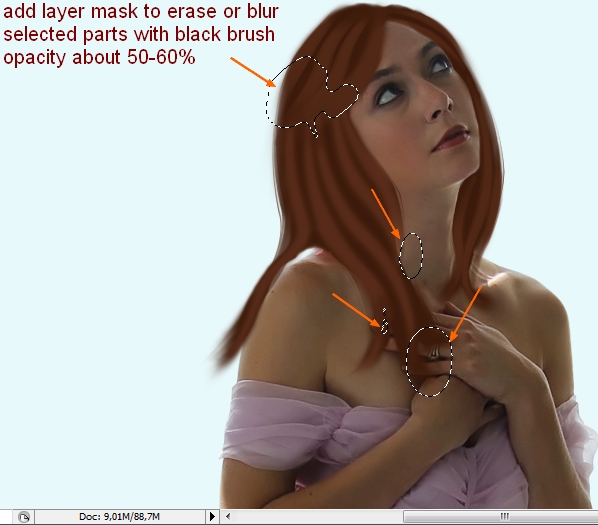
Add layer mask to erase or blur selected parts with soft black brush, opacity 100% or 50-60%:
Create a new layer and I continue painting smaller strokes with brighter color on strands ( #783f28) then lower opacity of this layer to 80%:

Step 9
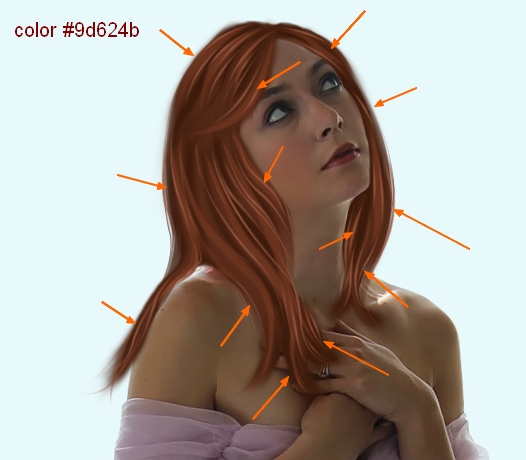
Continue with a new layer, use basic hard brush with color #9d624b and size from 4-6 px with settings like below to add some highlight strands. Remember to follow the direction of basic strands ( hair highlights usually go on the curves) but you must vary the curves as hair strokes are not always go in one position.
Make a new layer ( keep same brush, same color and settings), and draw some more hair strands on the top of model head then blur with with Gassian Blur, 2 px:

New layer and change foreground to #9a573e. Make some random single strokes to add some hightlight and break the blocks of hair strands. You can see how I add them but you can draw wherever you feel good. Don’t add too much as we will use some another colors later.

Step 10
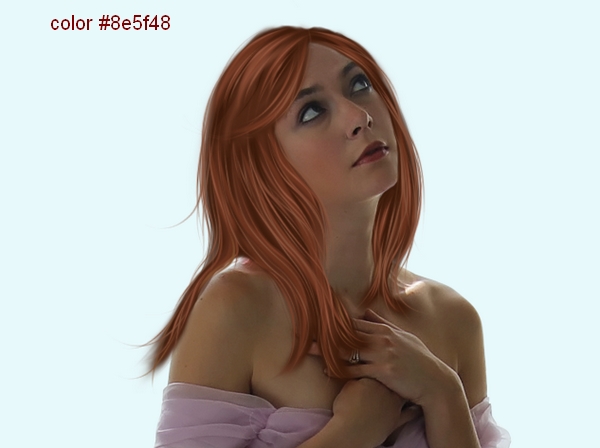
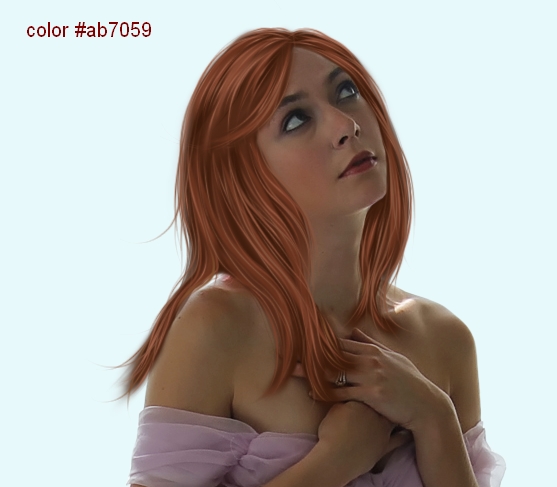
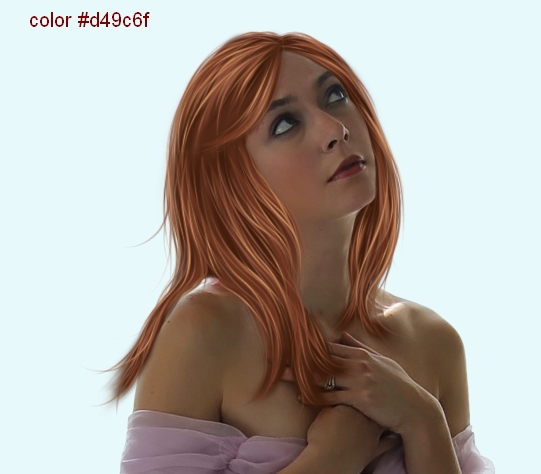
Create three new layers and lower the size of brush a bit. On each layers I use different colors ( brighter and lighter than previous ones – #8e5f48, #ab7059, #d49c6f) to add more details and texture for the hair, especially flying ones out of the head to make the hair more natural. On the screenshot below you can see result achieved after adding hair with such colors. On the last layer I use a really bright color ( #d49c6f ) to make the hair pop :
Step 11
I notice that there are some unecessary dark part at the bottom of hair strands. It’s caused by the basic hair shape and smudging. So I come back to these layers , add layer mask for them then erase and blur these ones:
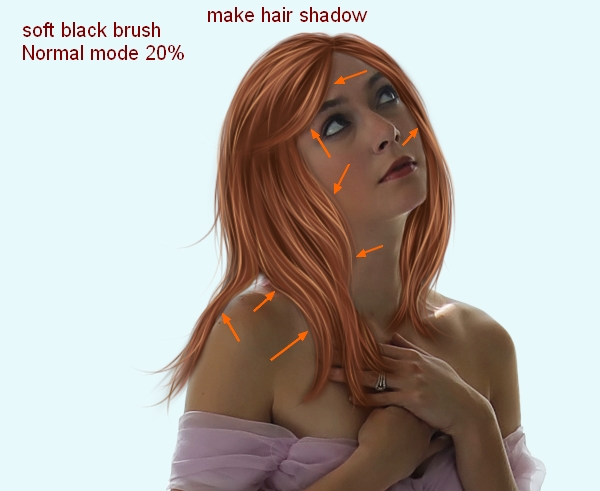
Make a new layer and place it under all hair ones. Use black brush with small size to paint along hair shape to make shadow for it. Lower opacity to 20%:
We’ve finished the hair! Hope this process won’t bore or make you tired as we still have a long road ahead ![]() .
.
Step 12
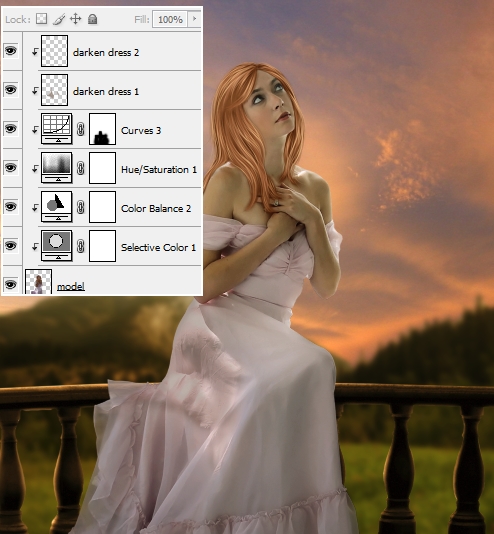
Merge all transparent layers ( extracted model, hairs and hair shadow). Now our girl is ready. Move her into sunset picture, resize and place her onto the balcony:

Color and brightness of model don’t fit the background so I use some adjustment layers ( Clipping Mask) to correct them ( look at step 3 if you forgot how to make Clipping Mask options).
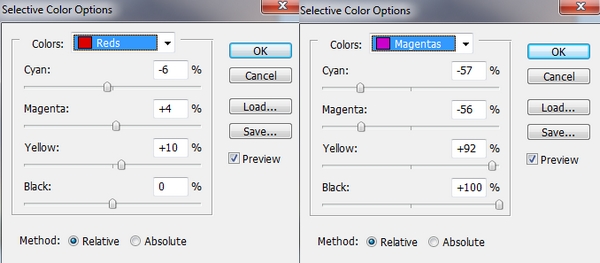
Selective Color:
Color Balance:

Hue/Saturation:

Curves:
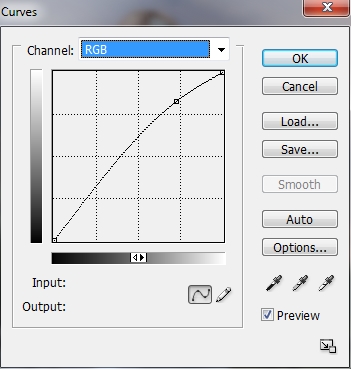
Use soft black brush on Curves layer mask to remove the highlight on model dress as it’s brighter than another parts already.

Step 13
I want to balance the brightness of model (will add light for her later) so I need to fix some parts of dress and model arms that are much brighter than the rest. Add two new layers ( Clipping Mask) and use soft brush with color #aa9c92 painting on these parts and change the mode to Multipy 70%:
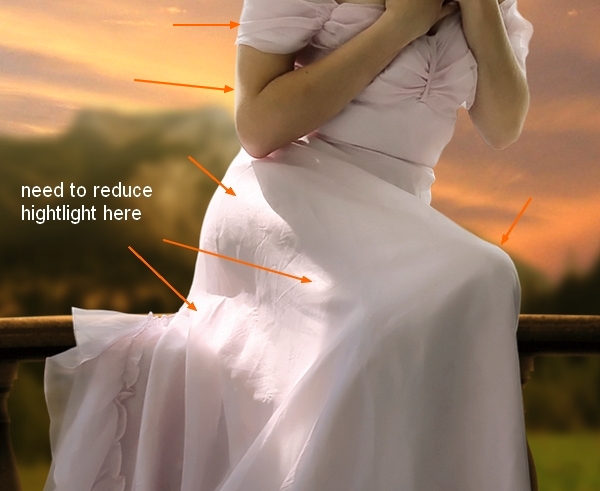


Name these layers as “darken dress 1″ and “darken dress 2″:
Create a new layer (Clipping Mask) and use brush painting on the right shoulder with color #9e8a70. Set the mode as Multipy 50%:

Step 14
I want to retouch model skin to create a smoother look. Make a new layer ( Clipping Mask) and use Blur Tool ( R key) with Strength about 60% to paint under model eyes and along the arms ( remember to check Sample All Layers on property bar).
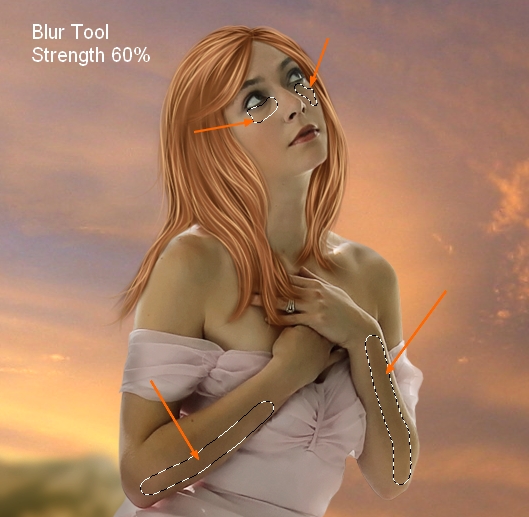
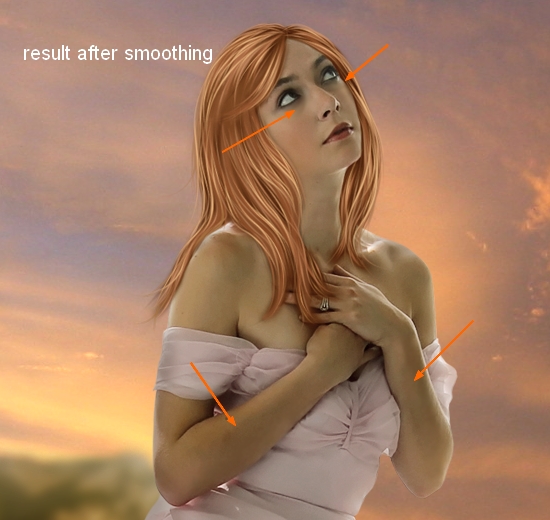
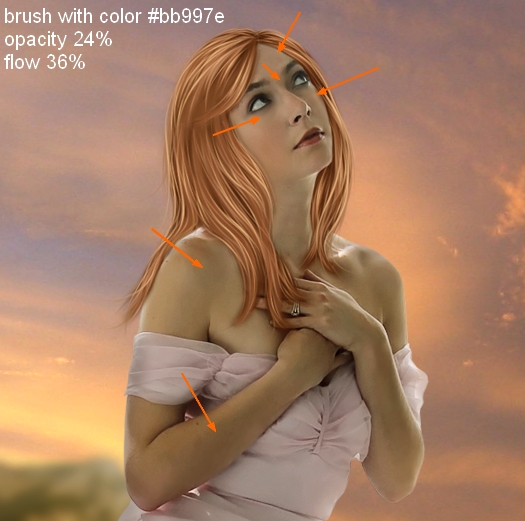
To make some parts of model skin brighter, make a new layer and use soft brush with color #bb997e, opacity about 24%, flow about 36%. Paint gently around the eyes, forehead and dark parts on arms and shoulders. Don’t paint twice on one part as you can lose the details.
New layer and I use brush with color #c6bfb6. Paint over the skin and some parts of hair. Put the mode as Soft light 100%:

Step 15
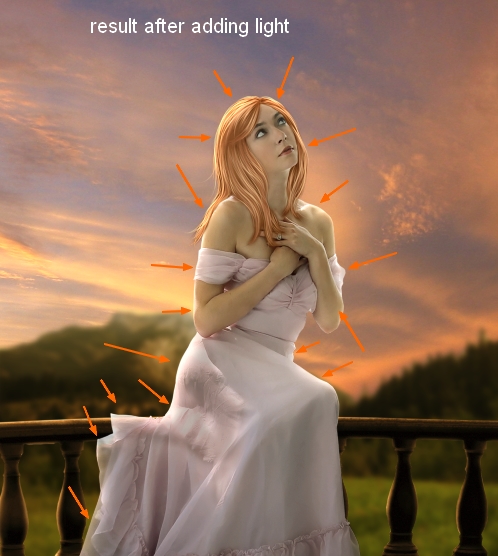
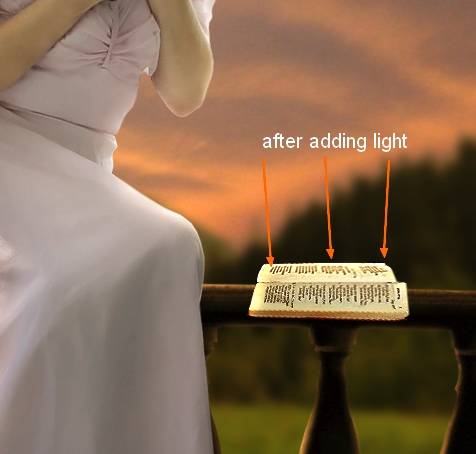
Add reflected light from background to model as we did with balcony:
Step 16
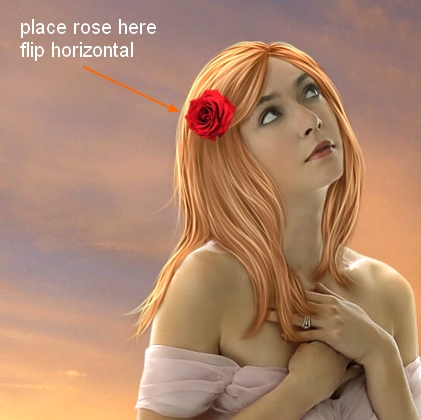
Extract rose 1 and position it on model hair, scale it down and flip it horizontally as we did in step 1.
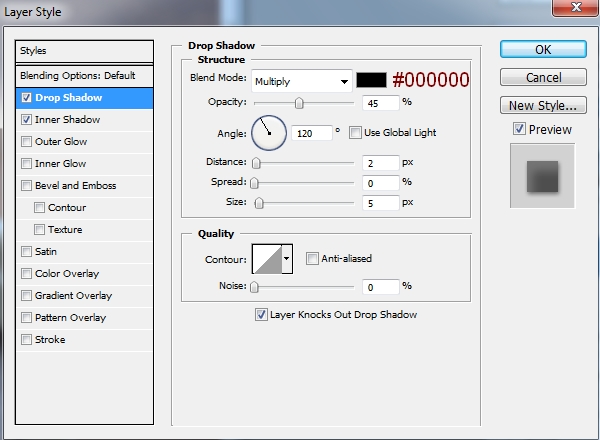
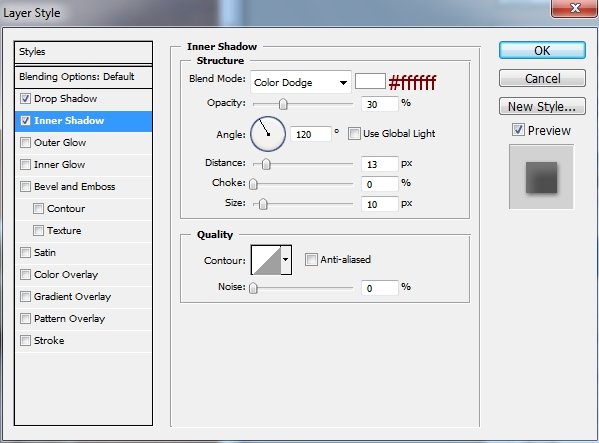
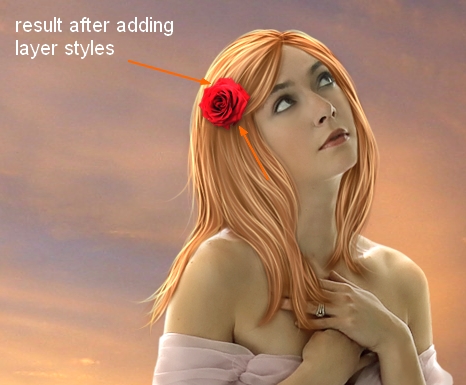
I use Layer Styles to add shadow and light for this rose. Right click rose layer, choose Blending Options:
Step 17
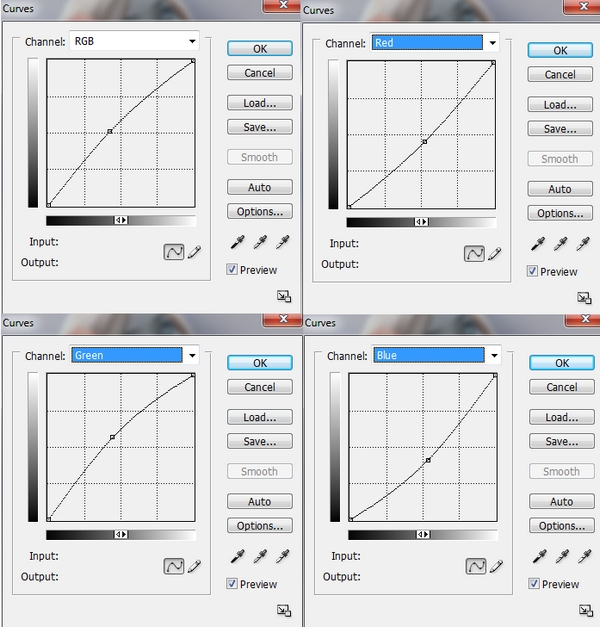
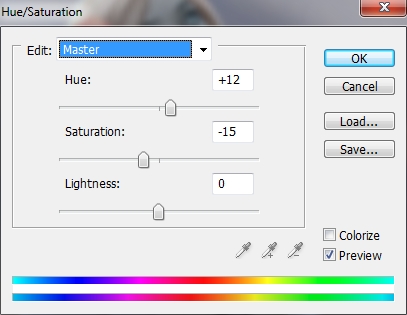
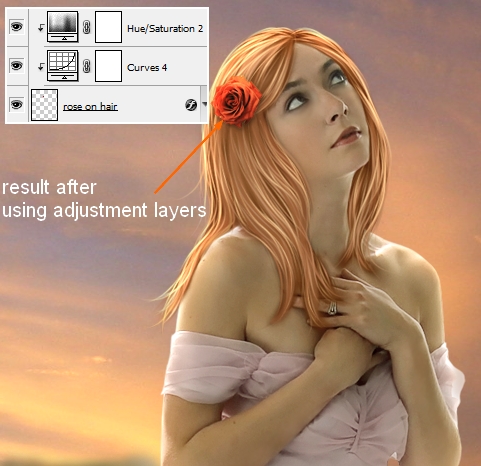
Make some adjustment layers ( Clipping Mask) to change color of this rose.
Curves:
Hue/Saturation:
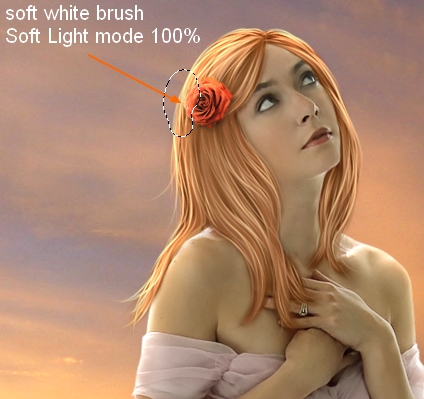
To make the part of this rose which catches light from background brighter, make a new layer ( Clipping Mask) and use soft white brush to paint over this part. Change the mode to Soft Light 100%:
Step 18
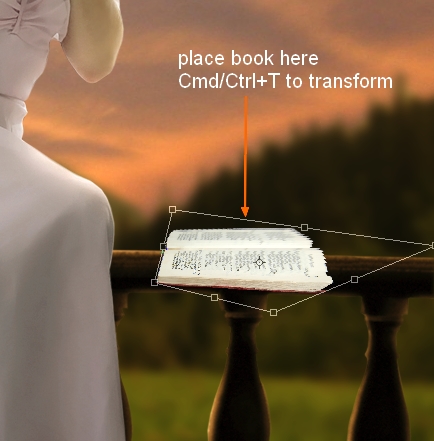
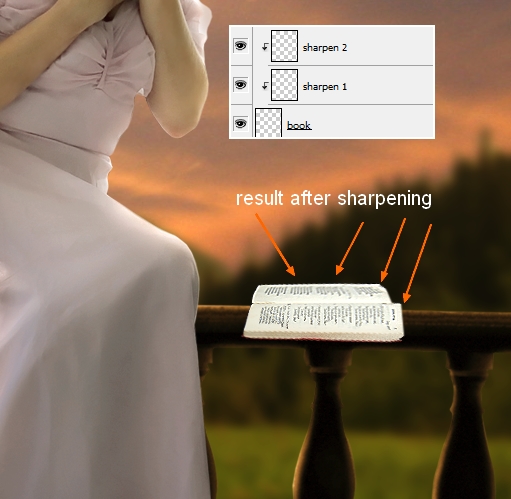
Cut out the book and place it at the right side of balcony, near model. Use transform tool ( Cmd/Ctrl+T) to change its direction and get a look it’s lying horizontally:
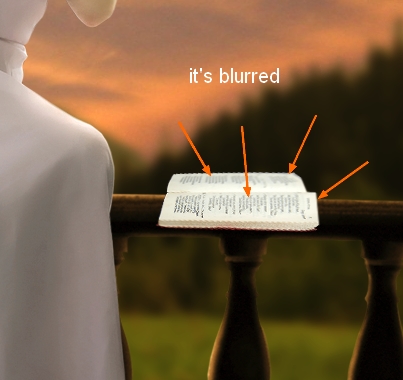
You may notice that some parts of the book too blurred. To fix it, I make a new layer with Clipping Mask for book. On book layer, make selection for blurred part, press Cmd/Ctrl+C to copy it then use Cmd/Ctrl+V to paste copied part into this new layer:

On this new layer, go to Filter-Sharpen-Unsharp Mask:
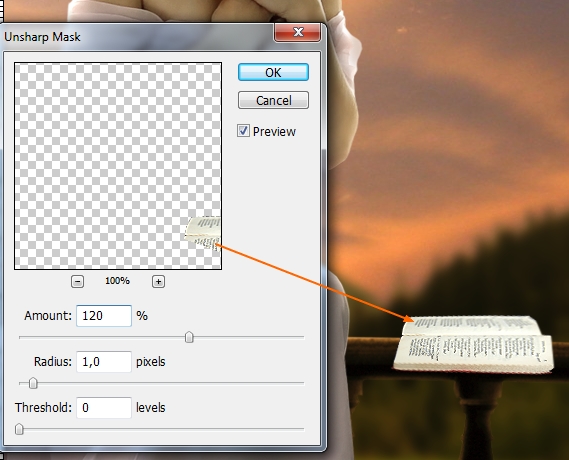
Create a new layer again and with same method we sharpen more a part of this book again but change the settings:
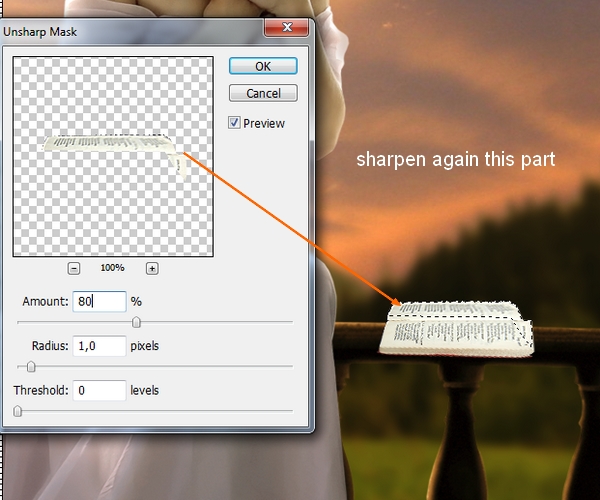
Call these layers “sharpen 1″ , “sharpen 2″.
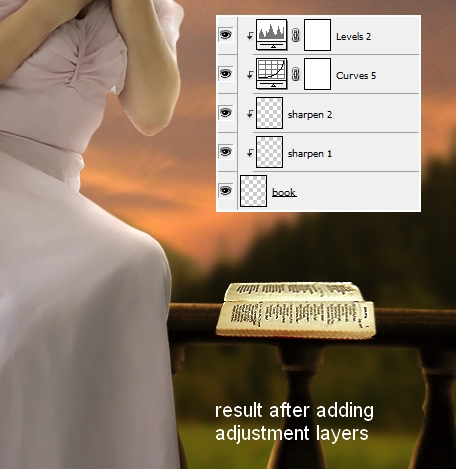
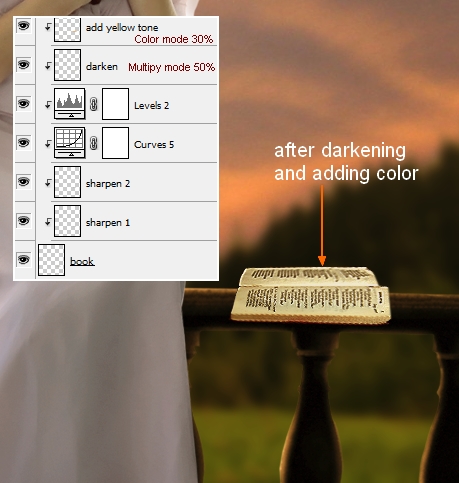
Step 19
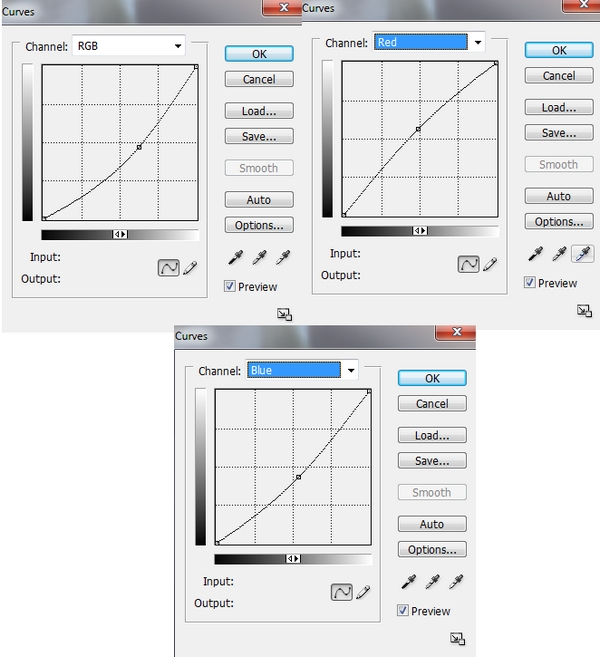
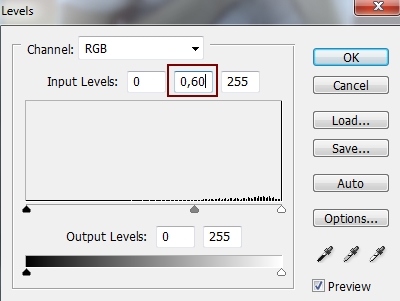
To change color and contrast of this book, I use Levels and Curves layer with Clipping Mask.
Curves:
Levels:
Step 20
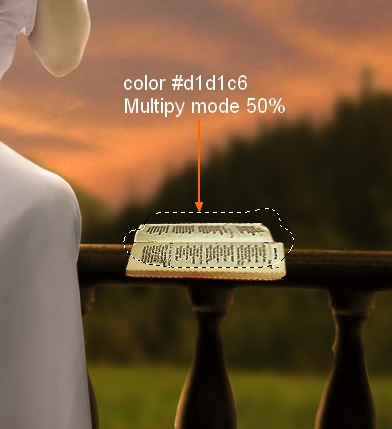
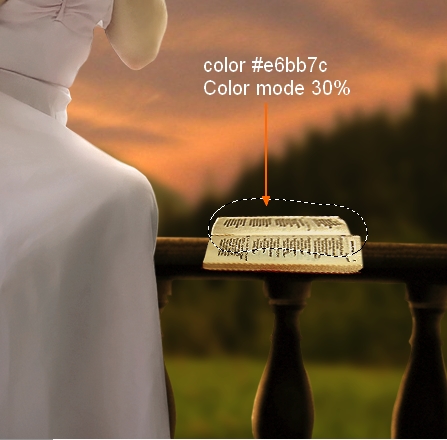
I use two new layers, one with brush and color #d1d1c6 and Multipy mode 50% to darken the book. Another with color #e6bb7c and Color mode 30% to add more yellow tone:
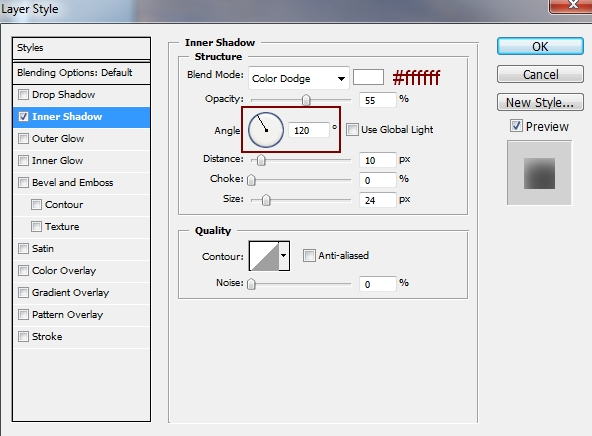
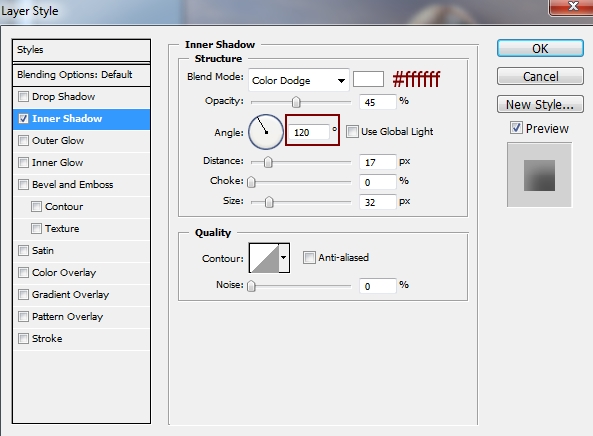
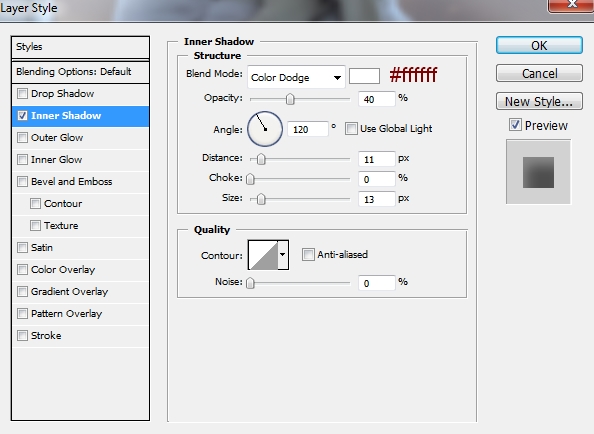
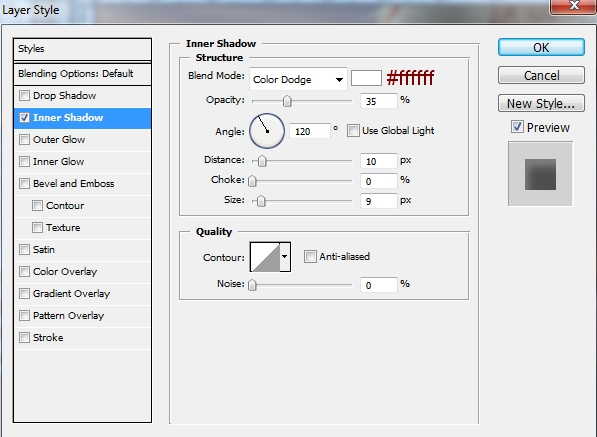
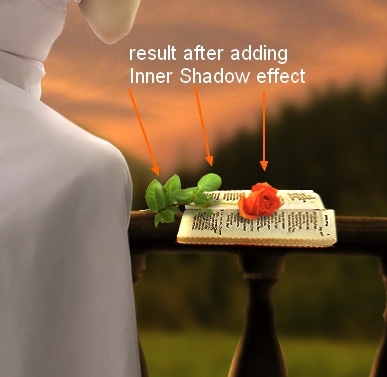
Add reflected light for this book by Inner Shadow effect:
Step 21
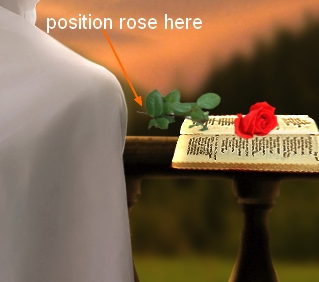
Open rose 2 stock. Isolate it from background, resize and transform it, place it onto the book:
Go to Edit-Transform-Warp and tweak the top and bottom of the rose down:

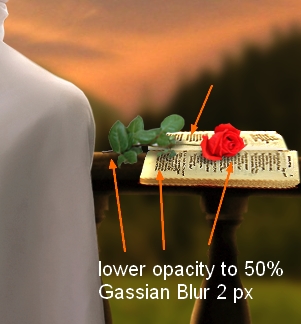
Make a new layer under this rose layer. Use Cmd/Ctrl+click rose thumbnail to load its selection as done in step 5 and fill this selection with black. Move this black part downward and use Cmd/Ctrl+T to transform it as shown below. Name this layer “rose shadow”:

Lower opacity of this shadow to 50% then apply Gassian Blur with 2 px :
Step 22
I make some adjustment layers for this rose with Clipping Mask.
Color Balance:

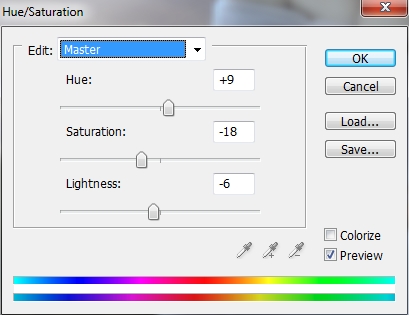
Hue/Saturation:
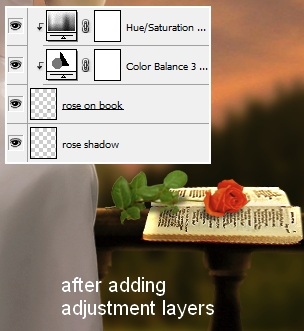
Now add light for this rose as we always did with other subjects:
Step 23
We finished adding all elements. Now this time for coloring and blending. Go to Layer-New Adjustment Layers-Gradient Map. I want to change a bit of color and add more contrast for it:
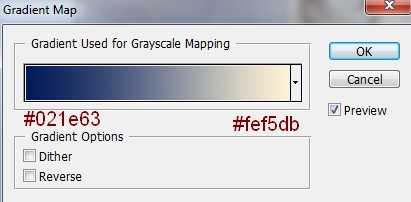
Set the mode of this Gradient Map layer to 70%. Use soft black brush with opacity about 60% to reduce dark contrast on some parts of model:

Step 24
Create a new layer on the top. Hit G to active Gradient Tool then choose Radiant Gradient with default color ( black and white). Drag a line from top left to the center:

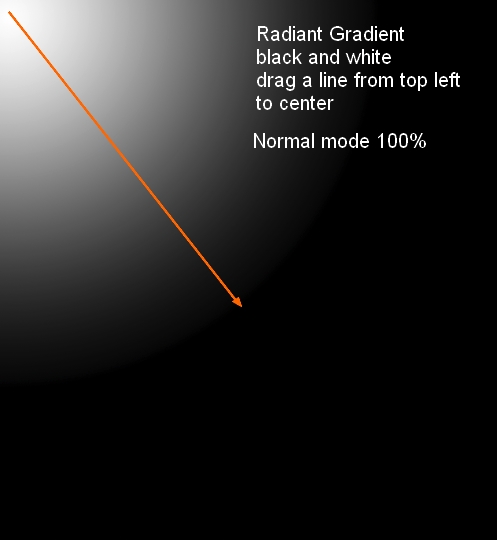
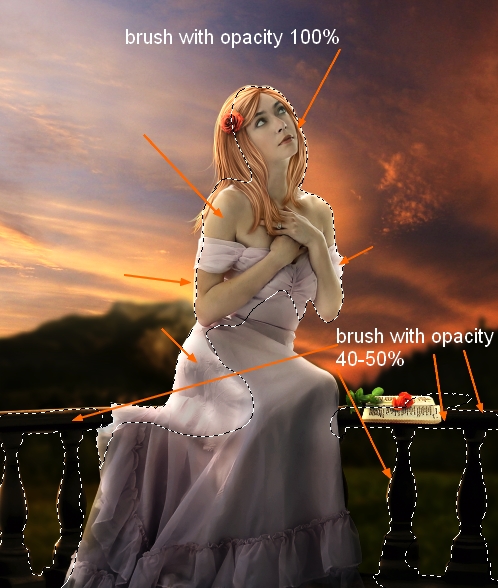
Change the mode to Soft Light 100%. Add layer mask for this layer and use brush with opacity 100% for model parts and about 40-50% for balcony:
Step 25
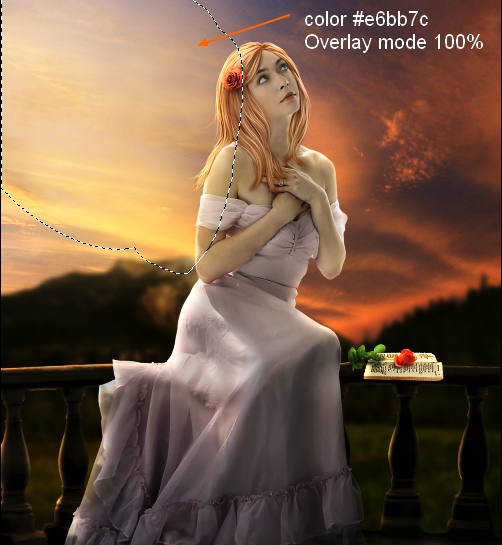
Create two new layers on the top and set to Overlay mode 100%. On each layer I use brush with different colors to brighten and make sky and the left side of model more colorful and vibrant. On the first I use color #e6bb7c and #e6977c on the second.

To darken the right side of picture to make the light focus on the left more visible, I use a brush with color #b69666. Make a new layer and paint on this side.
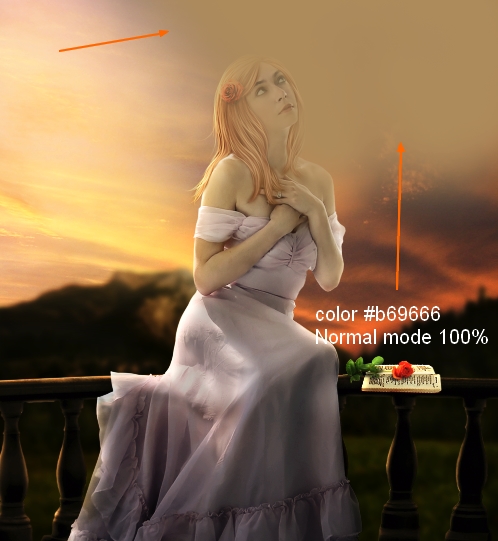
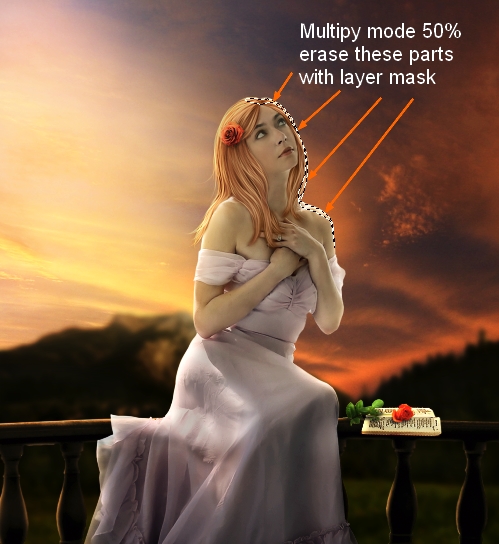
Change the mode to Multipy 50% and use layer mask to remove dark part on the model arm, shoulder and hair:
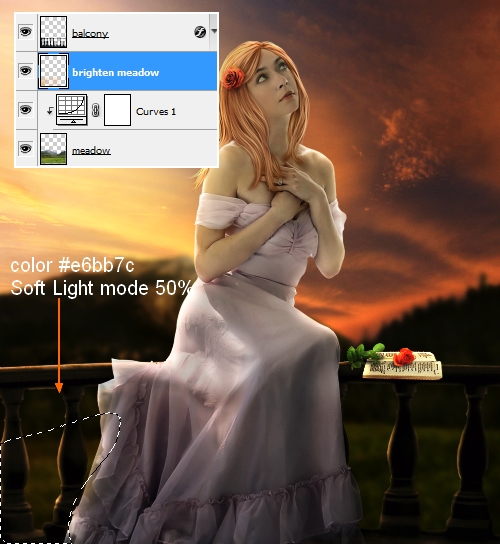
The left side of meadow should catch some light from sky so I make a new layer above meadow one and under balcony one. Use brush with color #e6bb7c paint on this side and put the mode as Soft Light 50%:
Step 26
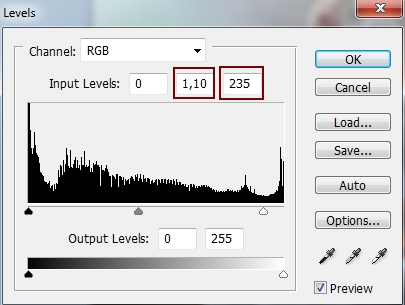
Final step: Go to Layer-New Adjustment Layer-Levels and change midtones and hightlights to give picture more contrast:
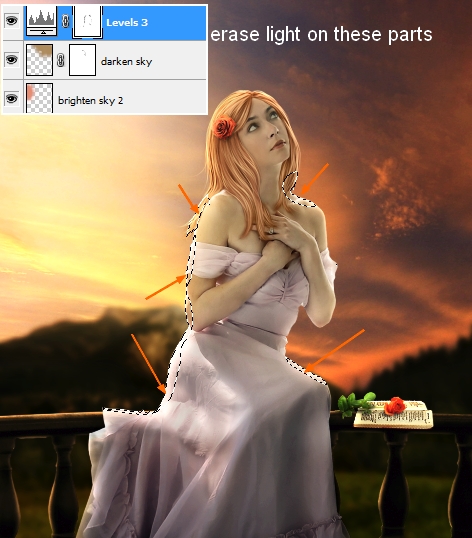
Take black brush and remove light on model shoulders, arm, and dress as I find them too bright:
And We’re Done!
You can view the final outcome below. I hope that you enjoyed this tutorial and would love to hear your feedback on the techniques and outcome.
Member File Download
Download the original .psd file for this tutorial here:

 Members Area Tutorial: Create a Cat in a Magical Pond Scene Photo Manipulation
 Members Area Tutorial: Create the Surreal Photo Manipulation ‘Twisting Water’
 Members Area Tutorial: Design a Colorful and Futuristic Photo Manipulation

Leave a comment
0 Comments:
No comments have been posted yet. Be the first!
Leave a Comment: