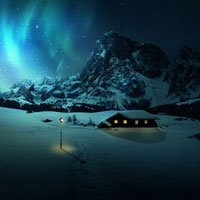
Members Area Tutorial: Create a Snowy Night Landscape Matte Painting
Matte painting is an essential skill to learn from any serious digital artist or Photoshop user. Not only does it allow you to produce beautiful out of this world outcomes, but it teaches you core skills such as correct image blending and photo manipulation.
In this tutorial I’ll show you how to create a snowy night landscape photo manipulation featuring a northern lights sky. You’ll learn how to combine many stocks together and blend them seamlessly, work with layer groups and Smart Objects, create stunning lighting effects and more.
Final Image
As always, this is the final image that we’ll be creating:

Resources Used In This Tutorial
Step 1
Create a new document and fill it with white. I choose the size of 1300×800 px but you can start with bigger size. Press Cdm/Ctrl+Shift+N to make a new layer and hit G to active Gradient Tool. I use Linear Gradient with white color and #2f6d7f. Drag a line from top to bottom to get result below:


Step 2
Open ‘starry sky’ stock. Use the Move Tool to drag it into our main canvas, place it at the right side of our canvas then right click this layer and choose to ‘convert to Smart Object’. Hit Cmd/Ctrl+T to resize it as shown below:

Change the mode to Screen 100%:

Use the Rectangular Marquee Tool (M) to make another selection on ‘starry stock’:

Drag it onto the left side of your canvas, convert to Smart Object and change the mode to Screen 100%:

I name these layers as “stars 1″. “stars 2″.
Step 3
Apply a layer mask to each of your star layers and use a 50% opacity black brush to blur some parts of the star fields. You can see how I did it on the mask of these layers:

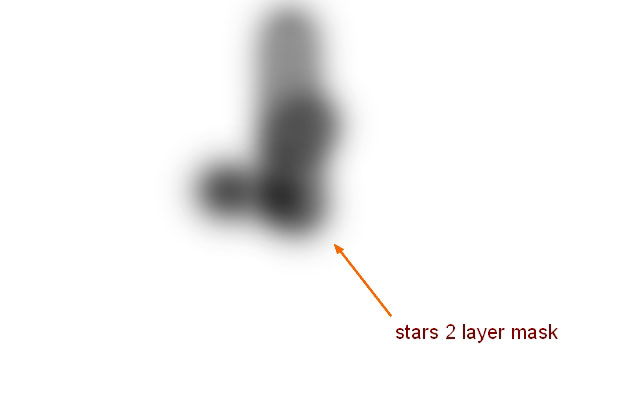
Result on picture:

Step 4
Open ‘background’ stock. Isolate the mountain and foreground and place it in our main document. Convert to Smart Object and resize with Cmd/Ctrl+T:


Use a layer mask and soft black brush to blend the top of the mountain at the middle part with sky:


We only use the background of this stock because its foreground is not suitable with a snowy track (we’ll see in a future step).
Step 5
To change color and brightness of this background, I use some adjustment layers with Clipping Mask. Go to New Layer-New Adjustment Layer-Color Balance:

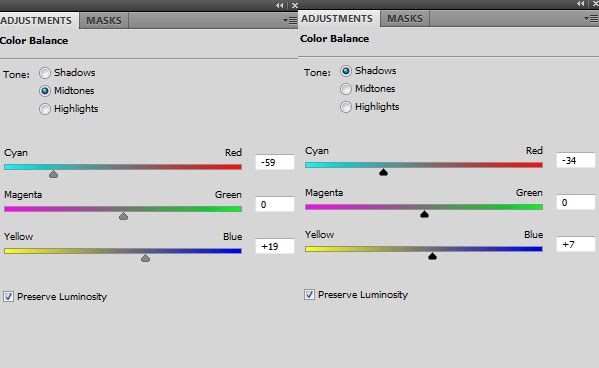
Curves:

We have result:

Step 6
Open ‘foreground’ stock. Take foreground part and position it at foreground of our main picture after converting it to Smart Object and resizing:


Use a layer mask to blend it with the background:

Step 7
I create some adjustment layers with Clipping Mask for foreground one.
Curves:

Color Balance:

Hue/Saturation:


Step 8
Open ‘snow 1′ stock. We’re going to add some small details around the big house. Move selected part to the indicated area and set this layer under foreground but above background one.


Use layer mask to remove some parts below:

I know it looks weird but don’t worry, we’ll blend it with adjustment layers in next step.
I name this layer as “background detail 1″.
Step 9
Create some adjustment layers (Clipping Mask) for this detail.
Color Balance:

Curves:


Step 10
Open ‘snow 2′ stock. Take snow part and situate it at the right side after converting to Smart Object and downsizing it. I flip it horizontally (choose Edit-Transform-Flip Horizontal):


Go to Edit>Transform>Warp and bend this part to fit the background. This layer is converted to a Smart Object so you can bend it freely and don’t need to worry if it will be blurred after warping. You can even revert back to the original form if you want.

Remove rough edges of this part with layer mask:

I name this layer “background detail 2″ and move this layer above foreground one.
Step 11
I make some adjustment layers with Clipping Mask for this layer.
Curves:

Hue/Saturation:


Step 12
Open ‘snowy track’ stock. I use Polygonal Lasso Tool to copy the track:

Place it at the middle section of foreground, transforming it to fit the perspective of the main scene:

Change the mode to Soft Light 100%:

I use layer mask to blend the track with ground:

Step 13
Cut out the lamp and locate it at the top left of the track, and don’t forget to make it as a Smart Object:

I change color of the lamp a little with a Color Balance layer (Clipping Mask):

Step 14
I aim to make the main light source from the top left of sky so the lamp should have a shadow on the right. To do it, I make a new layer under the lamp one. Hold Cmd/Ctrl while clicking lamp thumbnail layer to load its selection:

Fill this selection with black then flip it vertically (Edit-Transform-Flip Vertical). Convert it to Smart Object and use Cmd/Ctrl+T to transform it as the image below shows:

Go to Filter-Blur-Gassian Blur and apply radius as 1 px:

Lower opacity to 40% and use layer mask to blur the top of this shadow a little:

Step 15
I make a new adjustment layer on the top of layers to reduce saturation of overall picture:
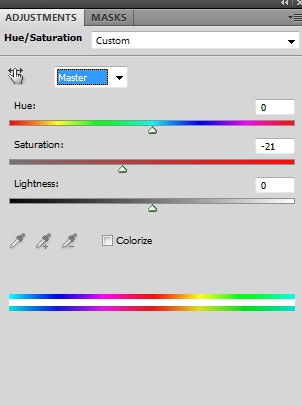

Step 16
Extract ‘mountain 1′ from its background and place it at the left side of our main document, flip it horizontally and convert to Smart Object:

Hide rough edges with layer mask:

Call this layer “left mountain”.
Step 17
I add a Curves layer (Clipping Mask) to change color and darken this mountain:

Step 18
Open ‘mountain 2′ stock. I cut out the mountain on the left:

Move it to the right of our main picture (Convert to Smart Object, resize, flip horizontally):

Blend the mountain with ground by using layer mask:

Step 19
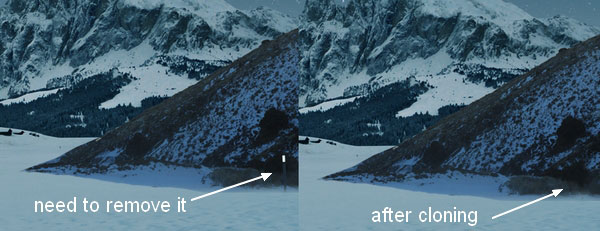
I want to remove small stake at the right edge so I make a new layer (Clipping Mask) and use Clone Tool to spot over it:
Step 20
Create some adjustment layers to alter the mountain color.
Hue/Saturation:

Selective Color:


Step 21
The bottom of the right mountain looks a bit empty so I decide to add more details to it. Open snow 1 stock again. Copy a snow with rock part and paste into the bottom, convert it to Smart Object and warp it to fit:


Hide rough edges with layer mask:

Step 22
I use some adjustment layers to match color of this part with the mountain.
Color Balance:

Hue/Saturation:


Step 23
Open ‘trees’ stock. Extract the trees part and snowy ground and move it to the bottom of the left mountain, make it as a Smart Object and scale it down:
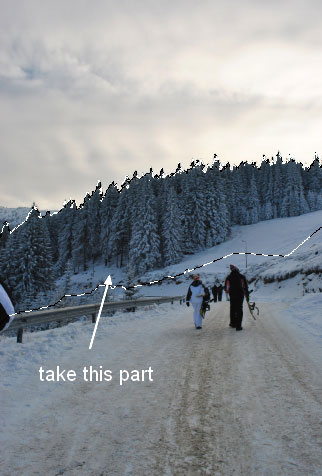

Clear the hard edges:

I duplicate this layer twice, make them smaller and smaller and arrange them along the left mountain bottom:

Name these layers from “trees 1″ to “trees 3″.
Step 24
To edit all trees layers together, I make group for them. Make all trees layers selected and press G, then change the mode of this group from Pass Through (default mode) to Normal 100%. On trees 3 layer, go to New Layer-New Adjustment Layer-Color Balance:
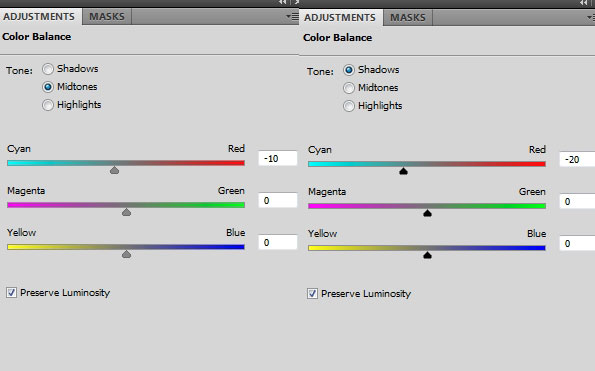
Curves:

Because the mode changed to Normal 100% (no Pass Through) so these adjustment layers only affect the layers inside the group (trees ones).

Step 25
Open ‘aurora 1′ stock. I place this image into the original document, positioning the layer beneath the mountains/background layers but above the starry sky layer.


Change the mode to Soft Light 100% and use layer mask to remove unwanted parts:

Step 26
I want to remove black parts of the aurora image that remained after changing the layer blend mode and erasing. Double click this aurora layer, choose Blending Options. Hold the Alt/Option key while dragging black sliding button of This Layer to get the result below:


Step 27
I want to add some colors to this aurora so I use a Color Balance layer with Clipping Mask:

Then use soft black brush to remove the magenta tone on some parts below: (this is a handy way to use the masks associated with adjustment layers to control the effect of the adjustments on your image):

Step 28
I use another aurora stock to add to the sky. Open the ‘aurora 2′ image and choose the aurora part to move above aurora 1, convert to Smart Object, warp it and change the mode to Soft Light 100%:


Hide any hard edges by using a layer mask:

Step 29
I apply a Gradient Overlay blending option for this aurora layer:


Step 30
I open the ‘aurora 3′ stock. I choose a part from this image to place at the left of our aurora sky. I transform and warp it a bit:

I turn the mode to Screen 100% and use layer mask to hide unwanted parts:

Step 31
Do the same with aurora 4,5,6 but change the mode of them to Soft Light 100%.


Step 32
Create a new layer on the top. Set foreground and background to #627172 and #1b3d3e. Go to Filter-Render-Clouds:

Lower opacity to 30% and use layer mask to blur the parts as shown:


This step is to darken picture a little.
Step 33
Make a new layer and choose Radial Gradient with default colors (black and white):

Change the mode to Soft Light 100% and use layer mask on the top right and aurora effect:


Step 34
Create some adjustment layers on the top.
Color Balance:

Hue/Saturation:

Curves:


Step 35
I want to darken foreground more to make the focus on the sky. Create a new layer and use soft brush with color #273a42 to paint on foreground then change the mode to Multipy 100%:

Step 36
In this step we’ll add prominent light to aurora and the mountains. Make a new layer on the top and change foreground to white. Use soft brush to paint on these parts and change the mode to Overlay mode 50%:


Make a new layer and use soft white brush again to paint. I set the mode to Overlay 100%:


Step 37
Create a new layer and I use brush with color #d0c471 to paint on the bottom of aurora and a part of the mountain and ground. Put the mode as Color 10%:


This step is to add a light yellow color to the picture.
Step 38
I found the starry sky at the aurora part too visible. To fix it, I make group for stars layers as done with the trees and change the mode of this group to Screen 100%. To darken and turn white stars into cyan, I think a Channel Mixer adjustment layer is the best choice. Play around with the settings until the sky looks more realistic for you.


Step 39
Open the ‘window’ stock. I copy four suitable windows and paste into the big house (you can take your own).


Step 40
Place all of your window layers into a single layer group and change the group’s mode to Normal 100%. I use 3 adjustment layers to reduce red tone and brightness of them.
Color Balance:

Curves:

Hue/Saturation:


Step 41
In this step we’ll make a shadow for the house. Create a new layer on the top. Use Polygonal Lasso Tool to make selection around the house then fill it with black:

Convert it into Smart Object, flip it vertically, and apply a Gassian Blur with 1px strength. Lower the layer opacity to 40% and use a layer mask to blur the top a little (the same as done with lamp shadow):

Step 42
We’ll add light from the lamp and windows to environment around. Make a new layers on the top. I use soft brush with color #47300c to paint on the top of the lamp and the ground near the windows house. Set the mode to Linear Dodge 100%.

Create two layers and use soft brush with color #f3cdb0 to paint on previous light part. Turn the mode of these layers to Overlay 100%:

Step 43
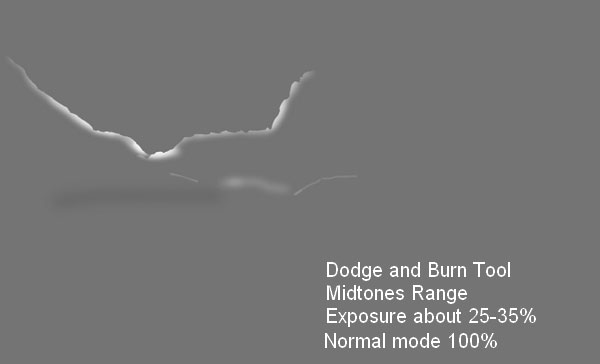
Final step: Make a new layer, fill with 50% gray and change the mode to Overlay 100%:

Use the Dodge and Burn Tool with Midtones Range and Exposure about 25-35% to brighten the mountain strokes and darken the lower snow part on the left. You can see how I apply this tool with Normal mode:
And We’re Done!
You can view the final outcome below. I hope that you enjoyed this tutorial and would love to hear your feedback on the techniques and outcome.
Member File Download
Download the original .psd file for this tutorial here:

 Members Area Tutorial: Create Beautiful Sunrise Landscape Matte Painting in Photoshop
 Members Area Tutorial: Create a Stunningly Detailed Matte Painting Landscape
 Members Area Tutorial: Create a Complex Alien Landscape Scene Using Matte Painting


Leave a comment
0 Comments:
No comments have been posted yet. Be the first!
Leave a Comment: