
Members Area Tutorial: Learn How to Create the Spectacular Photo Manipulation ‘Still Life’
In this tutorial we are going to learn how to create a fierce collage type Illustration using Photoshop. We are going to use several stock images to create a powerful illustration. Let’s get started!
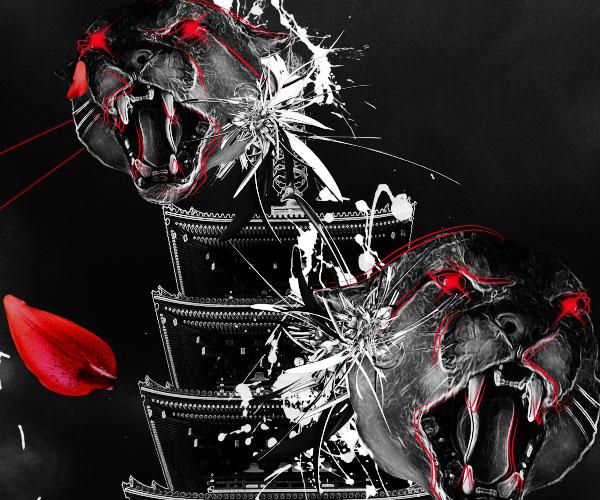
Final Image
As always, this is the final image that we’ll be creating:

Resources Used In This Tutorial
Step 1
Create a new document on Photoshop. It should be 2100 px wide by 3400 px high. Set the resolution to 300 dpi.Fill the background layer with color black.

Step 2
Download the “Stormy Sea” stock image and drag it to your document.Transform it to fit the entire canvas.This is gonna help to add depth to the illustration and help the collage look less flat.

Now we are going to Desaturate the image.We will be desaturating using this method most of our main elements.Go to Image>Adjustments>Desaturate or (Ctrl+Shift+U).

Now we are going to use the “Levels” Adjustment to darken the image a bit because it might over power everything we will add to our image.Go to menu Image>Adjustments>Levels , set the middle input level to .45 and the brightness output level to 155.

Right now the sky looks a bit too bright for the result we want to achieve so we are going to add an adjustment layer to fix it.Go to menu Layer>Adjustment Layer>Levels.Change the middle input level to .55

Switch to your brush tool and select color black.Paint the entire bottom part of the sea so delete the effect of the Adjustment Layer.

Step 3
In this step we are going to line up the different elements that will give shape to the entire composition.We are going to duplicate and mirror some of the images to get a balanced symmetrical effect to the image and we´ll keep on doing this for the rest of the image.
We are going to start with the buildings.
Take the shrine stock image and open it in photoshop. We are now going to extract this element from the background using the Pen Tool (P).
Draw a path against the building and try to maintain as much detail as possible on the top part of the tower. You can be less exact on the lower part since we are going to cover that with other buildings.Once you have closed the path,right click and select the option make selection. Then Copy and paste the extracted shape to get a new layer of the image without the background:


Drag the extracted building to your document and resize it to fit your composition.Then desaturate the image like we did before.
Open the Levels menu options and change the middle input level to .45 and the brightness input to 230.


Duplicate this layer and make sure is set above the original Shrine layer.We are now going to apply a nice filter effect to give the building more texture.Go to Menu Filter>Stylized>Glowing Edges and set the Edge width to 1, Edge Brightness to 9 and Smoothness to 7.

Add a layer mask to this layer. Your layer palette should look something like this:

Switch to the Brush tool (B) and select a Soft round brush of about 80px 0% harness and about 20-26% opacity:

Switch your main color to Black and set yourself on the layer mask you added.Soflty brush to erase some of the stronger effects on the image so it combines with the unfiltered image below.Focus on the top part of the building.

Grab the second building stock image and open it in photoshop. Extract it from the background using the exact same method like we did for the first one.

Resize it to cover the lower part of the first building and desaturate it.Go to menu Image>Adjustments>Brightness and Contrast and set the Brightness to -10 and the contrast all the way to 100

We are going to repeat the same process of treatment as we did for the first building.Duplicate the layer and make sure it’s set above the original. Bring up the Glowing edges menu and use the exact same settings as before.Add the layer mask and softly erase any unwanted effect. See the image below for reference:


Duplicate both layers (The building and the Glowing Edges one) and merge them together (Select both layers and Ctrl+E). Then go to menu Edit>Transform>Flip horizontal. Set this layer covering the other side of the main shrine:


We are doing this to fill up the background of the main focal point (the puma heads). We are trying to get a symmetrical composition with mirrored elements that will keep the image balanced. Duplicate one again this building and resize it down a bit. Put it one on the far corner of the two buildings you just added and a mirrored one on the other side:

Step 4
Open the Puma stock image to photoshop and extract it in a similar manner we did for the buildings using the pen tool. You don´t have to be very especific about the hair or the whiskers just make sure you have a nice smooth contour when you cut the image from the background:

Sieze down the head a little bit and desaturate it.

We are going to use an adjustment layer and clip mask it to the puma to make some changes to the light of the image. Create a new Levels Adjustment layer on top of the puma layer and clip masl the to layers together. To do this just click while holding the key Alt between both layers. Move the left level input to 43 on the adjustment layer

Duplicate the puma layer along with the clipped Adjustment layer and merge them together (Ctrl+e).Now go again to the filter “Glowing Edges”Set the Edge Width to 2,Edge Brightness to 10 and Smoothness to 5.

Create a new layer mask on that puma layer and using a small brush of about 100px wide 0% hardness and 30% opacity with color black to paint over and eliminate some of the stronger effect around the face of the puma.

Select the Puma layer with the clipped adjustment layer and the glowing edges layer and duplicate them we are going to do this 3 times.We are going to place them around the main building lowering their size as we go up like in the image below:

You can arrange the heads anyway you want but try to keep in mind the composition and the balance between the elements of the image.
Step 5
In this step we are going to focus on all the detailing for the Pumas: the outlining and some of the placing of other elements to tighten up our composition.We are going to start with the red outlining of the pumas that will make the faces pop up a bit more.
Create a new layer on top of the puma.First grab the brush too and change it to a Hard 100% hardness round brush of about 4px and 100% opacity. Open up the Brush menu and under the “Shape Dynamics” settings make sure the Control is set to “Pen pressure”.Select a Magenta tone #c50520 and then switch over to the Pen tool (P).

With the pen tool.Draw some paths along the face of the puma to enhance its features.Once you have a nice outline, right click and select the option “Stroke” make sure the Tool is set to “Brush” and check the “Simulate pen pressure” option.

Once you have all the details in one of the faces, you can duplicate this layer and resize it to fit the other heads.

Select all the detail lines ,copy the layers and merge them.Use the move tool (V) and move this layer a tinny bit to the upper left side to create double detail lines.

On the same layer switch again to the pen tool and using the same stroking method as before. Draw some crosses on the eyes of each tiger

Select the Brush tool and use a brush of about 50 px 0% harness and with the same color as the lines,brush once over every eye to create a glowing effect. Lower the size of the brush according to the size of the puma head.


Create a new layer and set it under the puma heads. Select a 100% hardness 100% opacity round brush of about 5px and the switch to the pen tool. We are going to stroke some lines from the heads to the outside of the canvas that will help with the composition:


You can add as many lines as you like. I suggest you experiment with the position and quantity for best results.


Double click on the layer’s thumb to bring up the Layer styles menu and select the option “Inner shadow”. Set the opacity to 93% and the angle to 120° Distance 2,Choke 0,Size 5.This will create a shadow on the lines that will give them more depth.


Step 6
Open the “Jotunheim” Abstract render from the render pack and desaturate it:

Drag it to your canvas and resize it.Duplicate it 3 times a place them under each of the pumas heads:

Duplicate this layers again.Only this time place them over the puma heads and rotate them a bit to give some variation and depth.

Step 7
Create on top of all the layers a Curve Adjustment Layer Layers>Adjustment Layers>Curves

Step 8
Open the Flower stock image and once again using the pen tool extract it from the background.

Resize it and rotate it a bit. Place it in fromt of the main building like shown Below. Open the Brightness and Contrast adjustment, set the Brightness to -20 and the Contrast to 20. All this next layers should go over the Curves Adjustment layer from the previous step.

Duplicate the flower a couple of times and size them down. Place this layers under the main flower and using a soft brush 0% hardness 50% opacity and 50px wide to brush some soft shadows over the duplicated layers:

Using the pen tool extract from the main flower some petals and paste them into different layers. We are going to use this petals to give more detail and depth to the composition.

Duplicate the petals and change their sizes randomly.The we are going to place them all around the image just keep in mind the flow of the composition and be sure not to over do it or else the image will look very heavy.

For the bigger petals that are going to be farther away from the focus point we are going to use some blur. Go to menu Filter>Blur>Gaussian Blur and apply a Radius of 10 px


After that your composition should look something like this:

Step 9
Load the Splatter brushes in photoshop and create a new layer under the puma heads.Chose whichever brushes you like and stroke with color white under the heads.Use a size of the brush of something about 1200px to 1500px.


Step 10
Open the paper texture in Photosohp and drag it to your document.Resize it to fit the entire canvas and desaturate it.

Go to Image>Adjustments>Invert (Ctrl+i) then open go to Image>Adjustments>Levels and change the middle input to .43 we need to do this so when we change the layer blending mode only the wrinkles of the paper show.

Now set the layer blending mode to “Screen” and lower the layer opacity to 75%

Your image should now look somethig like this:

Step 11
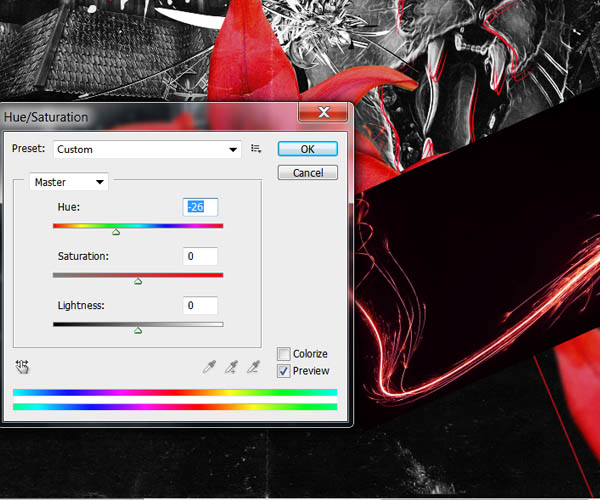
Open the light textures and select the image shown below and place it on your document next to the flower.

Go to Image>Adjustments>Hue/Saturation and change the Hue to -26 to match the palette of red we are using in the illustration.
Now open the Brightness and contrast Adjustment menu and change the Brightness to -30 and the Contrast 70.Set the layer blending mode to “Screen”.

Change to the Eraser tool (E) and select a soft round brush 0% hardness 100% opacity of about 120 px and erase some of the effects using the example below to hide the light streak behind the flower.

Duplicate the light layer and flip it horizontally.Place this secong light layer on the other side of the flower and like before use the eraser tool to erase some unwanted effect.

Step 12
Open the fire pack and select one fire image.Place it on your document and change the layer blending mode to “Lighten”.
We are going to be duplicating this layer to decorate all the top part of the main tower.

Use the eraser tool to delete all the hard edges and to eliminate some of the resemblance between all the duplicated fire layers.


Step 13
Open the nebula image and drag it to your document.Open the Brightness and Contrast adjustment menu and change the Brightness to -45 and the Contrast to 100.

Now we need to make it the same color shade as the reds we are working with. Open the Hue/Saturation Adjustment menu and change the hue to -10:

Rotate the image to your liking and change the layer blending mode to “Screen”

We are going to duplicate this nebula , rotate it and place one on each puma head.


Step 14
Duplicate the Texture layer from previous steps and place this new texture layer on top of the nebula layers.Lower the opacity to 75% and select the eraser tool.Erase all the parts where the texture effect overpowers the image.Remember we just want to make it look like an old piece of paper but we don’t want to cover all of our main elements.


Create a new Level Adjustment layer on top of this layers.
Our Image so far should look like this:
Step 15
Now we are going to create the layer that´s going to give the entire image an orangy tint.Go to menu Layer>New Fill Layer>Gradient and select a “Linear” style and an angle of 50°. Double click on the gradient to open the editor and change the first color stop to a soft orange #f80e0 and the second color stop to a melow magenta #f00624 and press ok.Change the layer blending mode to “Darker Color” and lower the opacity to 40%

Step 16
Using the same images for decorating the top of the tower,we are going to put some hints of fire on the flowers and on the leafs:

Select a brush of 0% hardness 50%opacity and 150px wide and set the color #fb8b01. Create a new layer on top of the fire on the flowers and brush little glows of orange.


Now select a magenta color #d3141c and brush glows on the same parts you did with the orange:


Step 17
For the final step create a new Brightness and Contrast Adjustment layer on top of all the layers.Set the Brightness to 20 and the contrast to 4.

And We’re Done!
You can view the final outcome below. I hope that you enjoyed this tutorial and would love to hear your feedback on the techniques and outcome.
Member File Download
Download the original .psd file for this tutorial here:

 Members Area Tutorial: Combining Extraction Techniques to Create a Unique Photo-Manipulation
 Members Area Tutorial: Design a Creative Bird Photo Manipulation
 Members Area Tutorial: Create the Surreal Photo Manipulation ‘Twisting Water’

Leave a comment
0 Comments:
No comments have been posted yet. Be the first!
Leave a Comment: